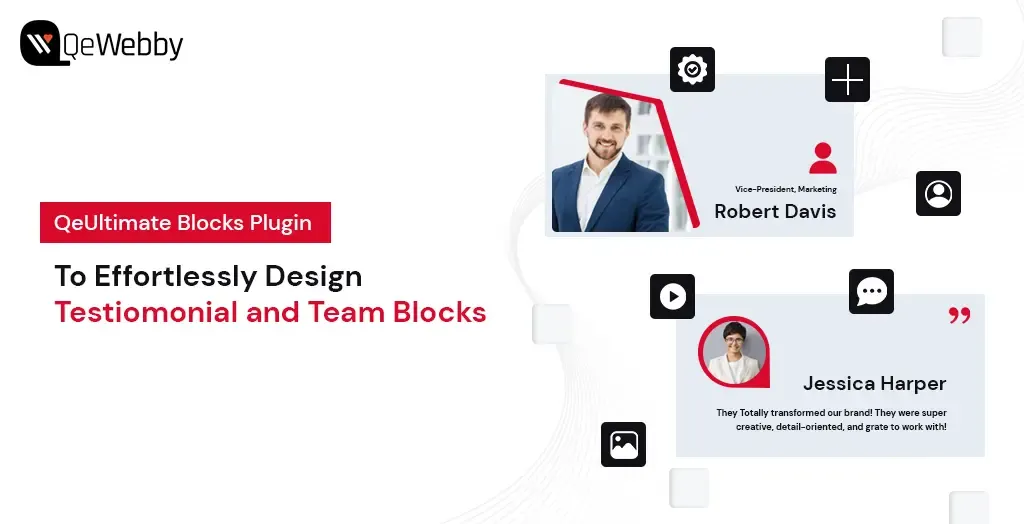
Effortlessly Design Testimonial and Team Blocks with QeUltimate Blocks Plugin

The QeUltimate Blocks Plugin for WordPress is a game-changer for anyone looking to create stunning, functional web pages with ease. Designed to enhance the Gutenberg editor, this plugin offers a variety of customizable blocks for testimonial and team member display that can transform your website without the need for complex coding or expensive design services.

Whether you’re a blogger, a business owner, or a creative professional, QeUltimate Blocks empowers you to craft pages that are not only aesthetically pleasing but also incredibly user-friendly. With an array of options to customize fonts, colors, backgrounds, and more, you have full control over every design element. Plus, the intuitive drag-and-drop interface means you can build and arrange your pages in no time, focusing on what you do best—creating outstanding content.

But that’s not all. QeUltimate Blocks enhances the visitor experience with features that promote easy navigation and engagement, such as interactive buttons and forms. Fully compatible with WordPress, this plugin seamlessly integrates with your existing setup, allowing you to easily expand your site’s capabilities.

Benefits of Using QeUltimate Blocks Plugin

The QeUltimate Blocks Plugin significantly improves website design and functionality. With a variety of customizable blocks, users can create visually appealing and user-friendly pages. The plugin offers easy customization of fonts, colors, backgrounds, and other design elements, giving users complete control over their website’s appearance.
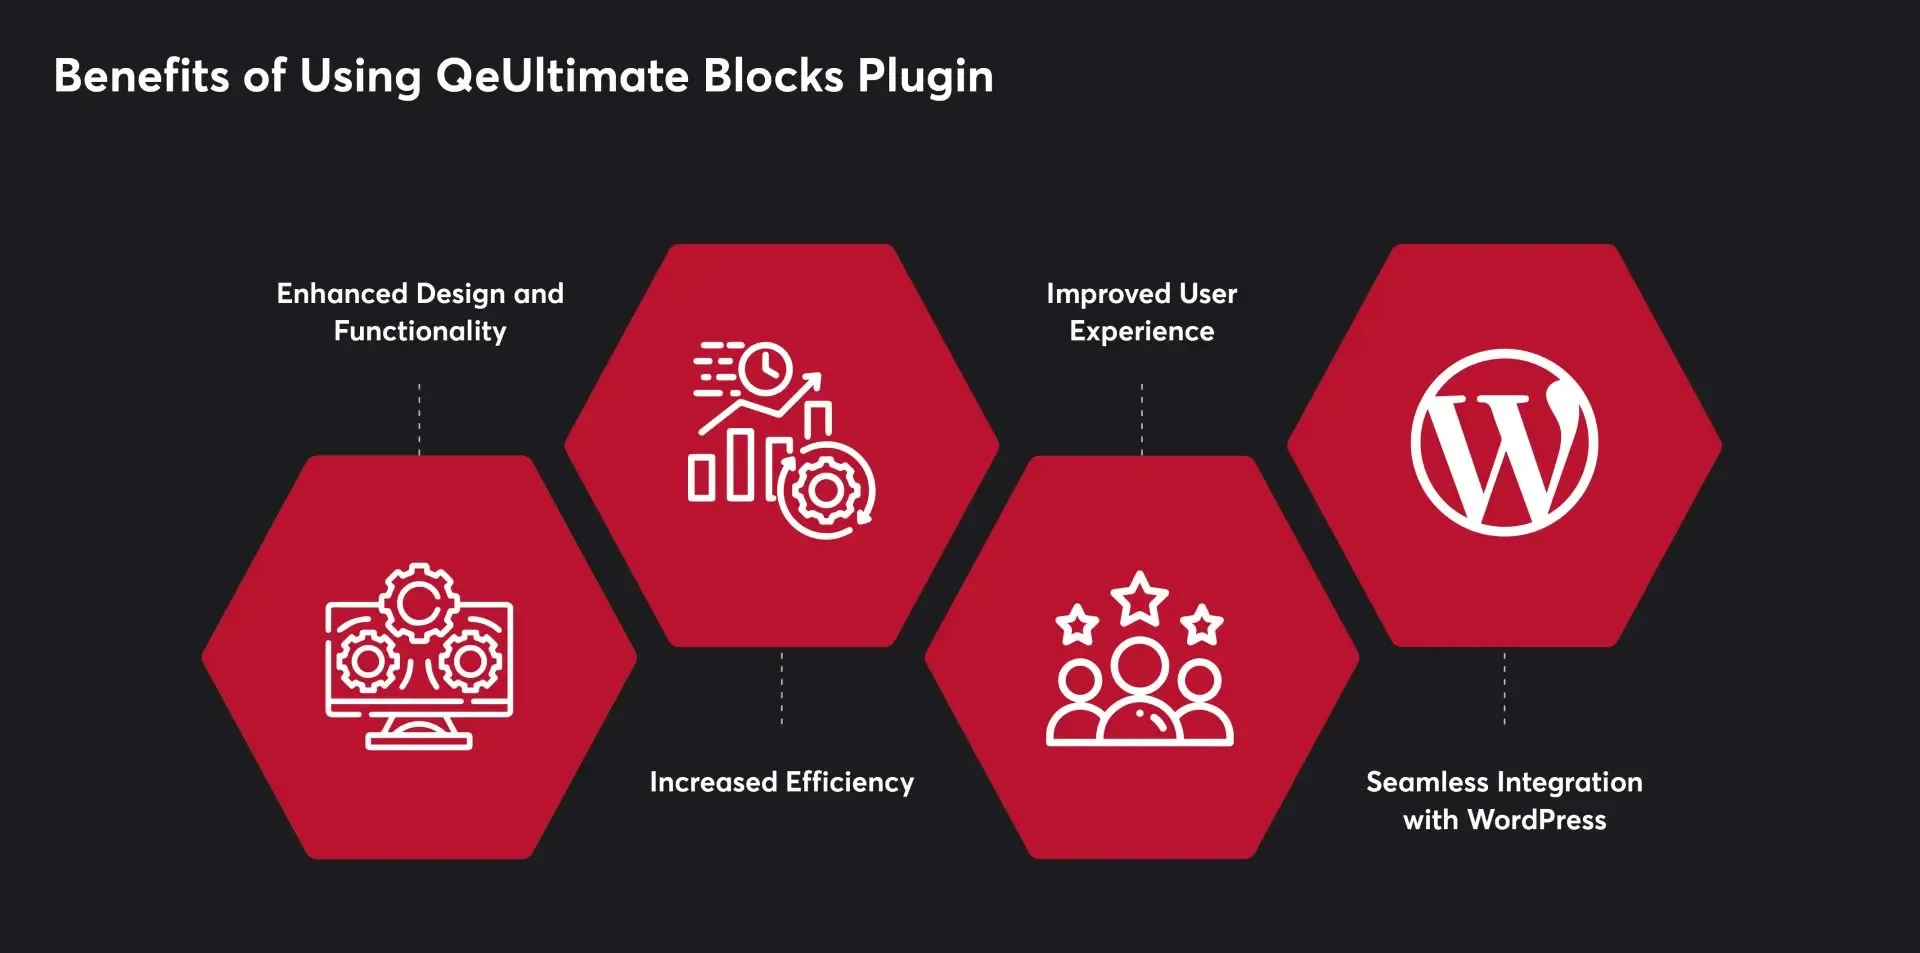
QeUltimate Blocks streamlines the page creation process with its intuitive drag-and-drop interface. Users can quickly add and arrange blocks without coding or technical skills, saving time and effort. This efficiency allows users to focus more on creating quality content for their website.

The plugin enhances the user experience by making website navigation and readability straightforward. Visitors can easily find the information they need, and interactive elements such as buttons and forms help increase user engagement and drive conversions.

QeUltimate Blocks is fully compatible with WordPress, making it easy to integrate into existing websites. Users can install the plugin directly from the WordPress repository and start building pages immediately. Additionally, the plugin works seamlessly with other WordPress plugins, enabling users to add further functionality to your websites.

3 Easy Steps to Add Testimonial and Team Blocks on WordPress Pages

Step 1: Install and Activate QeUltimate Blocks Plugin
Get QeUltimate Blocks Plugin for Free!

Craft Stunning Web Pages –

Free Download

Whether you want to improve your site’s design, enhance SEO, or add interactive elements, plugins provide a simple solution. One such powerful plugin is the QeUltimate Blocks Plugin, designed to help you effortlessly create stunning and functional pages. Here’s a detailed guide on how to install and activate the QeUltimate Blocks Plugin.

Log in to Your WordPress Dashboard: Open your web browser and navigate to your WordPress admin panel by adding /wp-admin to your site’s URL (e.g., www.yoursite.com/wp-admin). Enter your username and password to log in.

Go to Plugins: Once logged in, look at the menu on the left-hand side of the dashboard. Find and click on “Plugins” to open the Plugins management page.

Add New Plugin: At the top of the Plugins page, you will see a button labeled “Add New.” Click on this button to navigate to the Add Plugins page where you can search for and install new plugins.

Install the Plugin: Once you find the QeUltimate Blocks Plugin in the search results, click the “Install Now” button next to it. The installation process will begin, and the button will display a progress indicator.

Activate the Plugin: After the plugin has been installed, the “Install Now” button will change to “Activate.” Click on the “Activate” button to enable the plugin on your WordPress site.

Confirmation: After activation, you will be redirected back to the Plugins page, and a message at the top will confirm that the QeUltimate Blocks Plugin has been successfully activated.

 Step 2: Explore and Utilize QeUltimate Blocks Features

Now that you have installed and activated the QeUltimate Blocks Plugin, it’s time to explore its powerful features and see how you can utilize them to create stunning and functional web pages. QeUltimate Blocks provides a diverse set of blocks designed to meet various needs, including content structuring, interactivity, and visual enhancement. Here are some of the key blocks you can use:

Key Block: Team Members

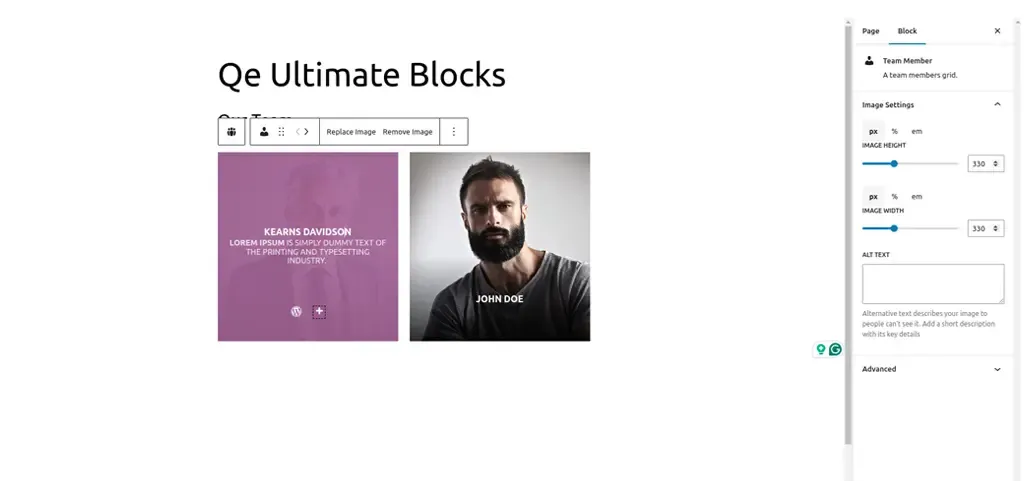
The “Team Members” block is a powerful feature of the QeUltimate Blocks Plugin that enables you to create an attractive section dedicated to showcasing your team. This block is perfect for highlighting the individuals behind your business, project, or organization, adding a personal touch to your website. The basic features include:
  • Go to the Post/Page Editor: From your WordPress dashboard, navigate to Posts or Pages and create a new post/page or edit an existing one.
  • Open the Block Inserter: In the Gutenberg editor, click on the “+” button to open the Block Inserter menu.
  • Find the Team Members Block: Scroll through the QeUltimate Blocks section or use the search bar to locate the “Team Members” block.
  • Add the Block: Click on the “Team Members” block to add it to your post or page.
  • Customize the Block: Once added, you can customize the block using the settings panel on the right-hand side of the editor. Here’s how:
    • Add Team Members: Start by adding individual team members. For each member, you can input their name, position, and a brief bio.
    • Profile Pictures: Upload profile pictures for each team member to add a personal touch.
    • Social Media Links: Include links to social media profiles or personal websites. You can add icons for platforms like LinkedIn, Twitter, and Facebook.
    • Layout Options: Choose from different layout styles, such as grid or list, to best present your team members.
    • Styling Options: Customize colors, fonts, and spacing to ensure the section aligns with your website’s design.
    • Arrange Team Members: Drag and drop team members to arrange them in the desired order. This helps highlight key individuals or create a logical flow.
  • Preview Your Page: Click the “Preview” button to see how the team section looks. Check for any adjustments needed to ensure it is visually appealing and informative.
  • Publish Your Page: Once you are satisfied with the design and layout, click the “Publish” button to make your page live.

Key Block: Testimonials

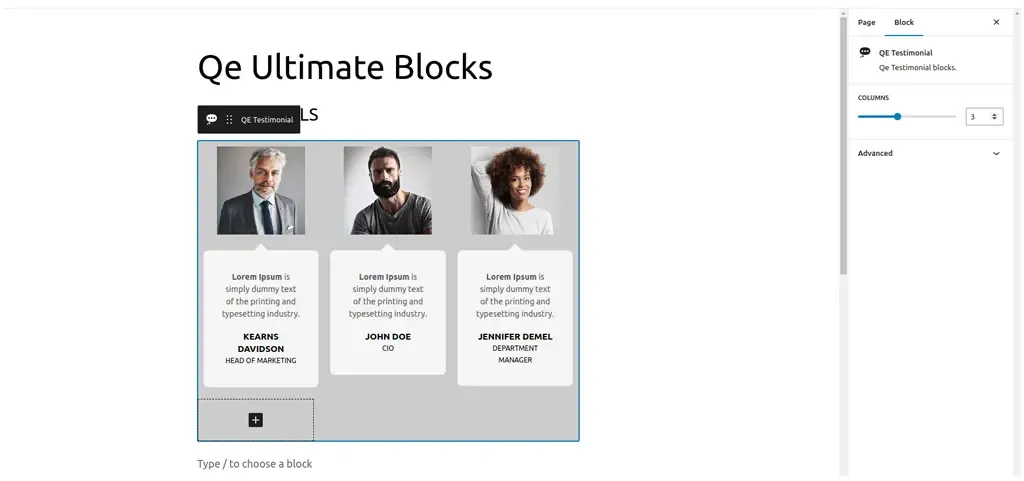
The “Testimonials” block is an essential feature for showcasing positive feedback from your customers. Testimonials serve as social proof, helping to establish trust and encouraging potential customers to engage with your business. The QeUltimate Blocks Plugin makes it easy to create and customize testimonial sections that stand out. The basic features include:
  • Customizable Layouts: Choose from various layout options, including grid, slider, and list formats.
  • Profile Information: Display the name, position, company, and photo of each testimonial provider.
  • Styling Options: Customize colors, fonts, backgrounds, and borders to match your website’s design.
  • Responsive Design: Ensure testimonials look great on all devices, from desktops to mobile phones.

Here is a step-wise guide to implement:

  • Go to the Post/Page Editor: From your WordPress dashboard, navigate to Posts or Pages and either create a new post/page or edit an existing one.
  • Open the Block Inserter: In the Gutenberg editor, click on the “+” button to open the Block Inserter menu.
  • Find the Testimonials Block: Scroll through the QeUltimate Blocks section or use the search bar to locate the “Testimonials” block.
  • Add the Block: Click on the “Testimonials” block to add it to your post or page.
  • Customize the Block: Once added, you can customize the block using the settings panel on the right-hand side of the editor. Here’s how:
    • Add Testimonials: Start by adding individual testimonials. For each testimonial, input the customer’s name, position, company, and their feedback.
    • Profile Pictures: Upload a photo of the customer to add authenticity and a personal touch.
    • Layout Options: Choose the layout style that best fits your design—grid for a clean, structured look, slider for a dynamic presentation or list for a straightforward approach.
    • Styling Options: Adjust colors, fonts, and backgrounds to ensure the testimonial section aligns with your website’s overall design. You can also add borders and shadow effects to enhance the visual appeal.
    • Display Options: Customize how many testimonials to display at a time and whether to include navigation arrows or dots if using a slider layout.
    • Arrange Testimonials: Drag and drop testimonials to rearrange their order as needed. Highlight the most impactful testimonials at the top for maximum effect.
  • Preview Your Page: Click the “Preview” button to see how the testimonial section looks on your site. Ensure it is visually appealing and the text is easy to read.
  • Publish Your Page: Once you are satisfied with the design and layout, click the “Publish” button to make your page live.

Step 3 Design and Publish Your Stunning Page

You are now ready to design and publish your stunning WordPress page. This final step involves putting together all the elements you’ve customized, arranging them for the best visual impact, and ensuring your page is ready to captivate your audience. Here’s a detailed guide on how to design and publish your beautiful, functional page.

Here is a step-wise guide to implement:

  • Outline Your Content: Before you start designing, outline the key sections and elements you want on your page. This could include a header, hero image, team section, testimonials, a call-to-action, and footer.
  • Sketch a Layout: Sketch a rough layout of your page on paper or using a digital tool. This helps you visualize the structure and flow, making it easier to arrange blocks later.
  • Go to the Post/Page Editor: From your WordPress dashboard, navigate to Posts or Pages and create a new post/page or edit an existing one.
  • Add a Title: Start by adding a compelling title that clearly conveys the purpose of your page.
  • Add and Arrange Blocks: Using the “+” button, add the blocks you’ve outlined in your plan. Arrange them in the order that follows your sketched layout. Here are some key sections you might include:
    • Hero Section: Use an Image or Cover block to create a visually striking hero section. Add a headline and a subheadline that grabs attention.
    • Team Members: Use the Team Members block to introduce your team. Customize it with profile pictures, names, and bios.
    • Testimonials: Add a Testimonials block to showcase positive feedback. Customize the layout and design for maximum impact.
    • Call to Action: Use the Call to Action block to encourage visitors to take a specific action, like signing up for a newsletter or contacting you.
    • Customize Each Block: Adjust the settings for each block to match your design preferences. This includes changing colors, fonts, spacing, and adding background images where needed.
  • Add Media: Enhance your page with high-quality images, videos, and graphics. Use the Image Slider block for interactive galleries or the Video block to embed engaging video content.
  • Use Advanced Columns: For a more sophisticated layout, use the Advanced Columns block to create multi-column sections. This can help organize content and improve readability.
  • Ensure Consistency: Maintain a consistent design throughout your page. Use the same fonts, colors, and styles to create a cohesive look.
  • Preview Your Page: Click the “Preview” button to see how your page looks on different devices. Check for any alignment issues, broken links, or design inconsistencies.
  • Optimize for SEO: Use an SEO plugin to optimize your page title, meta description, and content. This helps improve your page’s visibility in search engine results.
  • Test Functionality: Ensure all interactive elements, like buttons and forms, work correctly. Test any links to make sure they direct to the intended pages.
  • Save Draft: Before publishing, save your page as a draft. This ensures you don’t lose any work and can make final adjustments.
  • Publish: Once you’re satisfied with the design and functionality, click the “Publish” button to make your page live. Confirm any prompts to finalize the publication.
  • Promote Your Page: Share your newly published page on social media, in newsletters, and through other marketing channels to drive traffic.

End Note

The QeUltimate Blocks Plugin offers a range of customizable blocks that cater to various needs, from showcasing team members and displaying testimonials to creating advanced layouts and interactive elements. These features enable you to build professional, user-friendly pages without needing extensive coding skills. Now that you have the knowledge and tools to craft stunning WordPress pages, it’s time to unleash your creativity and make your website stand out. Happy designing!

QeUltimate Blocks Plugin!

Enhance your website’s design and functionality effortlessly with the
Free Download

Choose the Right 360 Product View Plugin: An Informed Look

Almost half of your visitors could be persuaded to hit that “Buy Now” button simply by experiencing your products in a more immersive way. Well, that’s right! Customers crave a dynamic and interactive shopping experience that allows them to truly connect with your products. And that’s where 360 product view plugins for WordPress come into play. So, get ready to discover the magic that can revolutionize your online store and skyrocket your sales. Let’s check out the features, pros, cons, and everything you need to know about 3 such WordPress plugins to make an informed decision.

Let’s start!

What are 360 Degree Product View WordPress Plugins?

360 Degree Product View WordPress plugins are powerful tools that allow you to showcase your products in a whole new dimension. These plugins leverage cutting-edge technology to create interactive and immersive product views that go beyond traditional static images. Not only do these plugins enhance the visual appeal of your products, but they also have a direct impact on customer engagement and conversion rates.

With 360 Product View WordPress plugins, you can unleash the true potential of your products. Whether you’re selling fashion items, electronics, furniture, or any other physical goods, these plugins enable you to showcase the intricate design, craftsmanship, and unique features that set your products apart.

So, if you’re looking to elevate your online store and leave a lasting impression on your customers, 360 Product View WordPress plugins are your secret weapon. They bring your products to life, increase customer engagement, and boost your sales like never before.

360 Product View for WooCommerce Plugin

Improve Your Customer Engagement in Free with

Free Download

What are 360 Degree Product View WordPress Plugins ?

To ensure you choose the right plugin that meets your requirements, there are certain must-have features to consider. Let’s explore these features in detail:

  • Smooth 360-Degree Rotation: The plugin should enable smooth and fluid rotation of the product, allowing customers to view it from all angles. It should provide a high frame rate and low latency, ensuring a realistic and responsive rotation experience.
  • High-Resolution Images: The plugin should support high-resolution images to ensure crisp and detailed product views. It should be capable of handling large image files without compromising loading speed or performance.
  • Interactive Zoom Functionality: The ability to zoom in on specific areas of the product is crucial for customers to examine fine details. The plugin should support interactive zoom functionality, allowing users to magnify the product and explore it with precision.
  • Hotspot Capability: Interactive hotspots offer the opportunity to add additional information, such as product specifications or clickable links, directly within the 360-degree view. The plugin should support hotspot creation and customization, enhancing the interactive browsing experience.
  • Mobile Responsiveness: With mobile devices being widely used for online shopping, the plugin should be fully responsive and optimized for mobile viewing. It should adapt to different screen sizes, maintaining smooth rotation and functionality across smartphones and tablets.
  • Customizable Design: The plugin should offer customization options to match your store’s branding and design. You should be able to adjust colors, button styles, control layouts, and other visual elements to create a seamless integration with your website’s aesthetics.
  • Cross-Browser Compatibility: The plugin should be compatible with all major web browsers, including Chrome, Firefox, Safari, and Edge. It should render consistently and perform optimally across different browsers to ensure a smooth experience for all users.
  • Device Compatibility: The plugin should be compatible with various devices, including desktop computers, laptops, tablets, and mobile phones. It should adapt to different device capabilities and orientations, providing a consistent and intuitive user experience.
  • Quick Loading Times: The plugin should be optimized for fast loading times to ensure that customers can access and interact with the 360-degree product view without delays or interruptions. It should utilize efficient loading techniques, such as lazy loading, to prioritize the initial image and load subsequent frames seamlessly.
  • Analytics and Tracking: Integrating analytics and tracking capabilities within the plugin can provide valuable insights into customer behavior, engagement levels, and conversion rates. It should support integration with popular analytics tools to help you measure the effectiveness of the 360-degree product view and make data-driven decisions.

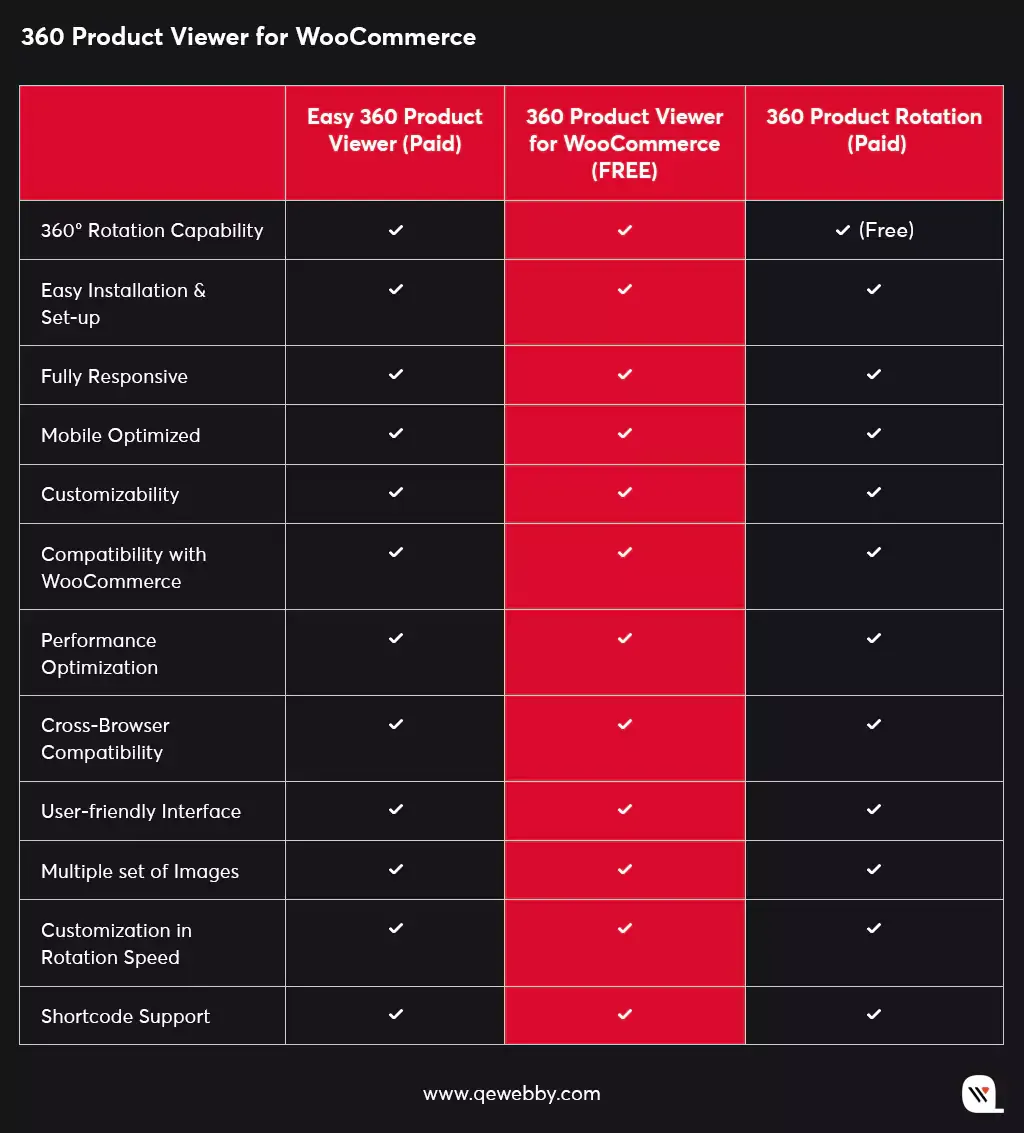
Easy 360° Product Viewer

This one plugin is a powerful solution that brings your products to life with stunning 360° views. With its user-friendly interface and extensive customization options, this plugin allows you to showcase your products from every angle, providing an interactive and engaging experience for your customers. Whether you’re selling physical goods, digital products, or creative designs, Easy 360 Product Viewer empowers you to create immersive product presentations that captivate and convert.

SR Product 360° Product Viewer

This is another feature-rich WordPress plugin that revolutionizes the way you showcase your products. With its seamless integration and intuitive interface, this plugin allows you to create captivating 360° views of your products, giving your customers a dynamic and immersive experience. With easy customization options and support for both 2D and 3D views, SR Product 360° View empowers you to highlight every detail and angle of your products, helping you boost engagement, increase conversions, and stand out from the competition.

360 Product Viewer for WooCommerce

This is the ultimate solution to showcase your products in a whole new dimension. With this powerful plugin, you can effortlessly create immersive 360° views of your products, allowing your customers to explore every angle and detail. Whether it is to engage your audience with interactive product experiences that captivate and inspire, or lead to increased customer satisfaction and higher conversion rates, this plugin has it all. With easy integration, customizable settings, and seamless compatibility with WooCommerce, the 360 Product Viewer empowers you to create a truly remarkable shopping experience. This innovative plugin allows you to take your online store to new heights and let your products shine.

Wrap Up

A correct 360 product view plugin enables you to provide an immersive and interactive shopping experience to your customers, allowing them to explore your products from every angle. It’s the secret ingredient that will take your product presentation to new heights and leave your customers in awe. By incorporating the power of 360-degree product views, you create an unparalleled shopping experience that drives excitement and captivates your audience.

The best part? This amazing plugin can be available to you completely free of charge. Yes, you read that right! You can harness the full potential of 360 product viewing without spending a penny. It’s a remarkable opportunity to level up your online store and stand out from the competition, all while keeping your budget intact.

360 Product View for WooCommerce Plugin

Download the free access to

Free Download

The Battle of the Themes: How To Choose the Right One for Your WordPress Site?

Setting up a WordPress website can be both exciting and overwhelming! Although with many options available, choosing the right theme can feel like a battlefield. Certainly, it is an important decision that you will want to get right with, as the theme you choose is responsible for the look, feel, and functionality of your website. Let’s explore the process of selecting the perfect theme for your website, considering your needs and budget.

Before that, let’s understand the importance of selecting the right theme!

Why is selecting the right WordPress theme important after all?

In today’s digital age, having a well-designed website is crucial for businesses and individuals who want to establish an online presence. And for that, selecting the right WordPress theme is a critical step in building a successful website. Here is how.

  • Firstly, the right theme can enhance the visual appeal of your site and make it more intriguing to visitors. A well-designed theme can help you create a professional image and increase brand recognition. A visually enticing website also helps in keeping visitors engaged and encourages them to explore further.
  • Additionally, the right theme can greatly improve the functionality of your site. Some themes are specifically designed for a particular niche, such as eCommerce, blogging, or portfolios, and come with built-in features to support these purposes. For example, an eCommerce theme may include features like product listings, shopping carts, and payment gateways. On the other hand, a blog theme may have features such as social sharing buttons, related posts, and a commenting system.
  • Moreover, the right theme can also play a role in search engine optimization (SEO). An SEO-optimized theme can help your site rank higher in search engine results, making it easier for potential visitors to find your site. This is particularly important for businesses that want to drive traffic and generate leads through their website.
  • Ultimately, a suitable theme makes it easier to manage and maintain your site. A well-designed theme will be user-friendly and allow you to make changes to your site with ease. Furthermore, many themes come with an intuitive dashboard that makes it simple to customize and manage your site.

What factors to consider when selecting your WordPress theme?

It is important to consider various factors to ensure that the WordPress theme you select for your site meets your specific needs and helps your website perform at its best. Here are the key factors that you should never ignore:

  • Functionality – Consider the features and capabilities that are essential for your websites, such as eCommerce functionality, contact forms, social media integration, and more. Ensuring these functionalities will make your website run effectively.
  • Design and Aesthetic – Consider your brand’s visual style and select a theme that aligns with your aesthetic. This will help your website to be more visually appealing and engaging for your visitors.
  • User Experience – this is crucial for keeping your visitors engaged and coming back for more. Select a theme that offers a clean and intuitive design that is easy to navigate.
  • Customization Option – Customization allows you to personalize your website and make it truly your own. Consider the level of customization that includes options for changing colors, fonts, and more.
  • Responsiveness – Ensure your selected theme offers responsive behavior to your visitors’ navigation on your site.
  • Mobile Optimization – It is important that your website has a theme that adapts to different screen-size and provides an optimal viewing experience for all visitors, no matter what device they are using.
  • Speed and Performance – This is important to reduce the bounce rate of your website. If your theme is optimized for better speed and performance, then it allows your website to load quickly and smoothly, even with a large amount of content.
  • Support and Documentation – A theme from a reputable author can offer excellent customer support and clear documentation. Moreover, verifying the theme clinches the regular updates that address any bugs or security vulnerabilities.

How to select the right WordPress theme for your specific needs?

Determine your website’s goals and objectives

Before you start your search for the perfect theme, it is important to determine your website’s goals and objectives. You can recognize it by answering the questions like

  • What is the primary purpose of your website? Is it to showcase your portfolio, sell products, or provide information on a specific topic?
  • What kind of content will you be publishing? Will you be publishing articles, blog posts, or both?
  • What kind of functionality do you need? Do you need an eCommerce solution, a contact form, or a photo gallery?

A clear vision will help you narrow down your search and select a theme that meets your purpose for the website.

Evaluate your budget

WordPress themes can range in price from free to several hundred dollars. For this, it is fundamental to calculate how much you are willing to spend on a theme. While it is tempting to choose a free theme, it is important to remember that you get what you pay for. Free themes often lack the functionality and customization options that you will find in premium themes.

Accordingly, also keep in mind that a high-priced theme does not always equal a high-quality theme and that there are many themes available at a reasonable price. If you have a limited budget, consider choosing a premium theme that offers a free demo version to test whether the theme suits your requirements or not.

Research and compare different themes

Once you have a clear understanding of your goals and budget, you can now start researching to compare different themes.

Start by browsing the WordPress theme repository, which offers a wide range of free and premium themes. You can also search the websites like ThemeForest and Creative Market, which offer a large collection of premium themes.

Look at the variety of themes that interest you and meet your needs, essentially paying close attention to the factors discussed above. Enlist the themes that intrigue you and compare them side-by-side to determine what fits best for your website.

Research and compare different themes

Before you make a final decision, it is crucial to try out a demo version of the theme to get a feel for how it looks and works. Most theme developers offer demo versions or trials, which allow you to test the theme and see how it will resemble your website’s purpose.

When testing a demo version, be attentive to the following:

  • Are there options for changing colors, fonts, and background images?
  • Does the theme look good on both desktop and mobile devices?
  • Can you customize the theme for your specific needs?
  • Does the design match your brand and style?
  • Does the theme load quickly and efficiently?
  • Is it optimized for smart devices like tablets?
  • Is the layout clean and easy to navigate?
  • Is the theme user-friendly?

The demo version trial is an excellent opportunity to check out the feasibility of a theme for your website.

A Curated list of the best WordPress themes for your site

Here, we bring to you some selected WordPress themes that you should consider while comparing a variety of others.

ASTRA THEME

1+ M Active Installations

Astra is a lightweight and customizable theme that is designed for speed and performance. It is compatible with popular page builders like Elementor and Beaver, has pre-built templates, and offers various customization options.

WordPress Astra Theme Features
  • Pre-built websites
  • Customize without code
  • Made for page builders
  • Super fast performance
  • Visual theme customizer
  • Glutenberg compatible
  • Live editing

ELEGANT THEMES -DIVI

880K+ Active Installations

Elegant themes – Divi is a popular WordPress theme known for its drag-and-drop interface with a built-in page builder and a wide variety of design options.

Elegant Themes – Divi Features
  • True-visual editing
  • Custom CSS control
  • Responsive designing
  • Design options galore
  • Inline text editing
  • Global elements and styles
  • Undo, Redo, and revisions

AVADA THEME

880K+ Active Installations

Avavda is another popular multipurpose theme that offers a broad spectrum of customization options. It comes with an integral page builder, responsiveness, and ready-made templates.

WordPress Avada Theme Features
  • Live visual builder
  • Build custom layout
  • Off-canvas builder
  • Array of styling and layout options
  • Setup wizard
  • Prebuilt Avada studio
  • WooCommerce integration

OCEAN WP THEME

590K+ Active Installations

OceanWP is a fast and lightweight theme that offers an extensive variety of personalization alternatives. It is designed to work with popular templates, page builders, and artistic schemes.

WordPress OceanWP Theme Features
  • No coding skills required
  • Global fonts & typography
  • Global site layouts
  • Customizable header styles
  • Social media collaboration
  • Free WooCommerce integration
  • Smooth eCommerce customization

UNCODE THEME

10K+ Active Installations

Uncode is a versatile and powerful theme that is designed to help you create a unique and professional-looking website.

WordPress Uncode Theme Features
  • Frontend page builder
  • WooCommerce builder
  • Wireframes plugins
  • One click import
  • Dynamic srcset images
  • WPML certified and RTL
  • Power elite support

ADIOS THEME

2K+ Active Installations

Adios is a minimal and modern WordPress theme that is designed for creatives and agencies, that offers an extensive variety of features to build your WordPress site.

WordPress Adios Theme Features
  • One click demo importer
  • Advanced blog layouts
  • Advanced portfolio layouts
  • Fully responsive parallax layout
  • Portfolio filtering option
  • Isotope plugin
  • Page metabox options

Wrap Up

The right theme for your WordPress site is essential as it governs the success of your website. With so many options available, it can be astounding to make a decision. However, keeping in mind the checkpoints like theme functionality, design & aesthetics, user experience, responsiveness & mobile optimization, customization options, proper documentation, etc. can help you make an informed decision.

In case, you still find difficulty in considering the right theme for your WordPress site, ask the experts! QeWebby has a proficient team of WordPress experts that will help you acquire a brilliant WordPress theme that matches your needs.

Top 3 AI Plugins for WordPress That Are Dominating 2025

AI (artificial intelligence) tools are estimated to save content creators up to 80% of the time and effort required to create content manually. Moreover, this helps to increase productivity by allowing them to focus on other aspects of content creation like content strategy and promotion. Companies now equip their content team with such AI tools that automate the process of researching, writing, and editing content.

Are you too willing to improve your content marketing with the help of AI?

Using WordPress plugins can actually be one of the best things you can do if you have the skill set to install additional plugins on your website. This post discusses how AI helps in content generation and the best AI content generator tools for your WordPress site.

Let’s dive in!

How AI helps in creating meaningful content?

The ways AI is utilized in content marketing include

  • Natural Language Processing (NLP): AI algorithms analyze and understand human language to generate content that is more natural and human-like.
  • Text Generation: AI models are trained to generate written content, like articles, blog posts, and various other descriptive sections of the website.
  • Content Optimization: The AI method optimizes content for SEO and other metrics, like readability and engagement.
  • Personalization: AI tools even personalize content for specific audiences, based on data like demographics, browsing history, and past interactions.
  • Summarization: AI tools can summarize long-form content into shorter, more digestible pieces.

3 Best WordPress Plugins for AI Content Generation

Present-day websites are highly subjugated with AI since it is flourishing day by day with progress in technologies like machine learning and artificial intelligence. A similar tendency is observed with WordPress plugins that are generated specifically to redeem the time and effort required for content generation.

Let us take a look over the best AI content generation plugins that can help your WordPress site with optimum results in content creation.

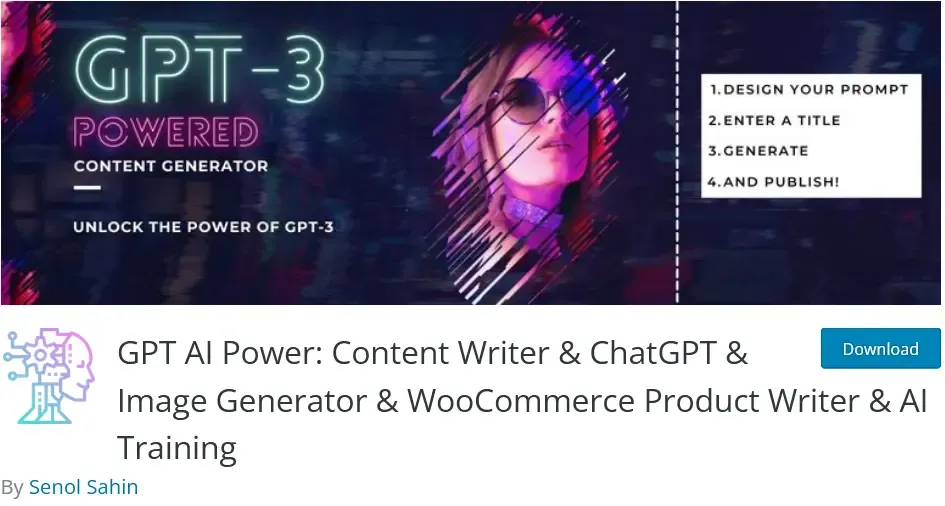
GPT AI Power

GPT-AI Power is one beneficial plugin that can generate high-quality content for blog posts, product descriptions, or any other type of content on your WordPress site. GPT AI Power can understand and interpret user input utilizing state-of-the-art natural language processing technology.

Attractive Features of GPT AI Power:

  • It can generate superlative, long articles using the GPT-3 language model.
  • Furthermore, it can fine-tune the writing style to make it informative, descriptive, creative, narrative, persuasive, expository, reflective, argumentative, analytical, critical, evaluative, journalistic, technical, and simple.
  • The plugin can even set the tone of the generated content to make it sound formal, neutral, assertive, cheerful, humorous, informal, inspirational, sarcastic, professional, and skeptical.
  • It supports 23 different languages that include English, Spanish, French, German, Italian, Portuguese, Russian, Japanese, Korean, Chinese, Dutch, Indonesian, Turkish, Polish, Ukrainian, Arabic, Romanian, Greek, Czech, Bulgarian, Swedish, and Hungarian.
  • Additionally, it can manage to customize heading tags, hyperlinks, and anchor text of the content by generating the introduction and conclusion segments of your content.
  • The bulk editor tool (Pro Plan) can allow bulk updates via CSV and copy-paste with embedding ChatGPT in the front-end along with a featured image, and art style.
  • Specific WooCommerce integration can help to optimize product titles, and descriptions, and even train your AI by fine-tuning the GPT model.

Using Plans for GPT-AI Power:

FREE $0 / Month

  • Generate high-quality, longer articles
  • 23 different languages supported
  • Image Generator
  • ChatGPT
  • WooCommerce Product Writer
  • AI Training

PRO $9.99 / Month

  • All Free Features
  • Ability to add keywords
  • Make keywords bold
  • Ability to avoid certain keywords
  • Ability to generate Q&A
  • Bulk Content Writer (20 content at a time)
  • Bulk Content Writer via CSV (20 content at a time)
  • Bulk Content Writer via Copy-Paste (20 content at a time)
  • Schedule Posts
  • Additional Writing Styles
  • Additional Writing Tones
  • Priority support

AI Engine

AI Engine is another WordPress plugin, rated 5-star on WordPress.org, exploring the AI discipline for quick generations, suggestions, translation, corrections, SEO, etc.

Attractive Features of AI Engine

  • It empowers WordPress sites with AI-powered chat functionality by adding a short code [mwai_chatbot] for ChatGPT & Image generation bot.
  • The plugin makes content generation effortless with attributes to customize headings, language, and other related parameters.
  • Utilizing the DALL-E model, the AI engine also facilitates image generation. However, as it is a Beta version, image generation exclusively allows square formats (1024×1024).
  • The Fine-tuning arena helps in the preparation of datasets and managing them and even training new models using the same data set.
  • AI Engine uses the API from OpenAI and gathers the number of tokens utilized over its usage.

Using Plans for AI Engine

FREE VERSION

  • Chatbot (GPT-like)
  • Content Generator
  • Quick Suggestions
  • AI Playground
  • Train your AI
  • Casually Fined-Tuned
  • Internal API

PRO VERSION

  • Everything from the Free Version
  • Statistics Module
  • Content-Aware Chatbot
  • Much more to come…
  • STARTER $29 Yearly/ 1 Website
  • STANDARD $39 Yearly/ 5 Websites
  • PROFESSIONAL $59 Yearly/ 20 Websites
  • PRO VERSION CART $59 Yearly/ 20 Websites
  • STANDARD $169 Lifetime/5 Websites
  • PROFESSIONAL $249 Lifetime/20 Websites
  • DEVELOPER $349 Lifetime/500 Websites
  • AGENCY $499 Lifetime/2500 Websites

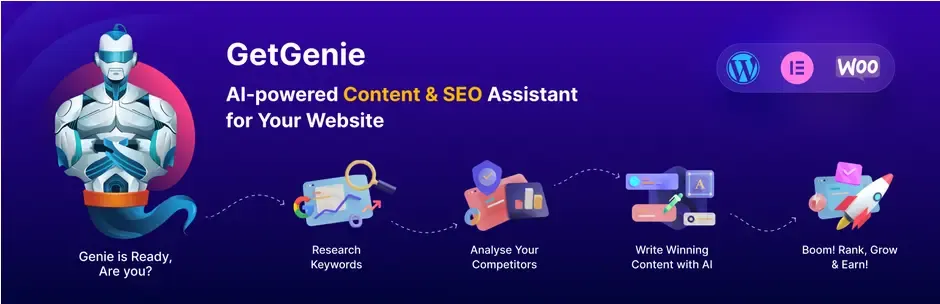
GetGenie

GetGenie is an effective plugin with 2000+ active installations in the WordPress community. It is beautifully crafted for multiple needs for content creation.

Attractive Features of GetGenie

  • It creates long-form content like blogs, product descriptions, video scripts, and fictional/ non-fictional books in your way using huge data.
  • The plugin also helps you in making your content SERP-ready, to give tough competition to your competitors.
  • The SEO-friendly feature helps to rank your content over search engines by providing keyword analysis, and competitor analysis.
  • Another important feature it provides for creating bigger impacts is by creating innovative shorter content for social media, ad platforms, and landing pages in the tone set with your project requirements.
  • The Genie Mode is provided as the special template of GetGenie to make content generation super easy and fast.
  • Moreover it provides SEO-friendly URLs with full control over word usage and gets the option to set the paragraph limit for better writing with this google and text assistant.

STARTER (FREE)

  • 1 Website
  • Unlimited Users
  • 1,500 AI Writing Words Per Month
  • 10 SEO Keyword Analysis Per Month
  • 5 Competitor SERP Analysis Per Month
  • 30+ AI Templates
  • WordPress Plugin
  • WordPress Blog Wizard
  • WooCommerce Product Wizard
  • Elementor Builder Support

WRITER $19/ MONTH

  • Unlimited Websites
  • Unlimited Users
  • 12,000 AI Writing Words Per Month + Extra 3,000 Words month Bonus for a limited time
  • 40 SEO Keyword Analysis Per Month + Extra 20 Bonus for a limited time
  • 20 Competitor SERP Analysis Per Month + Extra 10 Bonus for limited time
  • 30+ AI Templates
  • 14-Day Money Back Guarantee Premium Support
  • WordPress Plugin
  • WordPress Blog Wizard
  • Woocommerce Product Wizard
  • Elementor Builder Support
  • Chrome Browser Extension Coming soon

PRO $49/ MONTH

  • Unlimited Websites
  • Unlimited Users
  • 40,000 AI Writing Words Per Month + Extra 30,000 Words month Bonus for a limited time
  • 250 SEO Keyword Analysis Per Month + Extra 50 Bonus for a limited time
  • 80 Competitor SERP Analysis Per Month + Extra 20 Bonus for limited time
  • 30+ AI Templates
  • 14-Day Money Back Guarantee Premium Support
  • WordPress Plugin
  • WordPress Blog Wizard
  • Woocommerce Product Wizard
  • Elementor Builder Support
  • Chrome Browser Extension Coming soon

AGENCY $99/MONTH

  • Unlimited Websites
  • Unlimited Users
  • 150,000 AI Writing Words Per Month + Extra 100,000 Words month Bonus for a limited time
  • 600 SEO Keyword Analysis Per Month + Extra 200 Bonus for a limited time
  • 200 Competitor SERP Analysis Per Month + Extra 50 Bonus for limited time
  • 30+ AI Templates
  • 14-Day Money Back Guarantee Premium Support
  • WordPress Plugin
  • WordPress Blog Wizard
  • Woocommerce Product Wizard
  • Elementor Builder Support
  • Chrome Browser Extension Coming soon

Wrap Up

Remember that AI content generation isn’t going to be a silver bullet to solve all your problems. Although these plugins are important and complement one another, they require minor maintenance and updates on a semi-regular basis. Don’t overload your site with too many plugins, and always check the WordPress forum. In order to stay competitive and comply with upcoming trends, we suggest keeping an eye on these new AI plugins.

Want to add these benefits to your WordPress site? Don’t worry, QeWebby is right here for your help! Contact us now, for all your WordPress needs!

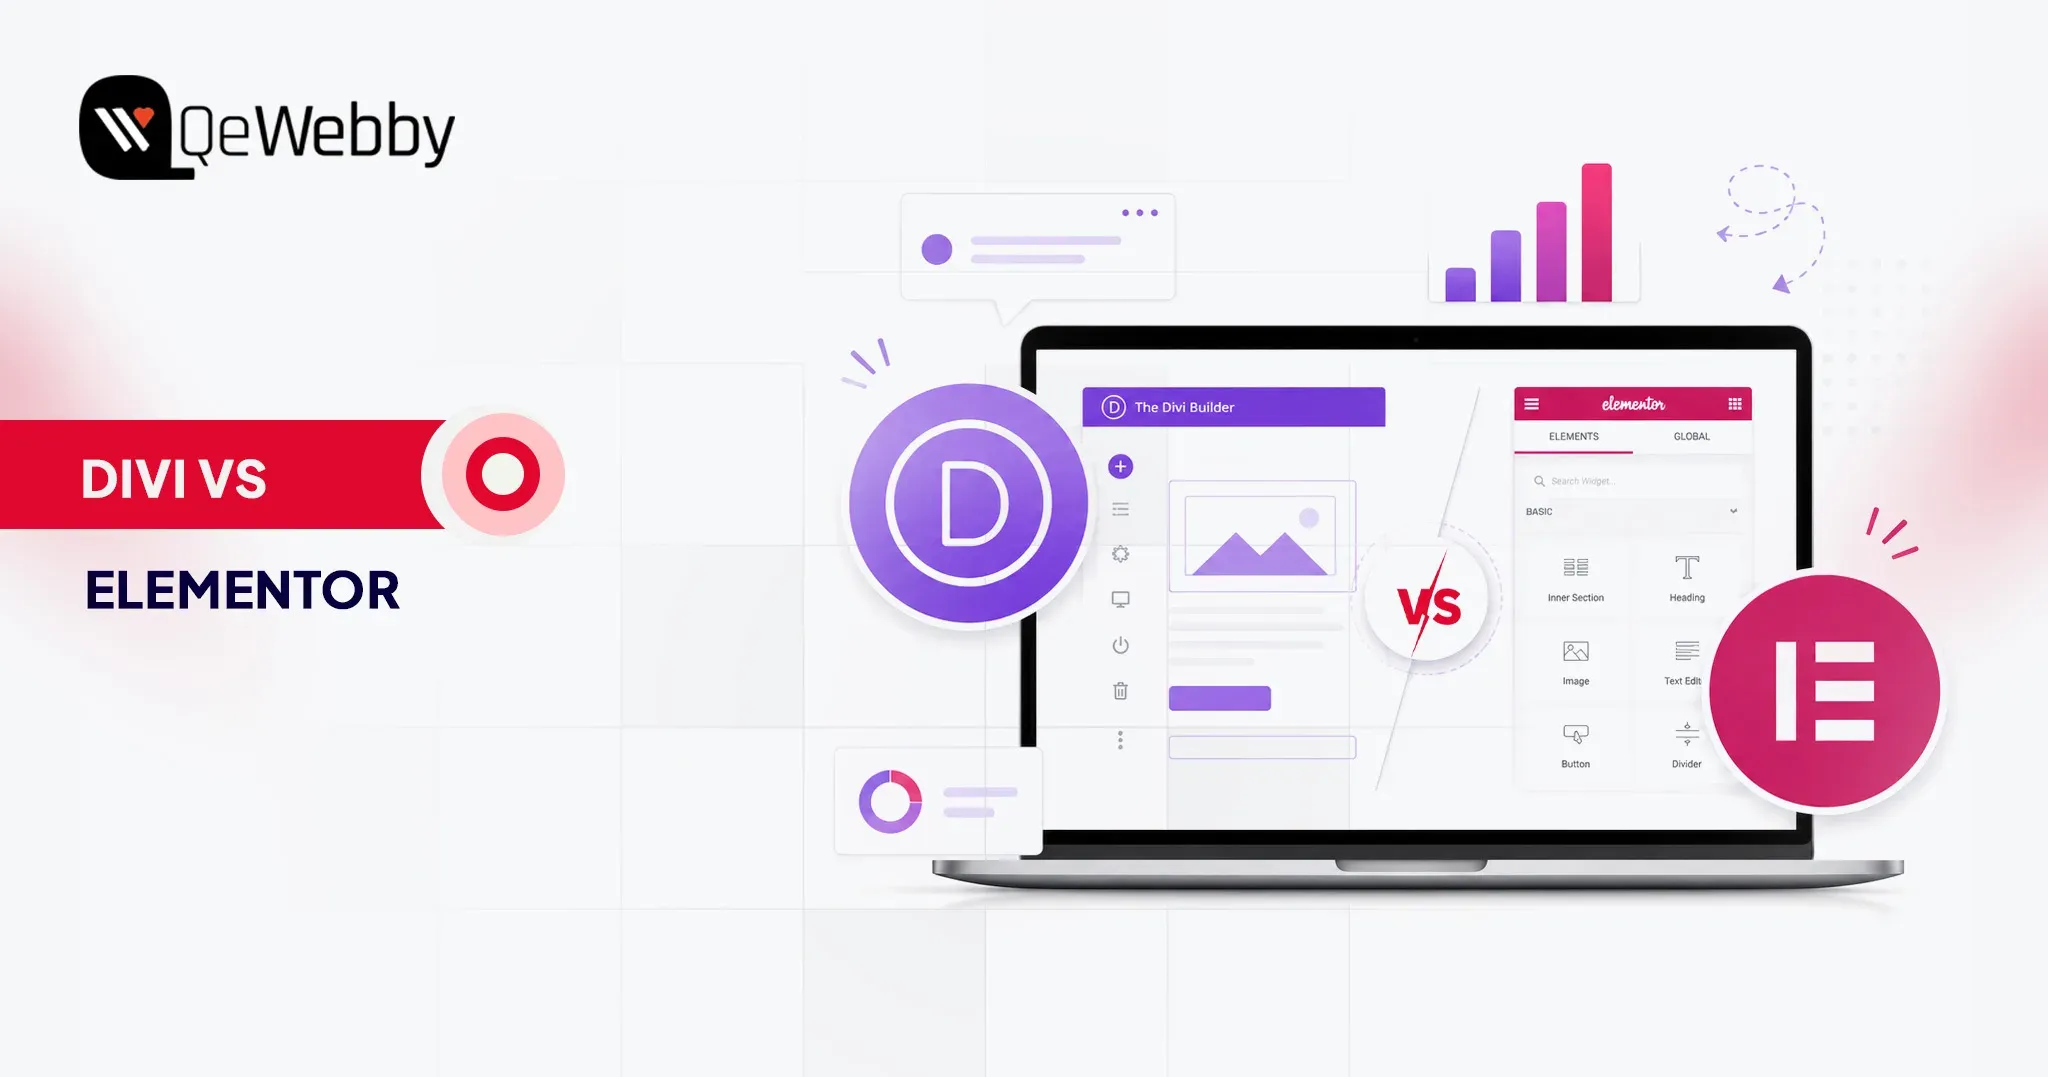
Divi vs Elementor: Which WordPress Page Builder is Better?

Choosing the right tools for your WordPress website can make or break your digital growth. Among those tools, page builders play a central role. They define how quickly you can design pages, how flexible your layouts are, and how well your site performs across devices. With dozens of options available, finding the best WordPress page builder is not as straightforward as it seems.

This is where the comparison of Divi vs Elementor becomes highly relevant. Both are powerful, widely used, and packed with features. Yet, they differ in how they handle speed, usability, customization, and scalability. What works perfectly for one business might create limitations for another. That is why understanding their strengths and trade-offs is critical before making a decision.

Selecting the wrong page builder can lead to slower load times, restricted design control, and higher maintenance effort over time. On the other hand, the right choice can streamline your workflow and improve user experience.

In this blog, we will break down Divi vs Elementor across key factors like performance, ease of use, pricing, and real-world usability, helping you confidently choose the best WordPress page builder for your needs.

Divi vs Elementor: Understanding the Builders Behind the Decision

Not all page builders deliver the same experience once you move beyond the surface. The Divi vs Elementor comparison is less about which has more features and more about which aligns better with your workflow, performance needs, and long-term goals. Before choosing the best WordPress page builder, it is important to understand how each one truly operates in real-world scenarios.

What is Divi?

Divi is a powerful visual builder developed by Elegant Themes, designed to simplify website creation without compromising on design depth. Known as the Divi WordPress builder, it combines a theme and a page builder into one unified ecosystem. This means you are not just editing pages; you are controlling the entire site structure with consistency. For users exploring Divi vs Elementor, Divi often stands out for its design flexibility and built-in editing experience that feels seamless and intuitive.

It is particularly favored by designers and agencies that want complete creative control while maintaining reusable design systems across projects.

Key Features of Divi

  • True visual front-end editing with real-time changes
  • Built-in theme builder for headers, footers, and templates
  • Extensive design modules and layout packs
  • Global elements and styles for consistency
  • Advanced responsive editing controls
  • Integrated A-B testing for conversion optimization
  • No dependency on third-party add-ons for core functionality

What is Elementor?

Elementor is one of the most widely adopted WordPress builders, powering millions of websites globally according to BuiltWith technology usage data. It focuses on ease of use, speed, and scalability, making it a strong contender for the best WordPress page builder. When comparing Divi vs Elementor, Elementor often appeals to users who want granular control through widgets and a lightweight editing experience that integrates smoothly with various themes.

Its ecosystem is vast, allowing users to extend functionality through plugins and third-party tools, which makes it highly adaptable for different project needs.

Key Features of Elementor

  • Intuitive drag and drop editor with a clean interface
  • Wide range of widgets for design and functionality
  • Theme builder for customizing site-wide elements
  • Popup builder for marketing and lead generation
  • Strong third-party plugin ecosystem
  • Advanced motion effects and animations
  • Flexible styling and typography controls

Divi vs Elementor: Feature-by-Feature Comparison That Impacts Your Choice

Feature Divi WordPress Builder Elementor
Ease of Use Visual front-end editing, slightly complex at first Clean UI with sidebar, beginner-friendly
Learning Curve Moderate to high Low to moderate
Design Flexibility Highly customizable with deep styling controls Flexible with structured widget-based design
Performance & Speed Improved, but can be heavy if not optimized Generally faster and lighter by default
Pricing Model Yearly and lifetime plans Subscription-based with multiple tiers
Value for Money High for long-term and multiple sites Good for short-term or single-site usage
Built-in Features Extensive, fewer external plugins needed Core features are strong, relies on add-ons
Integrations Limited compared to Elementor Large ecosystem of third-party integrations
WooCommerce Support Strong customization options Equally strong with more plugin flexibility
Global Design Controls Advanced global styles and reusable elements Available but less centralized
Support & Community Good support, strong design-focused community Massive global community and resources
Best For Designers, agencies, branding-focused builds Beginners, marketers, scalable projects

Picking the best WordPress page builder is rarely a quick decision. On paper, both tools promise speed, flexibility, and control. In reality, the experience can feel very different once you start building pages, managing layouts, and optimizing performance.

Ease of Use

According to Statista, mobile devices account for more than half of global website traffic, making mobile optimization a critical factor when selecting a WordPress page builder.

Ease of use is not just about drag-and-drop functionality. It is about how quickly you can move from idea to execution without second-guessing your steps. A builder that feels intuitive reduces rework, speeds up delivery, and improves overall productivity for teams and individuals.

  • The Divi WordPress builder offers a fully visual editing experience that places design controls directly on the page. This approach feels natural once you get used to it, especially for users who prefer real-time interaction. However, the interface includes multiple layers of settings, which can feel overwhelming in the beginning. It rewards users who invest time in learning its system.
  • Elementor follows a more structured layout with a fixed sidebar and clear widget-based controls. This separation makes navigation simple and predictable, especially for beginners. You can quickly locate elements, adjust settings, and preview changes without confusion. It is designed to reduce the learning curve and help users build faster from day one.

Design Capabilities and Flexibility

Design flexibility defines how unique and scalable your website can become. The best WordPress page builder should allow you to move beyond templates and create experiences that align with your brand and business goals.

  • Divi stands out with its deep design customization options. From advanced styling controls to global design settings, it allows you to fine-tune every element on the page. The ability to reuse layouts and apply global changes adds efficiency, especially for larger projects. It is particularly strong for users who want complete creative freedom within a single ecosystem.
  • Elementor offers powerful design capabilities through its modular widget system. Each widget can be customized with precision, giving users strong control over layout and styling. While slightly more structured than Divi, it provides enough flexibility for most use cases. Its third-party extensions further enhance what you can achieve visually.

Performance and Speed

Website performance directly impacts user experience, conversions, and search rankings. Even the most visually appealing design loses value if the site loads slowly or struggles to perform under real conditions.

  • Divi has made noticeable improvements in performance through features like dynamic CSS and optimized asset loading. However, complex designs with heavy modules can still increase load time if not optimized properly. It requires a more mindful approach to maintain speed and efficiency.
  • Elementor is generally perceived as more lightweight in its default setup. It delivers faster load times when paired with optimized themes and hosting. That said, overusing widgets or relying heavily on add-ons can gradually impact performance. Proper optimization practices are still essential.

Pricing and Value for Money

Cost is not just about the initial investment. It is about how pricing aligns with your long-term usage, scalability, and the number of projects you manage.

  • Divi offers a straightforward pricing structure with both yearly and lifetime plans. The lifetime option is especially attractive for agencies or freelancers working on multiple websites. It provides long-term value without recurring costs, making budgeting more predictable.
  • Elementor follows a subscription-based pricing model with multiple tiers depending on usage. This makes it accessible for beginners, but costs can increase over time as you scale. The value depends on how extensively you use its premium features across projects.

Integrations and Add-ons

Modern websites often rely on multiple tools working together. Integration capabilities determine how easily your builder fits into your broader tech stack.

  • Divi comes with a wide range of built-in features, reducing the need for additional plugins. While it supports integrations, its ecosystem is more self-contained. This can simplify management but may limit flexibility in certain advanced use cases.
  • Elementor excels in integrations and add-ons. Its open ecosystem allows you to extend functionality with a wide range of third-party plugins. Whether it is marketing automation, advanced design elements, or analytics tools, the possibilities are extensive.

Support and Community

Strong support and an active community can significantly influence your experience, especially when dealing with complex builds or troubleshooting issues.

  • Divi provides dedicated support along with detailed documentation and tutorials. Its community is active and particularly strong among designers and agencies. Users often benefit from shared resources, layouts, and practical insights.
  • Elementor has one of the largest communities in the WordPress space. From forums to tutorials and third-party resources, help is widely available. Official support quality varies by plan, but the overall ecosystem makes it easier to find solutions quickly.

Divi vs Elementor: Pros and Cons You Should Know Before Choosing

Before you finalize a page builder, it helps to look beyond features and understand the real advantages and limitations. The Divi vs Elementor debate often comes down to how each tool performs in everyday use, not just what it promises on paper. This section breaks down the pros and cons in a clear, practical way so you can evaluate what fits your workflow, team structure, and goals.

Pros of Divi

  • Strong visual editing experience that lets you design directly on the page
  • Deep customization controls for layouts, spacing, and styling
  • Built-in features reduce dependency on multiple plugins
  • Global elements and reusable styles improve consistency across pages
  • One pricing model with a lifetime option offers long-term value
  • Ideal for designers who want full creative control

Cons of Divi

  • Learning curve can feel steep for first-time users
  • The interface can become overwhelming due to multiple settings layers
  • Performance may require additional optimization for complex designs
  • Limited third-party ecosystem compared to competitors
  • Can feel heavier when handling large-scale or dynamic websites

Pros of Elementor

  • Clean and structured interface that is easy to navigate
  • Faster onboarding for beginners and non-technical users
  • Lightweight performance in default setups
  • Large ecosystem of third-party plugins and integrations
  • Flexible widget system for building dynamic layouts
  • Strong community support and learning resources

Cons of Elementor

  • Advanced features often require paid plans
  • Over-reliance on add-ons can impact performance
  • Design consistency may require more manual control
  • Pricing increases as you scale across multiple sitesc
  • Some customization limits compared to more design-focused builders

Divi vs Elementor: Who Should Use Which Builder?

Not every page builder fits every user. The real decision in the Divi vs Elementor comparison depends on how you work, what you prioritize, and how complex your projects are. The best WordPress page builder for you is the one that aligns with your workflow, not just the one with the most features. Here is how each builder fits different types of users and use cases.

Who Should Use Divi?

The Divi WordPress builder is best suited for users who want complete control over design and prefer an all-in-one ecosystem. It works well for those who value consistency, reusable design systems, and deeper customization without relying heavily on third-party tools.

Ideal for:

  • Design-focused freelancers who want pixel-level control and creative flexibility
  • Agencies managing multiple websites that benefit from global styles and reusable layouts
  • Business owners are focused on branding and want a visually unique website experience
  • Teams looking for long-term value with a one-time investment approach

Divi becomes especially powerful when you are building multiple pages with consistent design patterns. It rewards users who invest time in mastering its interface.

Who Should Use Elementor?

Elementor is a strong choice for users who prioritize ease of use, speed, and flexibility through integrations. It is often considered the best WordPress page builder for those who want to get started quickly while keeping the option to scale with additional tools.

Ideal for:

  • Beginners and non-technical users who need a simple and intuitive interface
  • Developers and marketers who rely on integrations and third-party plugins
  • Startups and small businesses looking for quick deployment and fast iterations
  • Agencies need flexibility across different types of client requirements

Elementor works best when you need adaptability. Its ecosystem allows you to extend functionality based on project needs without being locked into a single system.

Conclusion

The Divi vs Elementor decision is not just about selecting a tool. It is about setting the foundation for how your website evolves over time. The best WordPress page builder should support growth, simplify execution, and adapt to changing business needs without creating technical debt. That is why making the right choice early can save both time and resources later.

At QeWebby, we approach builders like the Divi WordPress builder and Elementor from a performance and scalability lens, not just design. Our focus is on aligning the right technology with your business goals to ensure long-term success. If you are planning your next build or migration, contact us to explore the right solution for your website.