How to Integrate a Payment Gateway in WordPress (Complete Guide + Troubleshooting)

Modern eCommerce platforms treat payments as core infrastructure. For any online business, how customers complete transactions directly impacts revenue, trust, and long-term growth. A poorly configured checkout can cause abandoned carts, failed transactions, and frustrated buyers.

That’s why WordPress payment gateway integration is not just a technical task. It’s a strategic decision that affects conversion rates, security, and scalability, often requiring WooCommerce development services to build a stable and scalable checkout system.

Businesses today can choose between hosted processors, on-site integrations, or even custom payment gateway development, depending on their operational needs. Each approach influences compliance requirements, customer experience, and system complexity. If you’re building a broader ecommerce system, this omnichannel ecommerce strategy guide explains how payment systems fit into a unified customer experience.

When payment systems fail, whether due to timeouts, false declines, or WordPress checkout issues, revenue loss compounds quickly. This guide explains how payment gateways work in WordPress, how to implement them correctly, and how to troubleshoot common problems before they impact your business.

Types of Payment Gateways Supported by WordPress

Selecting the proper integration method is the first step before you look at specific providers. You must decide whether to keep data off-site to improve compliance or to keep users on-site for a better brand experience.

This fundamental choice shapes your security posture and conversion rates just as it does for major eCommerce platforms. Understanding these architectures is essential when you plan your WP payment gateway strategy.

1. Hosted Payment Gateways

Hosted payment gateways manage the transaction process by directing the customer away from your WP payment gateway interface to a secure processor page. You simply redirect the user to a trusted environment where they enter their details, then return to your success page.

Major platforms initially relied on external processors to build consumer confidence during the early internet era. You can use the same strategy to reassure cautious buyers who prefer entering their data on a familiar URL, such as PayPal, rather than an unknown store. This method reduces your security burden since the processor handles sensitive data.

Trust plays a decisive role in checkout completion. Around 17% of online shoppers abandon purchases because they don’t trust the site with their payment information, making recognizable payment brands an important confidence signal.

Benefits:

  • Lower security responsibility
  • Faster setup
  • Trusted external payment pages
  • Reduced PCI compliance scope

2. On-Site Direct Payment Gateways

On-site gateways allow customers to enter credit card information directly on your WordPress payment module without leaving the checkout page. You create a seamless experience that generally leads to higher conversion rates and a more professional feel for your brand.

Seamless checkout experiences are especially important on mobile devices, which now account for more than 60% of global eCommerce traffic. Optimized on-site payments help prevent abandonment during mobile transactions.

Replicate the friction-free checkout of modern apps. Leading tech companies use invisible payments to remove barriers between users and services. You can implement similar direct integrations using APIs that serve as digital bridges, often powered by custom API integration services to ensure secure and seamless communication between systems. This gives you complete control over the authorization flow while modern tokenization ensures raw data never touches your server.

Benefits:

  • Higher conversion rates
  • Better user experience
  • Full control over checkout design
  • Support for subscriptions and advanced billing

Best Payment Gateways for WordPress in 2026

Here are some of the popular payment gateways that you can leverage for a WordPress website.

1. WooPayments WooCommerce Payments

This native solution lets you manage payments and disputes directly from your dashboard without requiring external logins. You get support for multicurrency transactions and digital wallets like Apple Pay, which simplifies the buying process.

2. Stripe

Stripe is a developer-friendly platform known for its flexibility and extensive ecosystem for businesses that prioritize analytics. You can use its optimized checkout suite to dynamically display local payment methods based on the user’s location.

3. PayPal

PayPal remains essential for building buyer trust as one of the most recognized payment brands globally. You can now use modern integrations that offer bright buttons to keep customers on your site rather than relying on older redirect methods.

4. Square

Square is an ideal choice if you are an omnichannel retailer selling both online and in physical locations. You can synchronize inventory and payments between your online store and your physical point-of-sale systems in real time.

5. Authorize.Net

Operated by Visa, this gateway is favored by established businesses requiring enterprise-grade infrastructure. You get an advanced fraud detection suite and robust support for recurring billing, which is vital for subscription models.

Offering multiple payment methods is increasingly critical. Digital wallets alone now account for over over 50% of global eCommerce transactions, reflecting changing consumer preferences toward faster and more secure payment options.

Prerequisites Before Integrating a Payment Gateway

A successful payment integration often requires adjustments to themes, checkout flows, and server configurations. Businesses without technical expertise frequently rely on professional WordPress development services to ensure gateways are implemented securely, perform reliably under load, and remain compatible with future platform updates.

1. WordPress and Hosting Requirements

You must ensure your server environment meets specific security standards before installing any plugins. This prevents technical conflicts and ensures your WordPress payment module functions correctly.

SSL Certificate HTTPS

An active SSL certificate is mandatory to encrypt sensitive data, as most gateways refuse unsecured connections. Banks use encryption to signal safety immediately. You prevent browsers from flagging your site as Not Secure, which destroys customer confidence and increases abandonment.
Server and Caching Configuration

Your environment must run on recent PHP versions and explicitly exclude dynamic pages, such as the Cart, from caching to ensure session integrity. High-traffic retailers use strict session management to ensure cart accuracy. You must apply similar rules to your WooCommerce payment gateway troubleshooting checklist to prevent errors that cause customers to see empty carts.

2. Payment Gateway Account Setup

API Credentials and Webhooks

You need distinct API keys for testing and live environments, while configuring webhooks ensures your site receives automated payment updates. Fintech platforms rely on real-time synchronization. You can use webhooks to ensure your dashboard reflects fund status immediately without manual intervention.

3. Legal and Compliance Essentials

PCI Compliance and Tokenization

You must never store raw credit card data in your database. Instead, you should rely on tokenization to replace sensitive details with secure tokens. Modern providers keep data off your servers entirely. You can adopt this architecture to reduce your security scope while offering a seamless checkout experience.

Methods to Integrate Payment Gateway in WordPress

Choosing the correct integration method depends heavily on your scale. eCommerce stores generally require robust carts while service providers benefit from lightweight forms to reduce technical overhead.

Using WooCommerce (Recommended for Online Stores)

Integrating via WooCommerce remains the industry standard because it provides a structured framework for handling orders. This approach offers a stable foundation that scales from a single product to thousands without requiring custom code

1. Plugin-Based Integration

This method involves installing pre-built extensions to connect stores to processors instantly. It serves as an ideal entry point for startups processing moderate volumes due to the low technical barrier.

Businesses use plugin marketplaces to add complex features without development time. Using pre-built extensions allows early-stage companies to launch rapidly and focus resources on marketing rather than infrastructure.

Advantages:

  • Minimal technical expertise required
  • Fast deployment
  • Reliable updates
  • Compatibility with WooCommerce

2. WooPayments Native Integration

The official all-in-one solution is built directly into the dashboard to streamline operations. This architecture eliminates the need to toggle between third-party dashboards by keeping payments and disputes within the WordPress interface.

Major platforms centralize tools to reduce friction. Adopting native integration mirrors this efficiency by centralizing financial operations in a single view, reducing administrative time and potential errors.

3. Checkout Blocks Modern Architecture

Newer implementations use React-based Checkout Blocks to deliver a conversion-optimized experience. Integrating payment methods here ensures full compatibility with mobile-responsive themes.

Social apps refine interfaces for mobile fluidity. Leveraging React-based blocks brings the same level of seamless interaction to the checkout process, providing mobile users with a zero-friction experience.

Using Payment Plugins Without WooCommerce

1. WP Simple Pay

Designed for direct payments, this plugin allows site owners to embed Stripe forms anywhere on their site. It supports recurring payments without the overhead of a complete platform, making deployment faster.

2. WPForms Payments

This solution combines form building with payment collection to create seamless lead-to-payment flows. It proves highly effective for collecting application fees or donations directly within a contact form.

Custom Integration Using APIs

1. Direct API Communication

A custom API integration allows businesses to connect directly with gateways to access cost-plus pricing, often supported by custom API integration services for better control and flexibility. This connection grants access to data optimization, which can save thousands in interchange fees.

2. Control vs. Maintenance

While APIs offer unlimited customization,n they place the burden of security updates entirely on the development team. Organizations must weigh the benefits of total control against the ongoing cost of compliance management.

Step-by-Step Guide to Integrate Payment Gateway in WordPress

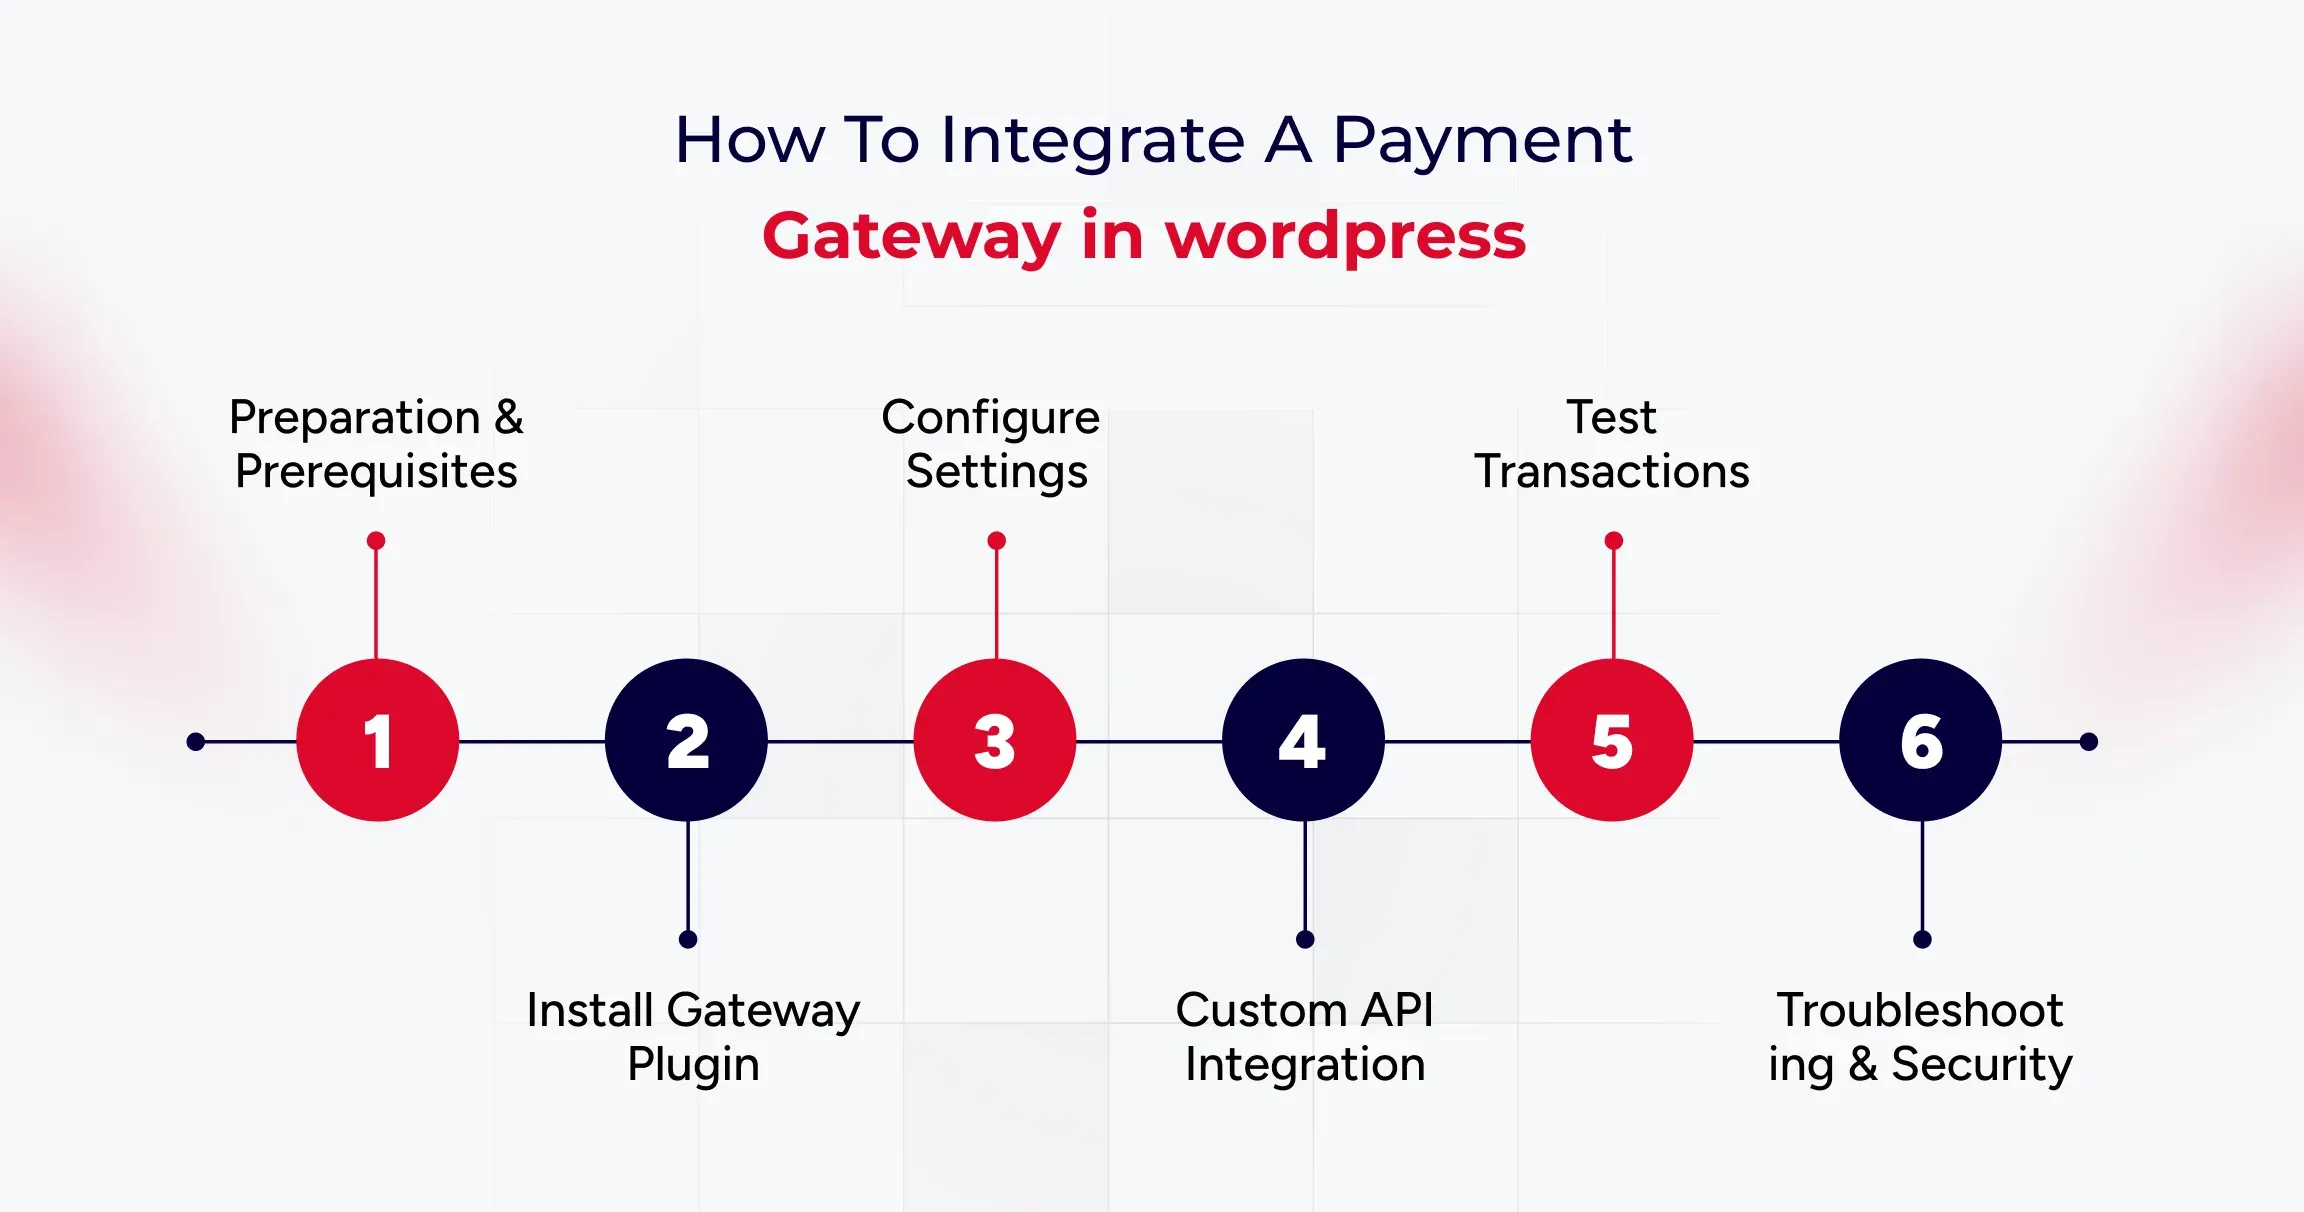
Integrating a payment gateway involves selecting the provider, installing the plugin, and configuring API credentials. You must ensure that security standards, such as PCI compliance, are met to process financial data safely.
Step 1: Preparation and Prerequisites

Before installing software, you must ensure your host is secure. An active SSL certificate is mandatory, as browsers flag non-HTTPS sites as Not Secure, which undermines user trust immediately. You also need a server running PHP 7.4 or higher to support secure communication with gateway APIs.

Step 2: Installing the Gateway Plugin

WooCommerce manages payments through extensions. You navigate to Plugins in your dashboard to search for your provider,r such as WooPayments or Stripe. Installing the official plugin ensures stability and compatibility with the core platform.

Step 3: Configuring Standard Plugins

Native solutions connect your store directly to the processor within the dashboard. You simply click Connect to link your account, or paste API keys for developer-friendly options like Stripe. You must also configure webhooks to ensure your store receivesreal-timee updates for events like refunds.

Step 4: Implementing Custom APIs

High-volume merchants often build custom integrations by extending the WC Payment Gateway class. This allows you to implement bespoke logic and access cost-plus pricing, which is not available in standard plugins.

Step 5: Testing the Integration

You must switch your plugin to Sandbox mode and use dummy card numbers provided by the gateway to verify that orders transition from Pending to Processing correctly.

Step 6: Troubleshooting and Security

If orders remain Pending after payment, your firewall might be blocking webhooks. You must allow gateway endpoints to ensure communication. Additionally, you should use tokenization to keep raw card data off your server to meet SAQ A compliance, along with quality assurance testing services to identify and resolve transaction-related issues early.

Common Payment Gateway Errors in WordPress and How to Fix Them

Here are some common payment gateway errors you can fix to ensure a seamless user experience.

1. Payment Declined or Failed Transactions

Transactions often fail due to mismatched API credentials or server communication timeouts, which are usually indicated by cURL Error 28. Verifying Live versus Test keys and upgrading server libraries ensures seamless connectivity between the store and the processor.

Cloud providers such as AWS utilize automated health checks to detect connection failures instantly. Adopting similar monitoring for API responses helps prevent revenue loss from silent authentication errors or server timeouts.

2. SSL or HTTPS Errors

Gateways reject connections from sites that lack valid SSL certificates or support modern TLS protocols. Ensuring the site is served over HTTPS with TLS 1.2 ensures that sensitive data remains encrypted during the handshake.

Financial institutions automatically terminate connections that do not meet encryption standards. Implementing strict SSL protocols mirrors this security posture, protecting customer data from interception.

3. Webhook Errors

Orders remaining in Pending status typically indicate that a firewall is blocking webhook callbacks. Allowing gateway IP addresses enables external services to communicate payment success statuses back to the WordPress database.

Apps like Slack rely on open channels to deliver messages instantly. Configuring firewalls to accept gateway signals ensures that order dashboards reflect actual payment statuses without manual refreshes.

4. Checkout Page Not Loading

Aggressive caching of dynamic pages often leads to broken checkout experiences or empty carts. Excluding specific endpoints, such as Cart and My Account, from the caching rules ensures that every session remains unique and functional.

Retail giants like Amazon dynamically render shopping carts to ensure inventory accuracy. Disabling cache for transactional pages prevents users from seeing outdated content and reduces cart abandonment.
Tips to Secure Your WordPress Payment Gateway

Payment systems are not a one-time setup. Plugins, APIs, and security protocols evolve continuously, making regular updates essential. Many businesses use ongoing website maintenance services to monitor performance, apply patches, and prevent disruptions that could affect transactions or customer trust.

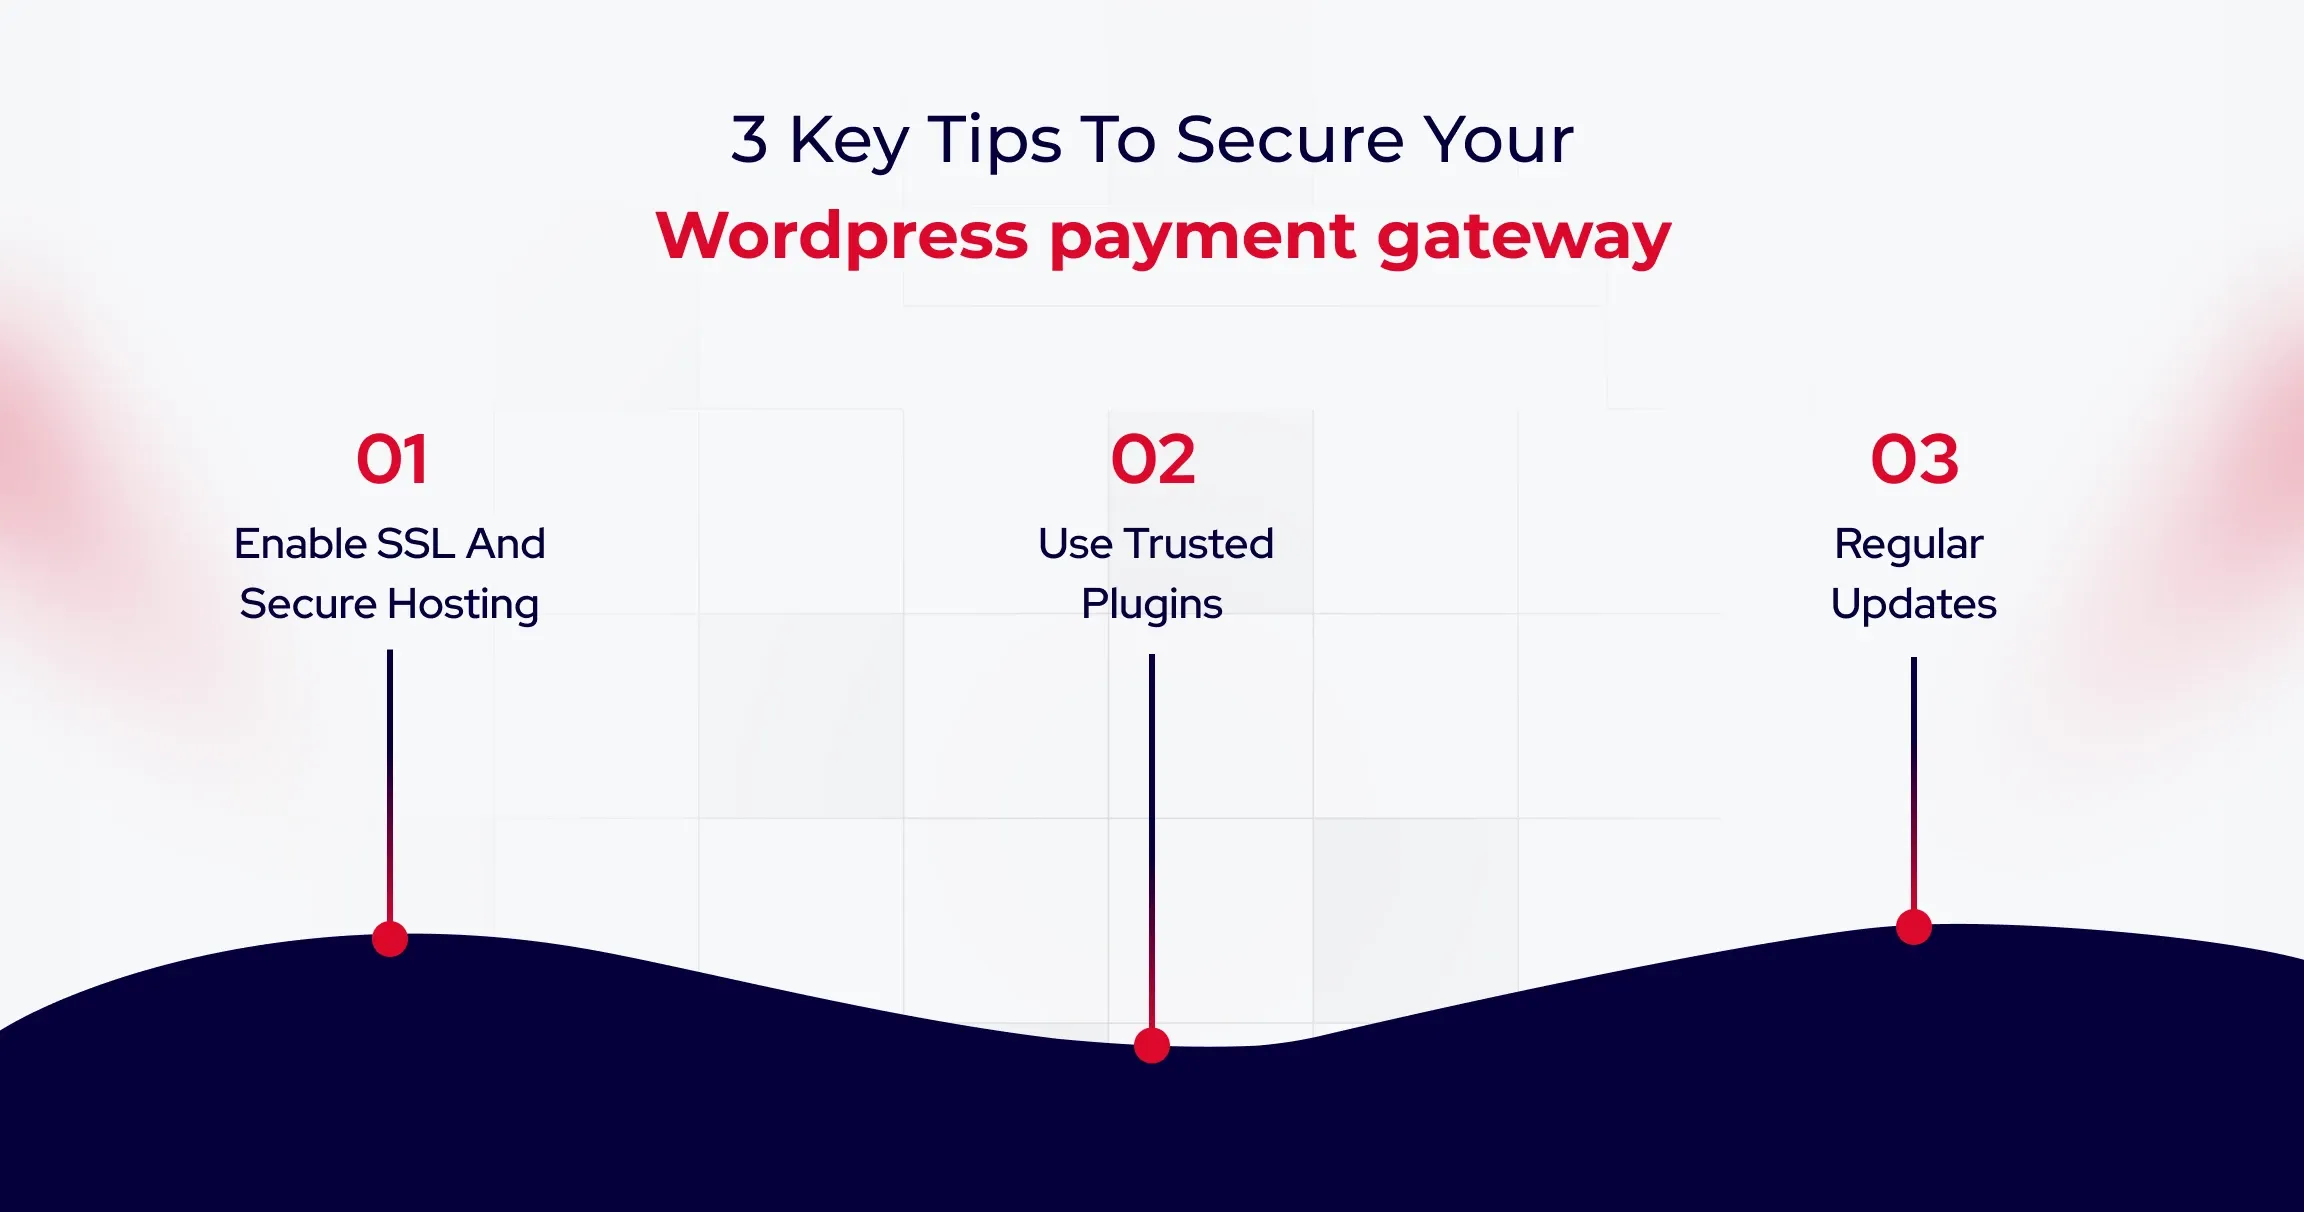
Here are some valuable tips to help you secure WordPress payment gateway integrations.

1. Enable SSL and Secure Hosting

An active SSL certificate is mandatory for any website handling payments. It encrypts data, ensuring that malicious actors cannot intercept sensitive information like credit card numbers.

Banks use encryption to signal safety immediately upon user arrival. You must prevent browsers from flagging your site as Not Secure, which destroys customer trust and prevents gateways from functioning.

Because payment processing involves sensitive financial data, advanced protections such as firewalls, malware scanning, and intrusion detection are critical. Companies handling significant transaction volumes often implement dedicated WordPress security services to reduce vulnerabilities and maintain compliance standards.

2. Use Trusted Plugins and Tokenization

You should only install plugins from verified sources and ensure they utilize tokenization. This process replaces sensitive data with a secure token, ensuring raw credit card details never touch your database. Modern SaaS providers keep data offsite to reduce compliance burdens. You can significantly lower your risk profile by adopting this architecture and avoiding SAQ D-level scrutiny.

3. Regular Updates and Two Factor Authentication

Outdated software is a common entry point for attackers. You must enforce strong passwords and implement Two Factor Authentication to protect administrative accounts from compromise. Corporate IT departments enforce strict access protocols to prevent unauthorized logins. You should restrict administrative access to only essential team members to reduce your attack surface.
Best Practices for Optimizing Payment Experience

Here are the best practices you can use to optimize eCommerce payment experience.

1. Reduce Checkout Steps

A complicated process is the primary cause of abandonment. To improve conversions further, you can explore AI A/B testing tools for WordPress to optimize checkout performance using real user data. To maximize conversions, you must minimize the number of form fields and implement Guest Checkout to reduce friction. Major retailers removed the requirement to create an account to speed up transactions. You can capture more revenue by allowing users to purchase without the hassle of registration.

2. Offer that lacks Payment Options.

Customer support expects to be paid using their preferred method, including digital wallets, which helps customers significantly increase their order value. International platforms optimize payment methods based on user location. You can increase conversion rates by offering local payment options such as UPI or iDEAL alongside standard credit cards.

3. Mobile Friendly Design

Your checkout experience must be fully responsive. Elements should automatically adapt to smaller screens, ensuring that input fields are large enough to tap easily. Mobile-first platforms prioritize touch-friendly interfaces to keep users engaged. You should use express payment buttons to enable one-tap purchases without entering card numbers.

As eCommerce continues to evolve, payment systems are no longer just technical components but critical business infrastructure that directly influences trust, conversion rates, and long-term customer retention.

Wrapping Up

Integrating a payment gateway in WordPress isn’t a technical checkbox. It’s a revenue decision that compounds with every transaction. The difference between payment systems that enable growth and those that constrain it isn’t the gateway you choose, but how you architect the integration. Businesses that scale efficiently often rely on white-label WordPress development services to build and manage complex payment systems without increasing internal workload.

Successful implementations treat payments as core infrastructure: prioritize SSL encryption, enforce tokenization, configure webhooks for real-time updates, and test rigorously before going live. Every day your payment architecture introduces friction is a day where competitors with seamless checkouts capture customers who started their journey on your site.

Start by auditing your current integration against the security and performance benchmarks outlined in this guide, then optimize systematically to transform checkout from a necessary evil into a competitive advantage.

9 Practical Tips to Keep Your WordPress Website Safe

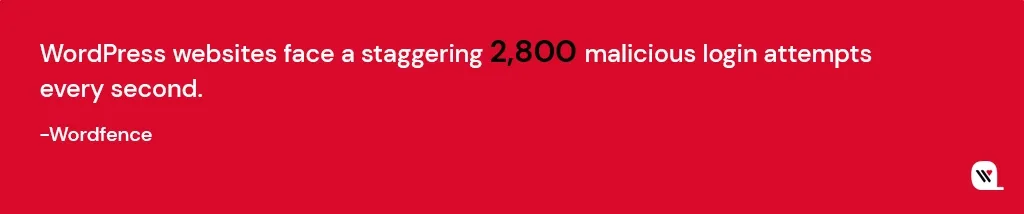
Your website can be hacked in less than one hour! Yes, you read it right!

WordPress is undoubtedly a testament to its user-friendly interface having a vibrant developer community that drives constant improvements. The popularity of WordPress fuels constant improvement, thanks to its vast developer community. However, this very popularity paints a bullseye on WordPress, making it an attractive target for hackers and malicious actors seeking vulnerabilities to exploit. The good news is, you can boost your WordPress security, even if you’re not tech-savvy.

Let’s check the 9-step WordPress security guide, that protects your website from vulnerabilities!

#1 Stay up-to-date – Regular Updates

Updating your WordPress core, themes, and plugins might seem routine, but it’s your first line of defense against potential security threats. Software updates aren’t just about adding new features; they often include vital security patches that shield your website from vulnerabilities.

Cybercriminals actively seek websites running on older versions because they exploit known vulnerabilities. Regular updates ensure your site is equipped with the latest security protocols, protecting it from potential breaches and data theft.

# Here is how you update WordPress Components:

Updating WordPress Core​:

  • Log in to your WordPress dashboard.
  • Click on the ‘Dashboard’ option in the left menu.
  • If an update is available, you’ll see a notification at the top. Click ‘Update Now.’

Updating WordPress Themes​:

  • Navigate to ‘Appearance’ in the left menu.
  • Click on ‘Themes.’
  • If an update is available, you’ll see an ‘Update Now’ option. Click it to install the latest version.

Plugins:

  • Go to ‘Plugins’ in the left menu.
  • You’ll see a notification next to plugins with available updates. Click on ‘Update Now’ next to each plugin.

Before updating, always back up your website. Use reliable backup plugins to create a full backup of your files and database. After updating, thoroughly check your website’s functionality. Sometimes, updates can conflict with other plugins or themes, causing unexpected issues. You can also automatically enable updates for plugins and themes using the following lines to your site’s wp-config.php file.

For plugins: define( ‘WP_AUTO_UPDATE_PLUGINS’, true );
For themes: define( ‘WP_AUTO_UPDATE_THEMES’, true );

#2 Make it Impermeable – Strong Password Policy

Creating strong passwords is the first line of defense against unauthorized access. Weak passwords are easy targets for hackers. A strong password should be complex, with a mix of uppercase and lowercase letters, numbers, and symbols. Avoid using easily guessable information like birthdays or common words.

# Check out these tips on Creating and Managing Complex Passwords:

  • Length and Complexity: Aim for passwords that are at least 12 characters long and include a mix of letters (both cases), numbers, and special characters.
  • Avoid Personal Information: Refrain from using personal details such as names, birthdays, or addresses in passwords.
  • Unique for Each Account: Use different passwords for different accounts. Reusing passwords across platforms increases vulnerability.
  • Passphrases: Consider using passphrases – longer phrases or sentences that are easy for you to remember but difficult for others to guess.

Password manager tools are invaluable in managing complex passwords. They generate, store, and autofill strong, unique passwords for each of your accounts. Some popular password managers include LastPass, 1Password, and Dashlane. These tools encrypt your password database with a master password, ensuring your credentials are securely stored.

Implementing these practices significantly enhances your WordPress security, ensuring robust protection against unauthorized access attempts. Remember, a strong password is your website’s first line of defense.

#3 Add an Extra Security Layer – Two-Factor Authentication

Two-factor authentication (2FA) requires users to provide two distinct forms of verification before accessing an account. Typically, this involves something you know (password) and something you have (a unique code sent to your mobile device or email). This dual-verification process ensures that even if a hacker discovers your password, they still cannot breach your account without the second form of authentication.

# How to Enable 2FA in WordPress:

# Benefits of 2FA in Website Security:

  • Choose a 2FA Plugin: Select a reputable 2FA plugin compatible with WordPress, such as Google Authenticator or Authy.
  • Install and Activate the Plugin: Install your chosen 2FA plugin from the WordPress repository. Once activated, the plugin integrates with your login system.
  • Configuration: Access the plugin’s settings and follow the configuration wizard. Typically, you’ll scan a QR code with a 2FA app on your mobile device, linking the app to your WordPress account.
  • Verification Codes: After setup, each time you log in, the 2FA app generates a time-sensitive verification code. Enter this code along with your password to access your account.
  • 2FA adds an extra layer of defense, significantly reducing the risk of unauthorized access, even if passwords are compromised.
  • Even if a user falls victim to a phishing attack and reveals their password, the hacker would still need the secondary 2FA code to access the account.
  • Particularly valuable for businesses, 2FA ensures secure logins from remote locations, safeguarding sensitive corporate data.

#4 Techniques to Prevent Unauthorized Access – Login Page Security

Ensure only authorized users can access your website’s backend. Stay proactive in these security practices, and your website remains resilient against cyber threats.

# By implementing the following technical techniques, you significantly enhance the security of your login page:

Limiting Login Attempts: Limiting the number of login attempts is a simple yet effective way to thwart brute force attacks. Brute force attackers try numerous password combinations, and limiting login attempts disrupts their efforts. To set this up:

  • Access Your WordPress Dashboard: Log in and navigate to the ‘Settings’ menu.
  • Select ‘Security’ or ‘Login Security’: Depending on your security plugin, locate the section related to login security settings.
  • Set Login Attempt Limit: Specify a low number of login attempts (e.g., 3-5). After this limit, the user is temporarily locked out, preventing further attempts for a defined period.

Customizing Login URL and Why It’s Important: Changing the default login URL from ‘/wp-admin/’ to a custom URL adds a layer of obscurity, making it harder for hackers to locate your login page. Here’s how to do it:

  • Install a Security Plugin: Use a reputable security plugin like WPS Hide Login or iThemes Security.
  • Configure Custom Login URL: In the plugin settings, locate the option for customizing the login URL. Enter the new URL you wish to use, ensuring it’s unique and not easily guessable.

Best Plugins for Login Page Security: Several plugins specialize in fortifying login page security, offering features beyond customization and login attempt limitations. Some top choices include:

  • iThemes Security: This comprehensive security plugin provides features like brute force protection, 2FA integration, and advanced user action logging.
  • Wordfence Security: Wordfence includes firewall protection, real-time threat defense, and login attempt monitoring, making it a robust choice for safeguarding your login page.
  • WPS Hide Login: Specifically designed to change your login page URL, this lightweight plugin ensures your login page is concealed from potential attackers.

#5 Data Protection in Case of a Security Breach – Regular Backups

Backups are essential not only for security breaches but also in cases of accidental data loss, server failures, or updates gone wrong. Moreover, regular backups, combined with a seamless restoration process, offer you peace of mind, knowing your data is secure and recoverable in the event of a security breach or any unforeseen circumstances.

# How to Set Up Automatic Backups:

  • Choose a Backup Plugin: Select a reputable WordPress backup plugin such as UpdraftPlus, BackWPup, or VaultPress. Install and activate your chosen plugin.
  • Configure Backup Settings: Access the plugin settings from your WordPress dashboard. Specify the backup frequency (daily, weekly), and choose a secure off-site storage location, like Dropbox, Google Drive, or a dedicated server.
  • Database and Full Site Backups: Configure the plugin to perform both database and full site backups. Database backups capture essential data, while full site backups include all files, ensuring comprehensive coverage.
  • Schedule Automated Backups: Set up automated backup schedules aligned with your website’s update frequency. Daily backups are advisable for active websites with frequent content changes.

# Restoring Your Website from a Backup:

  • Access Backup Plugin: In your WordPress dashboard, go to the backup plugin you installed.
  • Select the Backup File: Choose the backup file from the designated storage location. If your backup plugin offers versioning, select the appropriate date/version you want to restore.
  • Initiate the Restoration: Follow the plugin’s prompts to initiate the restoration process. Confirm settings, and the plugin will restore your site to the selected backup point.
  • Verify Website Functionality: After restoration, thoroughly test your website’s functionality. Ensure all pages, posts, images, and interactive elements are functioning correctly.

#6 Protect Against Brute Force Attacks – Implement CAPTCHA

Brute force attacks, a common threat to website security, involve automated attempts to crack passwords systematically. Automated bots systematically test different passwords, exploiting weak credentials.

Such attacks can compromise your website’s integrity and sensitive data. To safeguard your WordPress site against such attacks, employ these technical strategies:

Plugins and Tools to Safeguard Against Brute Force:

Monitoring and Responding to Suspicious Login Attempts:

  • Security Plugins: Utilize reliable security plugins like Wordfence Security and Sucuri Security. These tools offer features like limiting login attempts, IP blocking, and CAPTCHA integration, bolstering your site’s defenses.
  • CAPTCHA and reCAPTCHA: Integrate CAPTCHA challenges or advanced reCAPTCHA from Google on your login page. These tests differentiate between humans and bots, preventing automated login attempts.
  • IP Whitelisting and Blacklisting: Whitelist trusted IP addresses, allowing only authorized users to access your login page. Simultaneously, blacklist suspicious IP addresses, thwarting potential attackers.
  • Real-Time Monitoring: Leverage security plugins to monitor login attempts in real-time. Track IP addresses, login patterns, and failed login counts. Unusual activities might indicate a brute force attack.
  • Email Alerts: Configure your security plugin to send email notifications for multiple failed login attempts. Immediate alerts enable swift responses to potential threats.
  • Automatic IP Blocking: Implement automatic IP blocking for repeated failed login attempts. Temporary blocks discourage attackers, protecting your site without manual intervention.

#7 Limiting Access to Your Website Files – File Permission Security

Understanding and correctly configuring these permissions is essential to prevent unauthorized access and maintain the integrity of your website files. Properly configured permissions ensure that only authorized entities can modify or access crucial files, enhancing the overall security posture of your WordPress website.

Setting Correct File and Folder Permissions:

Common Mistakes to Avoid:

  • Access Control: Use the principle of least privilege. Only grant permissions necessary for each user category. For instance, files should typically have permissions set to 644 (rw-r–r–) and directories to 755 (rwxr-xr-x).
  • Secure Config Files: Critical configuration files like wp-config.php should have permissions set to 400 (r——–), ensuring only the owner (usually the web server) can read them.
  • Avoid 777 Permissions: Never set files or directories to 777 (rwxrwxrwx), which grants universal read, write, and execute permissions. Such openness invites exploitation.
  • Overly Permissive Settings: Avoid granting unnecessary write or execute permissions. Limit permissions to prevent unwanted modifications.
  • Ignoring Ownership: Be aware of file ownership. Ensure the appropriate user or group owns files, usually the web server user (e.g., www-data on Apache).
  • Failing to Update Permissions: Regularly review and update permissions, especially after installing plugins or making significant changes to your website.

#8 Data Transmission Encryption – HTTPs and SSL Certificates

HTTPS (Hypertext Transfer Protocol Secure) and SSL (Secure Sockets Layer) certificates are fundamental components of web security. HTTPS encrypts data transmitted between a user’s browser and the website server, ensuring that sensitive information remains confidential. SSL certificates validate the authenticity of websites, confirming to users that they are interacting with a genuine and secure platform.

How to Install and Configure SSL on WordPress:

  • Obtain an SSL Certificate: Purchase an SSL certificate from a trusted Certificate Authority (CA) or use a reliable hosting provider that offers free SSL certificates (e.g., Let’s Encrypt).
  • Install SSL Certificate: Follow your hosting provider’s instructions to install the SSL certificate. This may involve generating a Certificate Signing Request (CSR) and providing it to the CA.
  • Update WordPress Address and Site Address: In your WordPress dashboard, go to ‘Settings’ > ‘General.’ Update both the ‘WordPress Address (URL)’ and ‘Site Address (URL)’ to begin with ‘https://’ instead of ‘http://.’
  • Update .htaccess File: Insert code in your .htaccess file to redirect all traffic to the secure HTTPS version of your site. Example code:

RewriteEngine On

RewriteCond %{HTTPS} off

RewriteRule ^ https://%{HTTP_HOST}%{REQUEST_URI} [L,R=301]

Mixed Content Issues: Check for mixed content issues (HTTP content loading on HTTPS pages) and update URLs to HTTPS to ensure a fully secure browsing experience.
Implementing HTTPS through SSL certificates not only enhances your website’s security but also augments its credibility, user trust, and search engine ranking.

#9 Beware of DDoS Attacks – Confine XML-RPC functionality

Disabling XML-RPC when it’s not needed eliminates a potential security risk and reduces the attack surface of your WordPress site. It is commonly targeted for Distributed Denial of Service (DDoS) attacks and brute force amplification. If your website doesn’t rely on XML-RPC functionalities, such as pingbacks and trackbacks, it’s advisable to disable it to enhance your site’s security.

How to Disable XML-RPC:

Using a Security Plugin:

  • Install a reputable security plugin like Wordfence Security or iThemes Security from the WordPress repository.
  • Access the plugin settings and look for options related to XML-RPC. Disable XML-RPC functionality through the plugin interface.

Editing .htaccess File:

  • Access your website’s root directory using an FTP client or cPanel File Manager.
  • Locate the .htaccess file and edit it (make sure to back up the file first).
  • Add the following code to disable XML-RPC:

# Block WordPress xmlrpc.php requests

Order Deny,Allow
Deny from all

Functions.php Method (Advanced Users):

  • If you’re comfortable with the code, you can add the following snippet to your theme’s functions.php file to disable XML-RPC:

add_filter(‘xmlrpc_enabled’, ‘__return_false’);

These technical methods provide you with the means to secure your site by preventing unwanted access through XML-RPC and fortifying your overall security posture.

End Note

Remember, website security is not a one-time task but a continuous commitment. Don’t wait for a security breach to take action. Protect your website and your visitors’ data by investing in professional WordPress security services today. Our experts are here to help you fortify your digital fortress. Contact us now and safeguard your online presence against the relentless forces of the cyber world.

Backup Made Easy: Effortless Methods to Secure Your WordPress Site

Websites are a business’s lifeline, and these online entities’ vulnerability should never be underestimated. Without comprehensive WordPress backup measures in place, website owners expose themselves to a multitude of risks that could result in irreversible damage. This comprehensive blog post delves into the intricacies of website backups, shedding light on their pivotal role in fortifying your WordPress site against potential disasters.

Let’s start right away!

As a prudent WordPress website owner, you need to have a clear understanding of the diverse risks that can potentially impact your digital endeavors. By recognizing these risks, you can adopt a proactive and responsible approach toward safeguarding your online presence.

Potential Risks of Not Having a Reliable Backup Solution

Data Loss

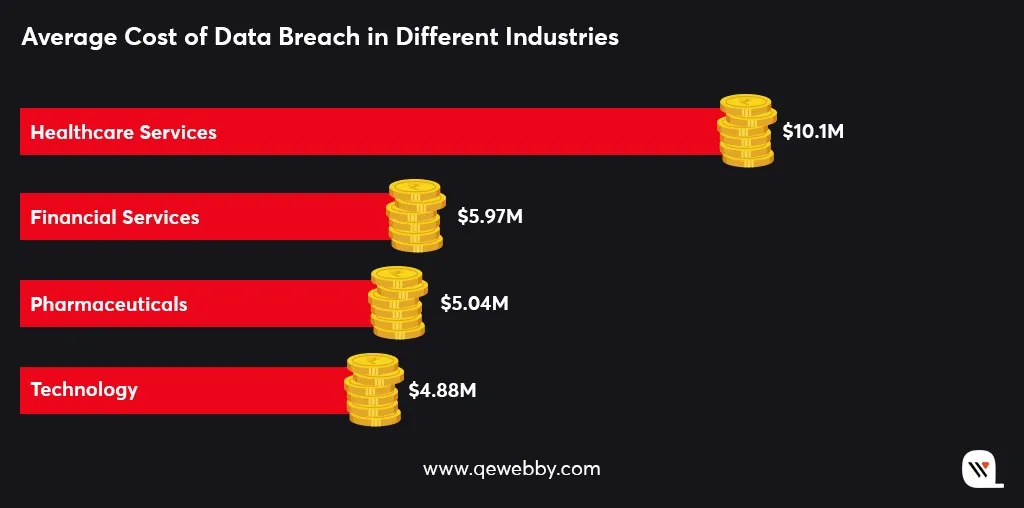
Recent studies at IBM found that specific industries like healthcare, financial, pharmaceutical, and technology face the most significant challenges when it comes to data breaches.

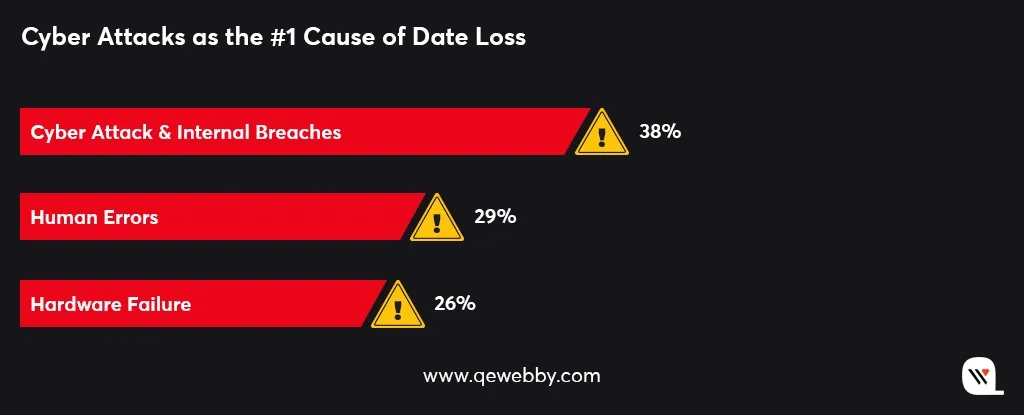
Data loss incidents are not uncommon in the digital landscape, with human errors, software glitches, and hardware failures being prominent culprits.

Human errors can occur in the form of accidental deletion of critical files or content, unintended modifications that render the website dysfunctional, or mishandling during website migrations or updates.

Similarly, software glitches, including conflicts between different plugins or themes, can result in data corruption or loss. Hardware failures, such as disk malfunctions or server crashes, which pose additional risks to the integrity and availability of your website’s data.

Cyber Attacks
Research by Databaraccks, reveals cyber attacks have been the primary reason for data loss over human errors and hardware failure.

Cyber attacks not only result in the theft of sensitive information but also disrupt website functionality, compromise customer trust, and lead to financial losses.

Cyber attacks continue to evolve in sophistication and frequency, making it crucial for website owners to prioritize backups as an integral part of their security measures.

Difficult Updates

When updates are released, there is always a risk of compatibility issues or unexpected conflicts arising between different components of your website. These conflicts can lead to errors, broken functionality, or even website crashes.

Furthermore, updates are not immune to human errors. It is possible to mistakenly update the wrong version of a plugin or accidentally delete critical files during the update process. Without a backup as a safety net, these mistakes can have severe consequences, causing data loss, website downtime, and potential damage to your online reputation.

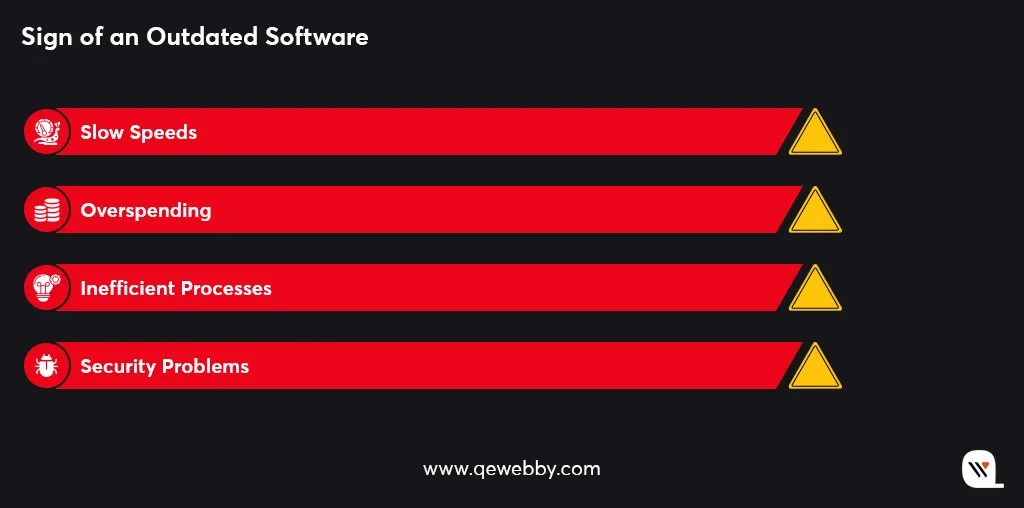
Without a reliable backup solution, you may find yourself in a difficult position if your website falls victim to a security breach due to outdated software. Here are some of the reasons that prove your software to be outdated:

Downtime Mitigation

Downtime refers to periods when your website is inaccessible or experiences disruptions in functionality, which can lead to frustration for visitors and potential loss of business.

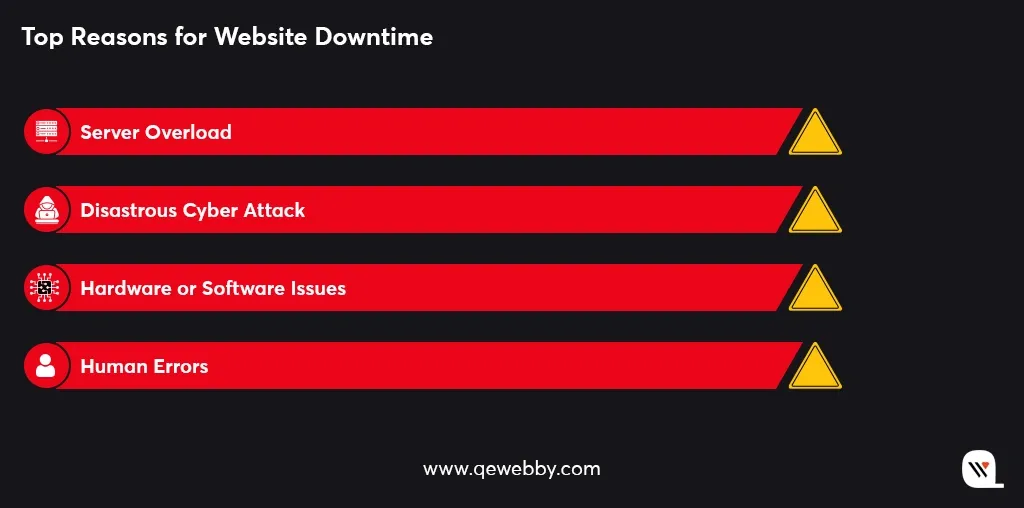
Website downtime can occur due to various reasons, such as server issues, software conflicts, security breaches, or even human errors. Whether it’s a server failure, a plugin update gone wrong, or a malicious attack, backups provide a reliable fallback option. They allow you to revert your website to a known stable configuration, eliminating the need to troubleshoot from scratch and reducing the time required to get your website back online.

Content Management

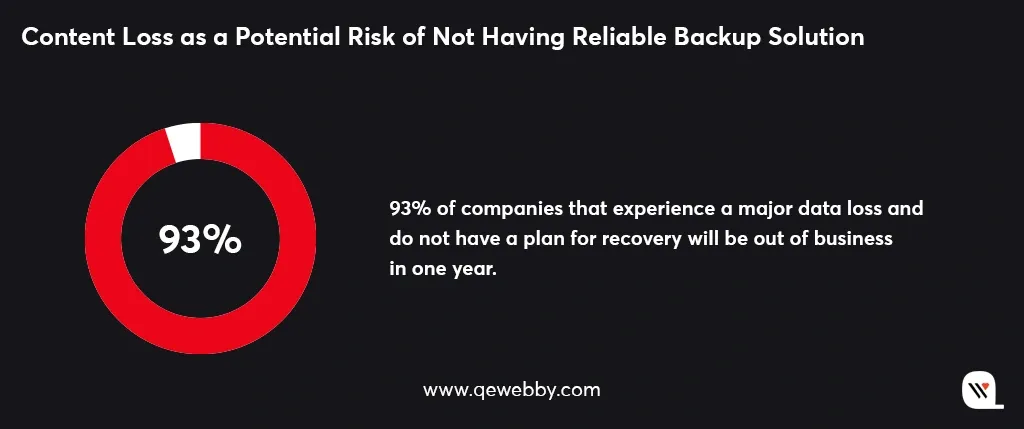
One of the key risks of not having a reliable backup solution is the potential loss of content. Whether it’s due to accidental deletion, website errors, or malicious activities, valuable content can be irretrievably lost without a backup.

Imagine spending hours crafting compelling blog posts, curating engaging images, or recording informative videos, only to have them disappear into the digital abyss.

Without a reliable backup strategy in place, managing your website’s content becomes a challenging and risky endeavor.

Easy Ways to Backup Your WordPress Site

Manual Backups

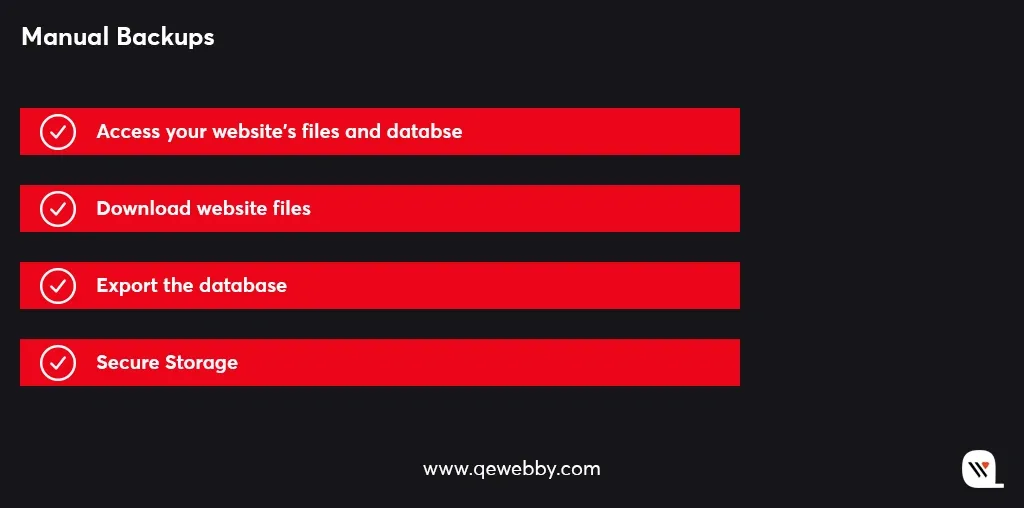
Creating manual backups provides a straightforward approach to safeguarding your WordPress site. Here’s how you can do it:

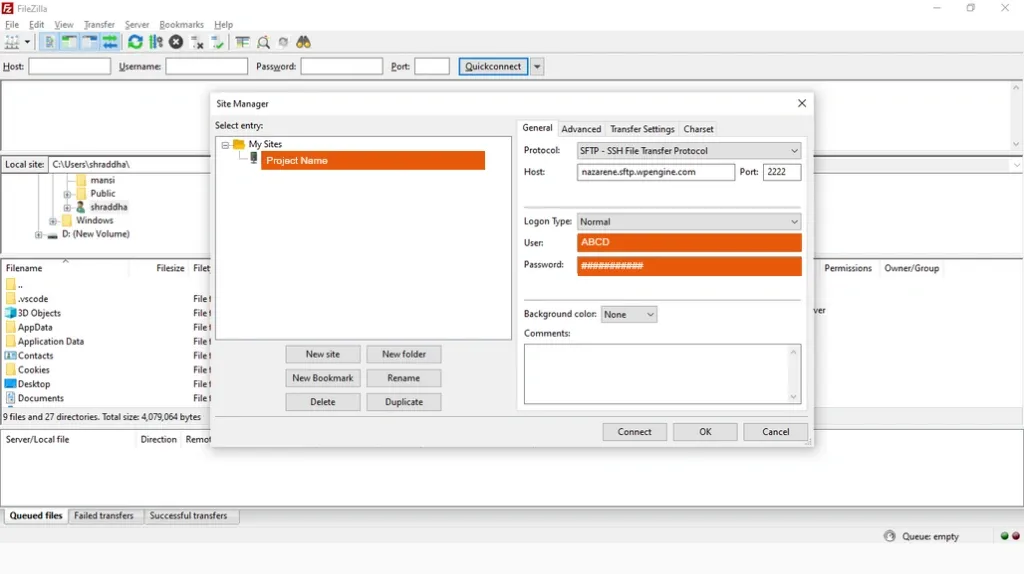
Access your website’s files and database:

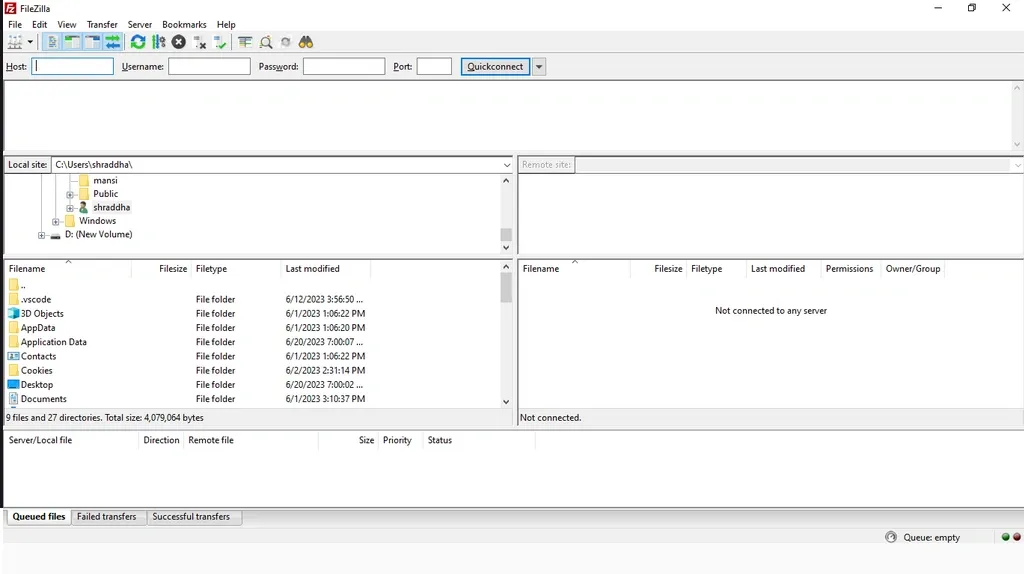
Use FTP (File Transfer Protocol) or your hosting control panel to gain access to your website’s files and database.

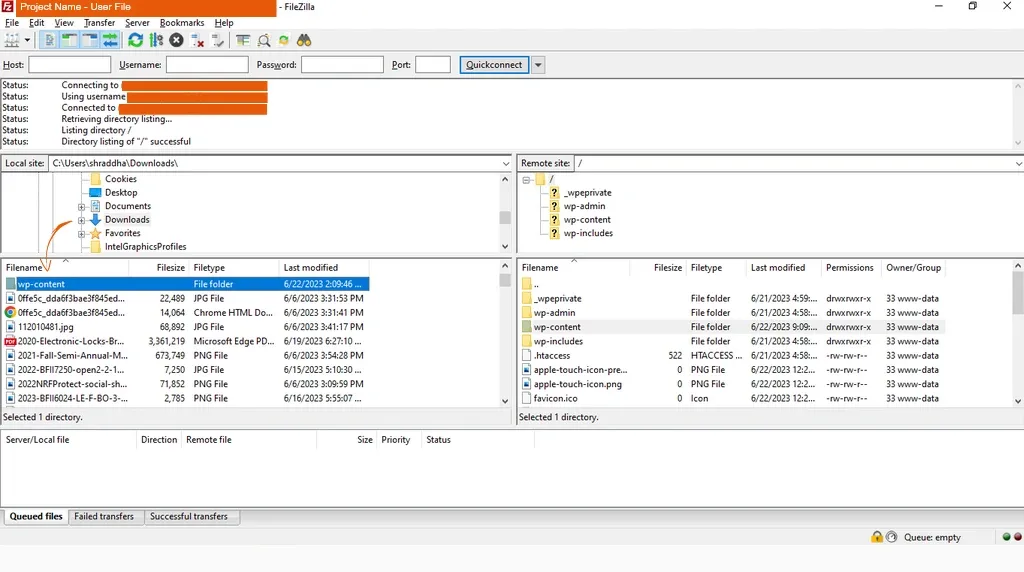
Download website files:

Copy your website’s files and folders from the server to your local computer. This ensures that you have a local copy of all the website’s components.

Export the database:

Use tools like phpMyAdmin or MySQL Workbench to export your website’s database. This step ensures that you have a backup of all your website’s content, settings, and other important data.

By performing manual backups, you retain full control over the backup process and the ability to store backups wherever you prefer. It’s a reliable method to ensure the safety of your WordPress website’s files and database.

Backup Plugins

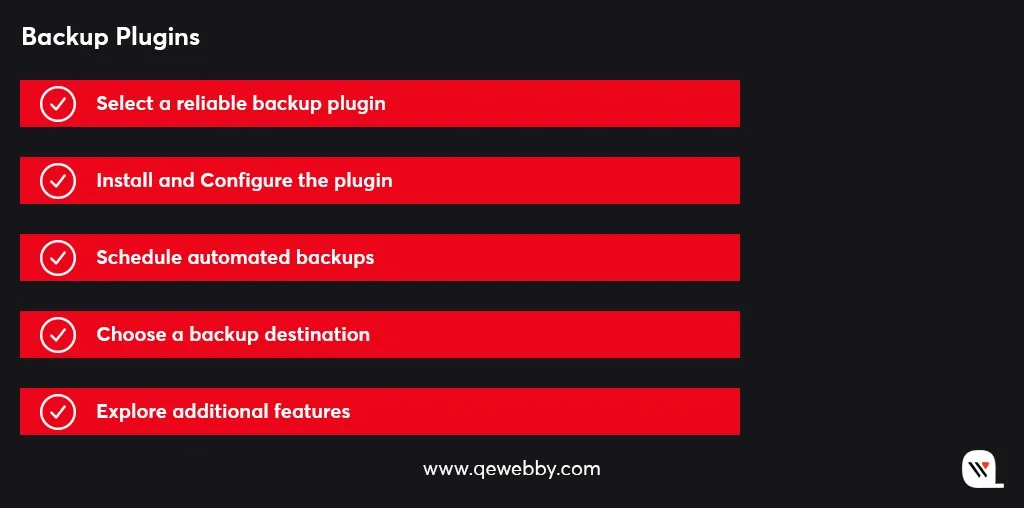
By utilizing reliable backup plugins, you can automate the backup process, ensuring the regular protection of your WordPress site. These plugins offer a range of features that enhance the backup experience, providing you with flexibility, convenience, and peace of mind regarding the safety of your website’s data. Follow these steps to effectively use backup plugins:

Select a reliable backup plugin:

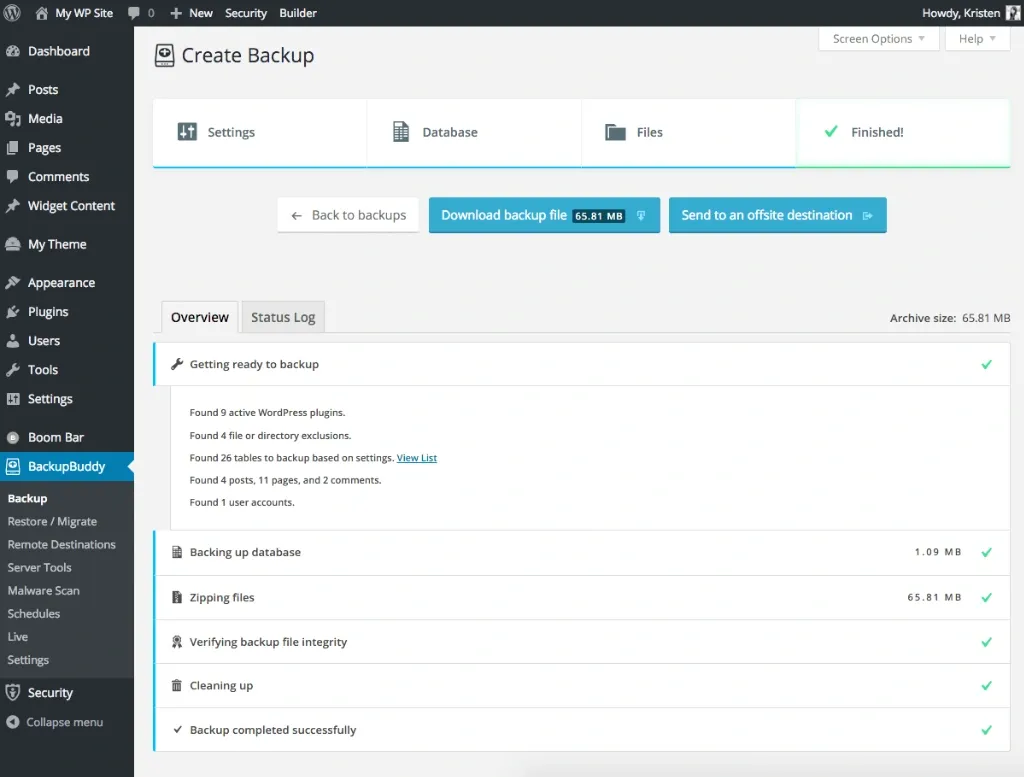
Explore reputable backup plugins available in the WordPress repository, such as UpdraftPlus, BackupBuddy, or VaultPress. Choose a plugin that suits your needs and has positive user reviews.

Install and configure the plugin:

Install the chosen backup plugin on your WordPress site and follow the provided setup instructions. Configure the plugin according to your preferences, including backup frequency, retention period, and compression settings.

Schedule automated backups:

Set up automated backup schedules to ensure your data is consistently protected. You can choose to schedule backups daily, weekly, or monthly, depending on the frequency of updates to your site.

Choose a backup destination:

Determine where you want to store your backups. Many backup plugins offer various options such as cloud storage services like Dropbox or Google Drive, FTP (File Transfer Protocol), or email. Select a destination that suits your storage preferences and provides secure storage for your backup files.

Explore additional features:

Some backup plugins offer advanced features like incremental backups, which only backup changes since the last backup, reducing storage space and backup time. Look for plugins that provide one-click restoration capabilities, making it easier to restore your website in case of emergencies. Additionally, consider plugins that allow you to exclude specific files or directories from backups, ensuring you have control over what is included in your backups.

Backup plugins provide a convenient and feature-rich solution for securing your WordPress site.

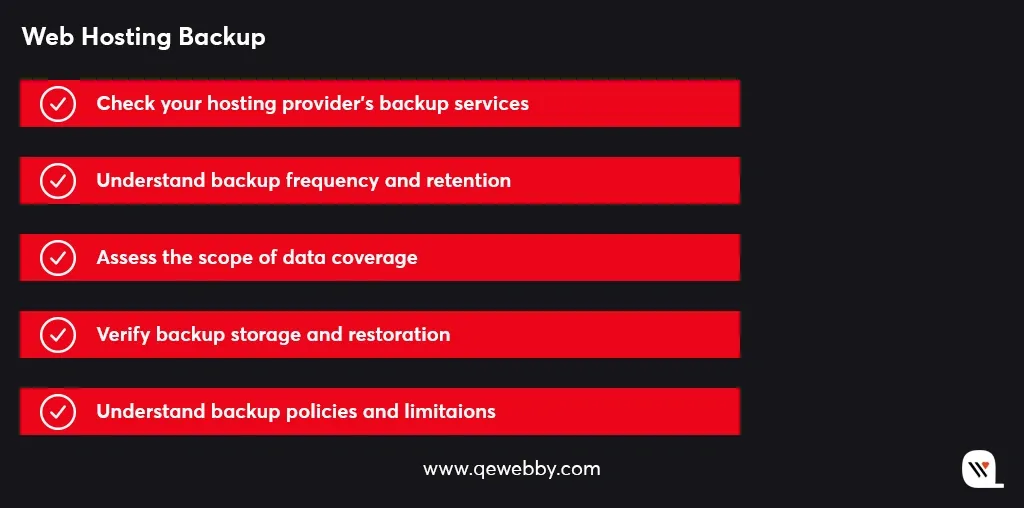
Web Hosting Backup

By assessing your web hosting provider’s backup services, you can ensure the safety and availability of your website’s data. Thus, when it comes to web hosting backup services, consider the following steps to ensure your data is protected:

Check your hosting provider’s backup services:

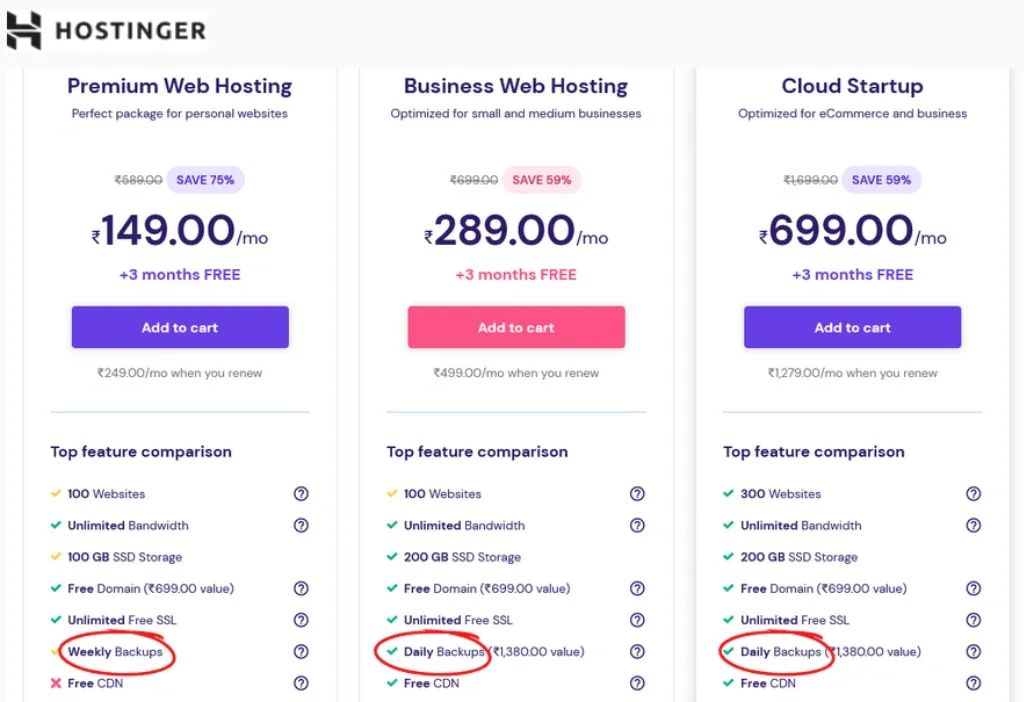
Review your web hosting package to determine if backup services are included. Some hosting providers offer automatic backups as part of their hosting plans.

Understand backup frequency and retention:

Learn about the frequency at which your hosting provider performs backups. Ideally, backups should be conducted regularly to minimize data loss. Additionally, familiarize yourself with the retention period, which defines how long backups are stored before being overwritten.

Assess the scope of data coverage:

Determine the extent of data covered by your hosting provider’s backups. Ensure that both your website files and databases are included in the backup process. It’s crucial to have a comprehensive backup to restore your site fully.

Verify backup storage and restoration:

Confirm that the backups are stored securely by your hosting provider. They should utilize reliable storage systems to protect your data from loss or unauthorized access. Additionally, check if the restoration process is straightforward, allowing you to easily retrieve your website from a backup when needed.

Understand backup policies and limitations:

Take the time to thoroughly understand your hosting provider’s backup policies and any limitations that may be in place. This includes the maximum size of backups, restrictions on the number of backup copies, and any specific terms regarding data restoration.

Understanding the backup frequency, retention, data coverage, storage security, and policies will help you make informed decisions about additional backup strategies to complement your hosting provider’s services.

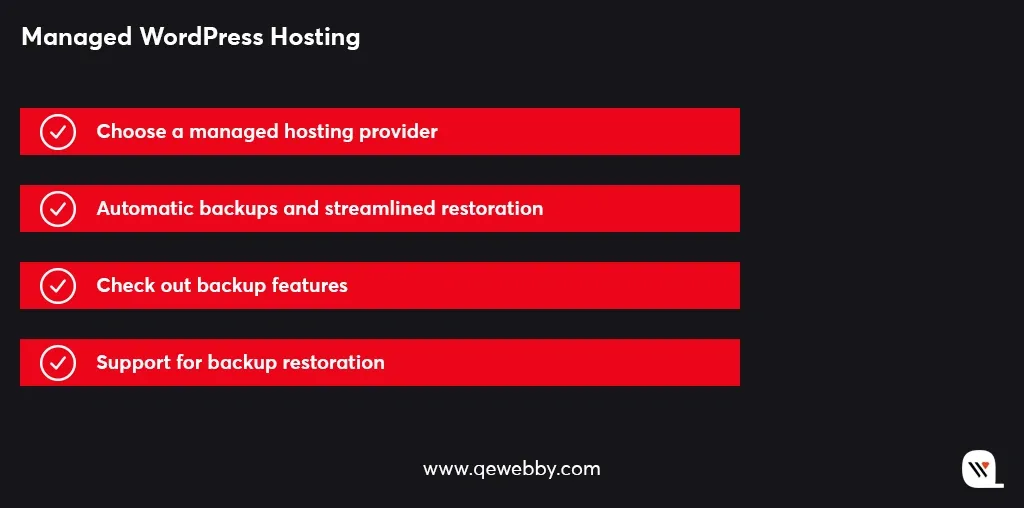
Managed WordPress Hosting

Managed WordPress hosting takes care of the backup aspect, ensuring that your website’s data is protected without you having to handle the technicalities. So if you’re looking for a hassle-free backup solution, managed WordPress hosting can be an excellent choice. Here’s what you need to know:

Choose a managed hosting provider:

Consider opting for managed WordPress hosting providers such as WP Engine, SiteGround, or Flywheel. These providers specialize in WordPress hosting and offer built-in backup solutions as part of their services.

Automatic backups and streamlined restoration:

Managed hosts typically offer automatic backup services, ensuring your website’s data is backed up regularly without requiring manual intervention. Additionally, they often provide streamlined restoration processes, simplifying the recovery of your website in case of any data loss incidents.

Research backup features:

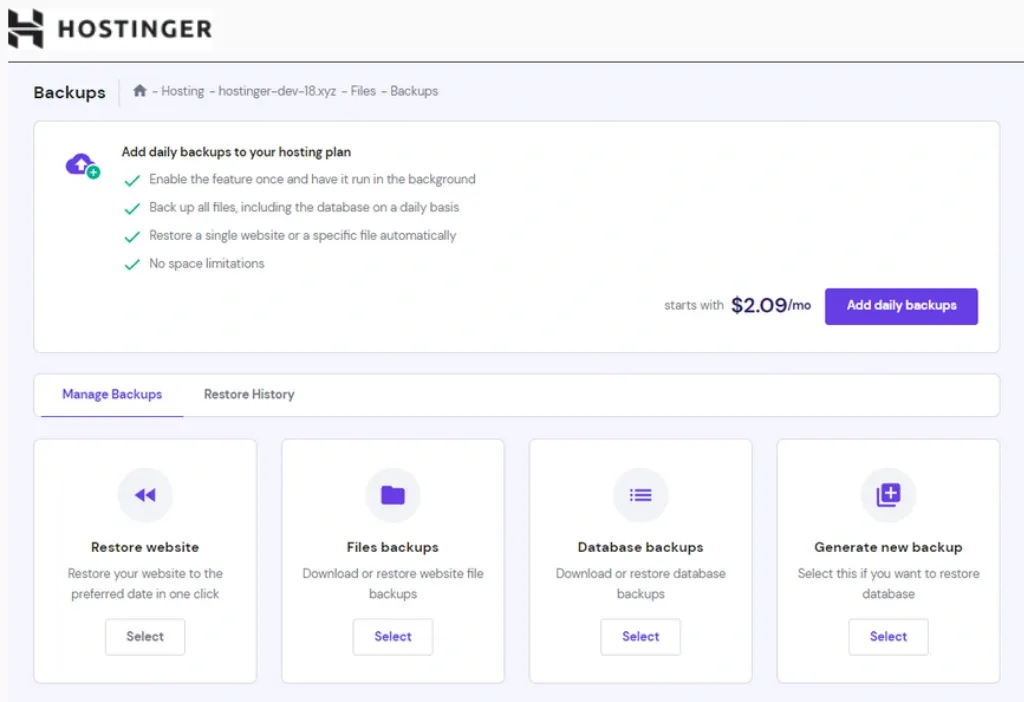
Before selecting a managed hosting provider, research the backup features they offer. Look into factors such as backup frequency, which determines how often backups are performed, and retention period, which specifies how long backup copies are stored. Also, check if they allow you to create on-demand backups whenever you need them.

Support for backup restoration:

Understand the level of support provided by the hosting provider when it comes to backup restoration or data loss incidents. Check if they have dedicated support teams available to assist you promptly and efficiently in case you encounter any issues during the restoration process.

By choosing a reputable managed hosting provider, you can enjoy the convenience of automatic backups, streamlined restoration, and reliable support, providing you with peace of mind and a robust backup solution for your WordPress site.

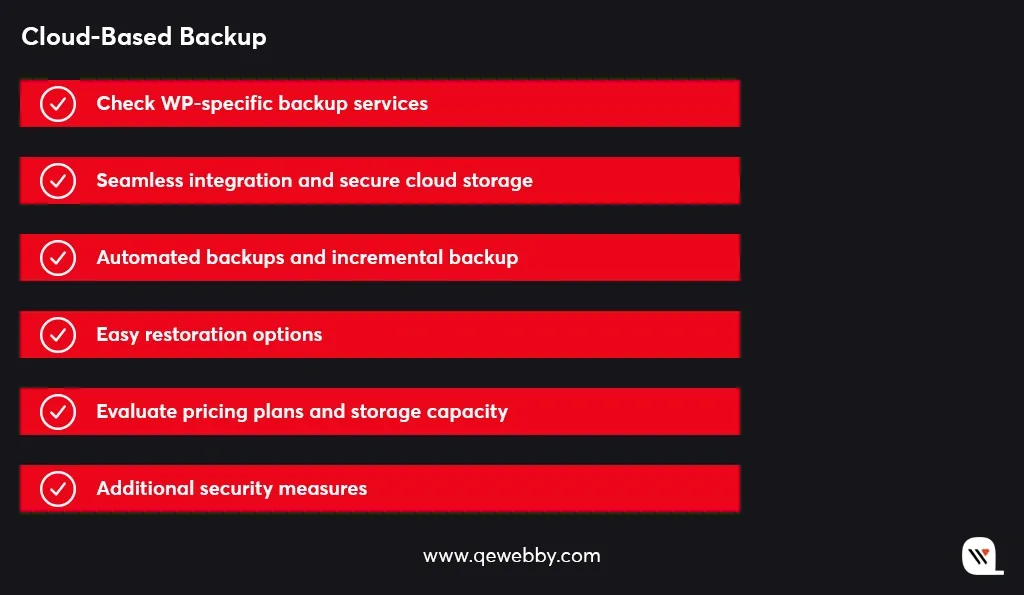
Cloud-based Backup Services

When it comes to reliable and secure backups for your WordPress site, cloud-based backup services are worth considering. Follow these steps to explore and utilize cloud-based backup services effectively:

Research WordPress-specific backup services:

Look into reputable cloud-based backup services specifically designed for WordPress, such as BlogVault, CodeGuard, or Jetpack Backup. These services are tailored to the needs of WordPress websites and offer specialized features.

Seamless integration and secure cloud storage:

Cloud-based backup services seamlessly integrate with your WordPress site, ensuring easy setup and smooth operation. They securely store your backups in the cloud, protecting them from hardware failures and other local storage issues.

Automated backups and incremental backups:

Look for services that offer automated backups, allowing you to schedule backups at regular intervals without manual intervention. Additionally, consider services that provide incremental backups, which only back up the changes made since the last backup. This speeds up the backup process and reduces storage space requirements.

Easy restoration options:

Ensure that the backup service offers straightforward restoration options. Look for features like one-click restoration or simple step-by-step guides to quickly restore your website from a backup when needed.

Evaluate pricing plans and storage capacity:

Compare the pricing plans offered by different cloud-based backup services. Consider factors such as storage capacity, the number of websites covered, and any limitations on backup frequency or retention. Select a service that aligns with your budget and backup requirements.

Additional security measures:

Assess the additional security measures provided by the backup service. Look for features like encryption, two-factor authentication, and malware scanning to enhance the overall security of your backups and data.

Cloud-based backup services offer convenience, scalability, and reliable storage for your WordPress backups. By selecting a WordPress-specific service that fits your needs and budget, you can ensure the safety and accessibility of your website’s backups in the cloud.

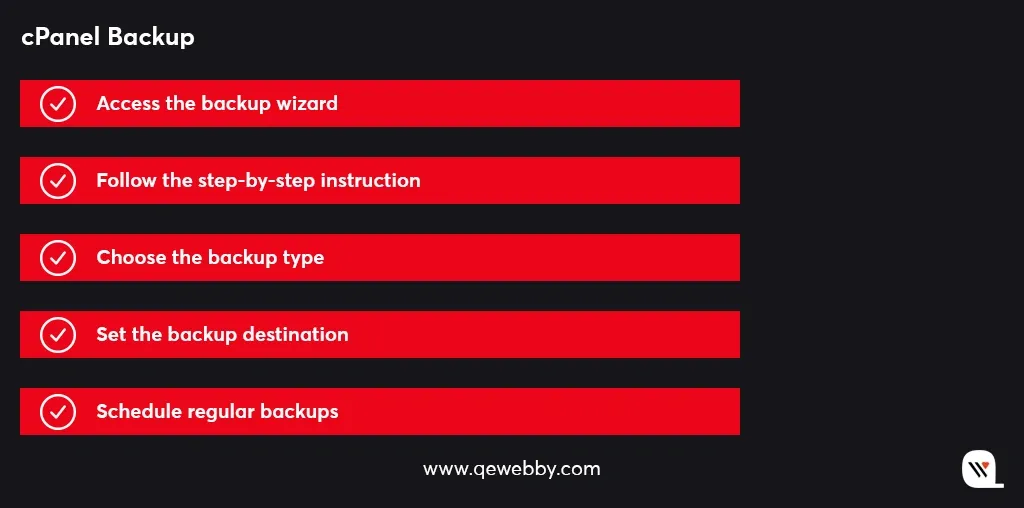
cPanel Backup

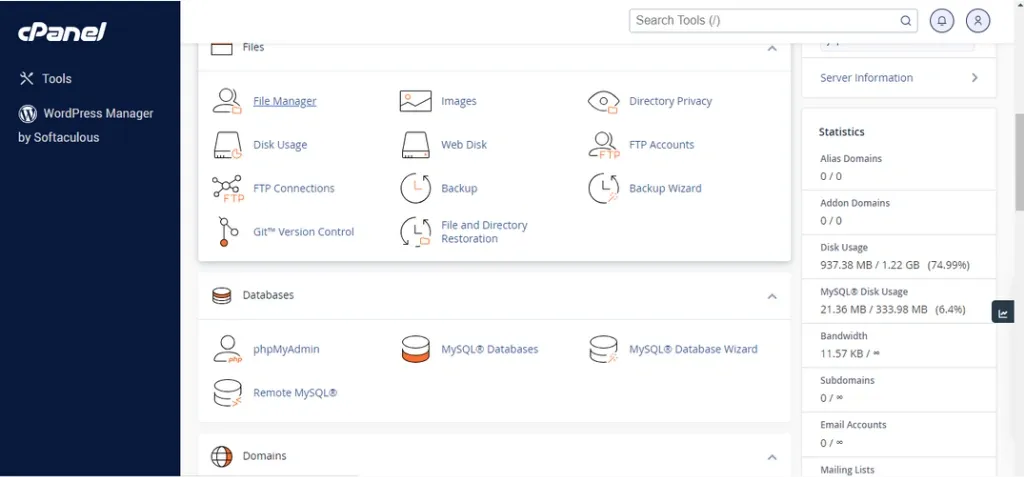
If your hosting control panel includes cPanel, you can take advantage of its built-in backup functionality. By utilizing cPanel’s backup functionality, you can easily create backups of your website files and databases. Follow these steps to create backups using cPanel:

Access the backup wizard:

Log in to your hosting control panel and locate the backup wizard within the cPanel interface. This user-friendly tool simplifies the backup process.

Step-by-step instructions:

Follow the step-by-step instructions provided by the backup wizard to create your backups. The wizard will guide you through the necessary configuration options.

Choose the backup type:

Select the desired backup type based on your requirements. You can choose between a full backup, which includes all files and databases, or a partial backup, where you can select specific files or databases to include in the backup.

Set the backup destination:

Determine where you want to store your backups. cPanel allows you to choose from various destinations, such as local storage or remote locations like FTP servers or cloud storage services.

Schedule regular backups:

To ensure automated protection for your website, schedule regular backups through cPanel’s interface. Set the backup frequency according to your needs, whether it’s daily, weekly, or monthly.

The intuitive interface and step-by-step instructions make the process straightforward, even for those without advanced technical knowledge. Take advantage of this built-in feature to ensure the safety and availability of your website’s data.

Content Delivery Network Backup

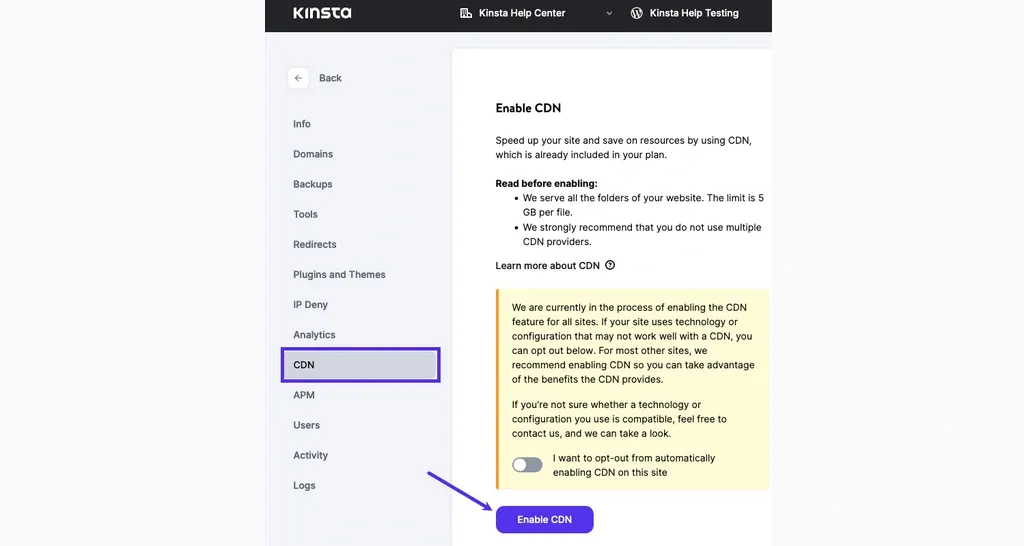
Certain content delivery networks, such as Cloudflare or Sucuri, provide backup features in addition to their caching and security services. Consider the following steps when exploring CDN backup options:

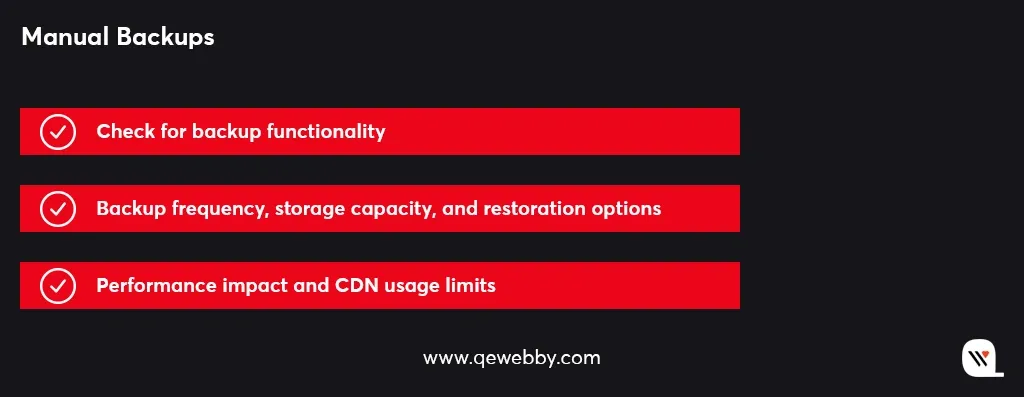
Check for backup functionality:

Determine if the CDN you have chosen offers backup functionality either as part of their service or through integration with third-party backup plugins. This ensures a seamless backup experience within the CDN ecosystem.

Backup frequency, storage capacity, and restoration options:

Understand the backup frequency provided by the CDN, ensuring it aligns with your backup needs. Also, consider the storage capacity available for your backups and evaluate the restoration options provided by the CDN. Look for features like one-click restoration or straightforward recovery procedures.

Performance impact and CDN usage limits:

Assess the potential impact of backups on your website’s performance when utilizing a CDN backup. Understand any usage limits set by the CDN, such as bandwidth or storage limitations, to ensure they meet your requirements.

By leveraging a CDN backup, you can combine the benefits of content delivery networks, caching, security, and backup functionality. Ensure that your chosen CDN offers reliable backup features, supports your backup frequency needs, provides sufficient storage capacity, and offers convenient restoration options. This way, you can effectively protect and restore your website’s data while leveraging the advantages of a CDN.

Wrap Up

The risks of data loss, cyberattacks, and website disruptions are ever-present, and the consequences can be severe for businesses of all sizes. So just don’t leave the fate of your WordPress website to chance. By partnering with a trusted IT provider, you can ensure efficient backup practices and protect your valuable online assets. Whether it’s implementing automated backup plugins or leveraging managed hosting services or exploring cloud-based backup solutions, an IT partner will ensure your data is safeguarded and readily recoverable.

QeWebby is well-versed in the latest backup methods and technologies, ensuring that your WordPress website is backed up efficiently and securely. We understand the importance of data protection and offer tailored solutions to meet your unique requirements. Contact QeWebby today and ensure the protection and availability of your valuable online assets. Let us be your reliable IT partner for all your WordPress website solutions.