Migrate Your WordPress Sites: A Definitive Guide [Easy & Fast]

Over 43% of the web runs on WordPress, yet the moment someone needs to migrate a WordPress site to a new host, the process feels anything but routine.

The fear is legitimate.

A failed WordPress migration does not just break a website. It can affect SEO rankings, form submissions, analytics tracking, checkout functionality, and customer trust within hours.

According to W3Techs WordPress Usage Statistics, WordPress powers more than 43% of all websites globally, making migration reliability a critical operational concern for businesses of every size.

What most migration guides miss is that failure rarely happens during the transfer itself. It usually happens before the migration begins or after the new site goes live.

This guide covers the complete process, including:

  • pre-migration preparation
  • plugin-based migration
  • manual migration
  • SEO preservation
  • downtime prevention
  • post-launch validation
  • common troubleshooting scenarios

So you can migrate your WordPress website safely without damaging performance, visibility, or user experience.

Pre-Migration Checklist: What to Do Before You Start

The WordPress site migration checklist isn’t administrative busywork. Every item on it represents a failure mode caught in advance, rather than a recovery task you’ll face under pressure with a live site down. Skipping even one step can mean a corrupted database, missing media files, or an SSL mismatch that takes days to trace.

#1. Build Your WordPress Site Migration Checklist Around a Full Backup First

A full site backup means your database export (.sql file) AND your complete WordPress file directory, including wp-content, all themes, all active plugins, and your .htaccess file.

There are many tools that let you store backups to Google Drive, Dropbox, and Amazon S3. Run a fresh backup immediately before migrating, not the one from yesterday. The few minutes this takes pays off the moment something breaks mid-transfer.

#2. Create a Staging Environment Before Any Live Migration Work

A staging environment is a private, non-indexed copy of your site hosted on a subdomain or locally, where you can test the migrated version before switching DNS. Managed hosts like Cloudways, SiteGround, and WP Engine offer one-click staging environments.

If your current host doesn’t, set one up by pointing a subdomain at a temporary directory. Testing on staging catches the majority of migration errors before they touch your live site.

#3. Audit Your Plugin Stack, Theme Dependencies, and PHP Version

Check the PHP version your current site runs on and confirm your new host supports the same version. Plugin conflicts post-migration are frequently traced back to PHP version mismatches, not the migration process itself.

Deactivate any plugins you no longer use before migrating: fewer files, smaller export, and a cleaner environment on the new host. This step alone reduces migration time noticeably on sites with bloated plugin libraries.

#4. Document Your Current SEO Configuration as a Baseline

Record your current permalink structure, sitemap URL, and robots.txt setup. Screenshot your Google Search Console coverage report. These become your post-migration benchmarks.

A spike in 404 errors or crawl anomalies in Search Console within 48 hours of going live on the new host is the signal to investigate; a clean baseline tells you exactly what changed.
How to Avoid Downtime During WordPress Migration

DNS propagation issues, incomplete file transfers, or untested staging environments usually cause downtime during a WordPress migration. The safest migrations reduce risk before the DNS switch happens.

Practical Steps to Reduce Downtime
  • Lower DNS TTL 24 hours before migration
  • Complete all testing inside a staging environment
  • Keep the old hosting account active during propagation
  • Verify forms, images, redirects, and SSL before switching DNS
  • Schedule migrations during low-traffic hours
  • Avoid making content changes during migration windows

A properly planned migration often completes with minimal or no visible downtime for users.

Choosing the Right Migration Method

When Plugin-Based Migration Is the Smarter Call

Plugin-based migration handles file transfer, database export, import, and URL rewriting in a single coordinated workflow. For most site owners and small agencies, a WordPress migration plugin reduces a four-hour manual process to approximately 45 minutes.

Duplicator, with over 1 million active installs and a 4.9-star rating on WordPress.org, is the most commonly used tool for this. All-in-One WP Migration and Migrate Guru each cover the same core workflow with different trade-offs on file size limits, automation depth, and server-side processing.

The right choice depends on site size and technical comfort. All-in-One WP Migration works well for sites under 512MB with no technical configuration required. Duplicator’s free tier handles unlimited restore sizes and includes recovery tools. For large sites or multisite networks, Migrate Guru runs the migration on the server side, so your local machine never becomes a bottleneck.

When Manual Migration Gives You the Control You Need

Manual migration takes longer but gives you direct visibility into every layer of the process. Developers migrating sites with complex custom database tables, multisite configurations, or non-standard directory structures often find the manual route less prone to unexplained failures. If a plugin migration fails silently at the database import step, identifying which table caused it requires digging into logs. Manual migration makes every failure point explicit.

That said, manual migration is not inherently more reliable than a well-configured WordPress migration plugin. The reliability difference depends on the site’s complexity and your familiarity with phpMyAdmin, FTP, and wp-config.php, not on the method itself.

Best WordPress Migration Plugins in 2026

The right WordPress migration plugin depends on your website size, technical comfort level, and hosting environment.

Plugin Best For Key Strength
Duplicator Most WordPress websites Flexible and reliable migration workflow
All-in-One WP Migration Beginners Simple drag-and-drop interface
Migrate Guru Large websites Server-side migration handling
UpdraftPlus Backup-focused migrations Cloud backup integration
WPVivid Small-to-medium sites Easy scheduled backups and migrations

As per the WordPress Plugin Repository Duplicator reports over 1 million active installs, making it one of the most widely used migration tools in the WordPress ecosystem.

How to Migrate a WordPress Site Using a Plugin (Step-by-Step)

This walkthrough uses Duplicator, since it handles the widest range of site sizes, and the free version covers most common migration scenarios without file size restrictions on restores.

Step 1: Install and Activate Your WordPress Migration Plugin

Log in to your WordPress admin dashboard. Go to Plugins > Add New, search for Duplicator, install it, and activate. Once active, Duplicator appears in your left sidebar under its own menu.

Step 2: Create the Migration Package on Your Current Site

Click Duplicator > Packages > Create New. Run the pre-build scan to catch any configuration warnings: large files, oversized databases, and non-standard table prefixes. Name your package, run the build, and download both the installer file (.php) and the archive (.zip). Both files are required for the next steps. The installer file is useless without the archive.

Step 3: Prepare a Fresh Database on Your New Host

On your new host, create a MySQL database, create a database user, and assign full privileges. If your new host uses cPanel, the MySQL Databases section handles all three in under five minutes. Note the database name, username, and password; you’ll enter these during the Duplicator import step.

Step 4: Upload the Package Files and Run the Installer

Upload both Duplicator files to your new host’s root directory via FTP using FileZilla, or through your host’s cPanel file manager. Navigate to yoursite.com/installer.php in a browser. The installer walks you through database connection, archive extraction, and URL updating in a guided interface. Enter your new database credentials when prompted.

Step 5: Complete Your WordPress Site Migration Checklist Verification

After the installer finishes, log in to your new WordPress admin dashboard. Check that pages load, images display correctly, and no critical functions are broken. Run a URL search-replace if Duplicator didn’t handle it automatically; the Velvet Blues Update URLs plugin covers this. Update your DNS pointing to the new host only after this full verification step passes.

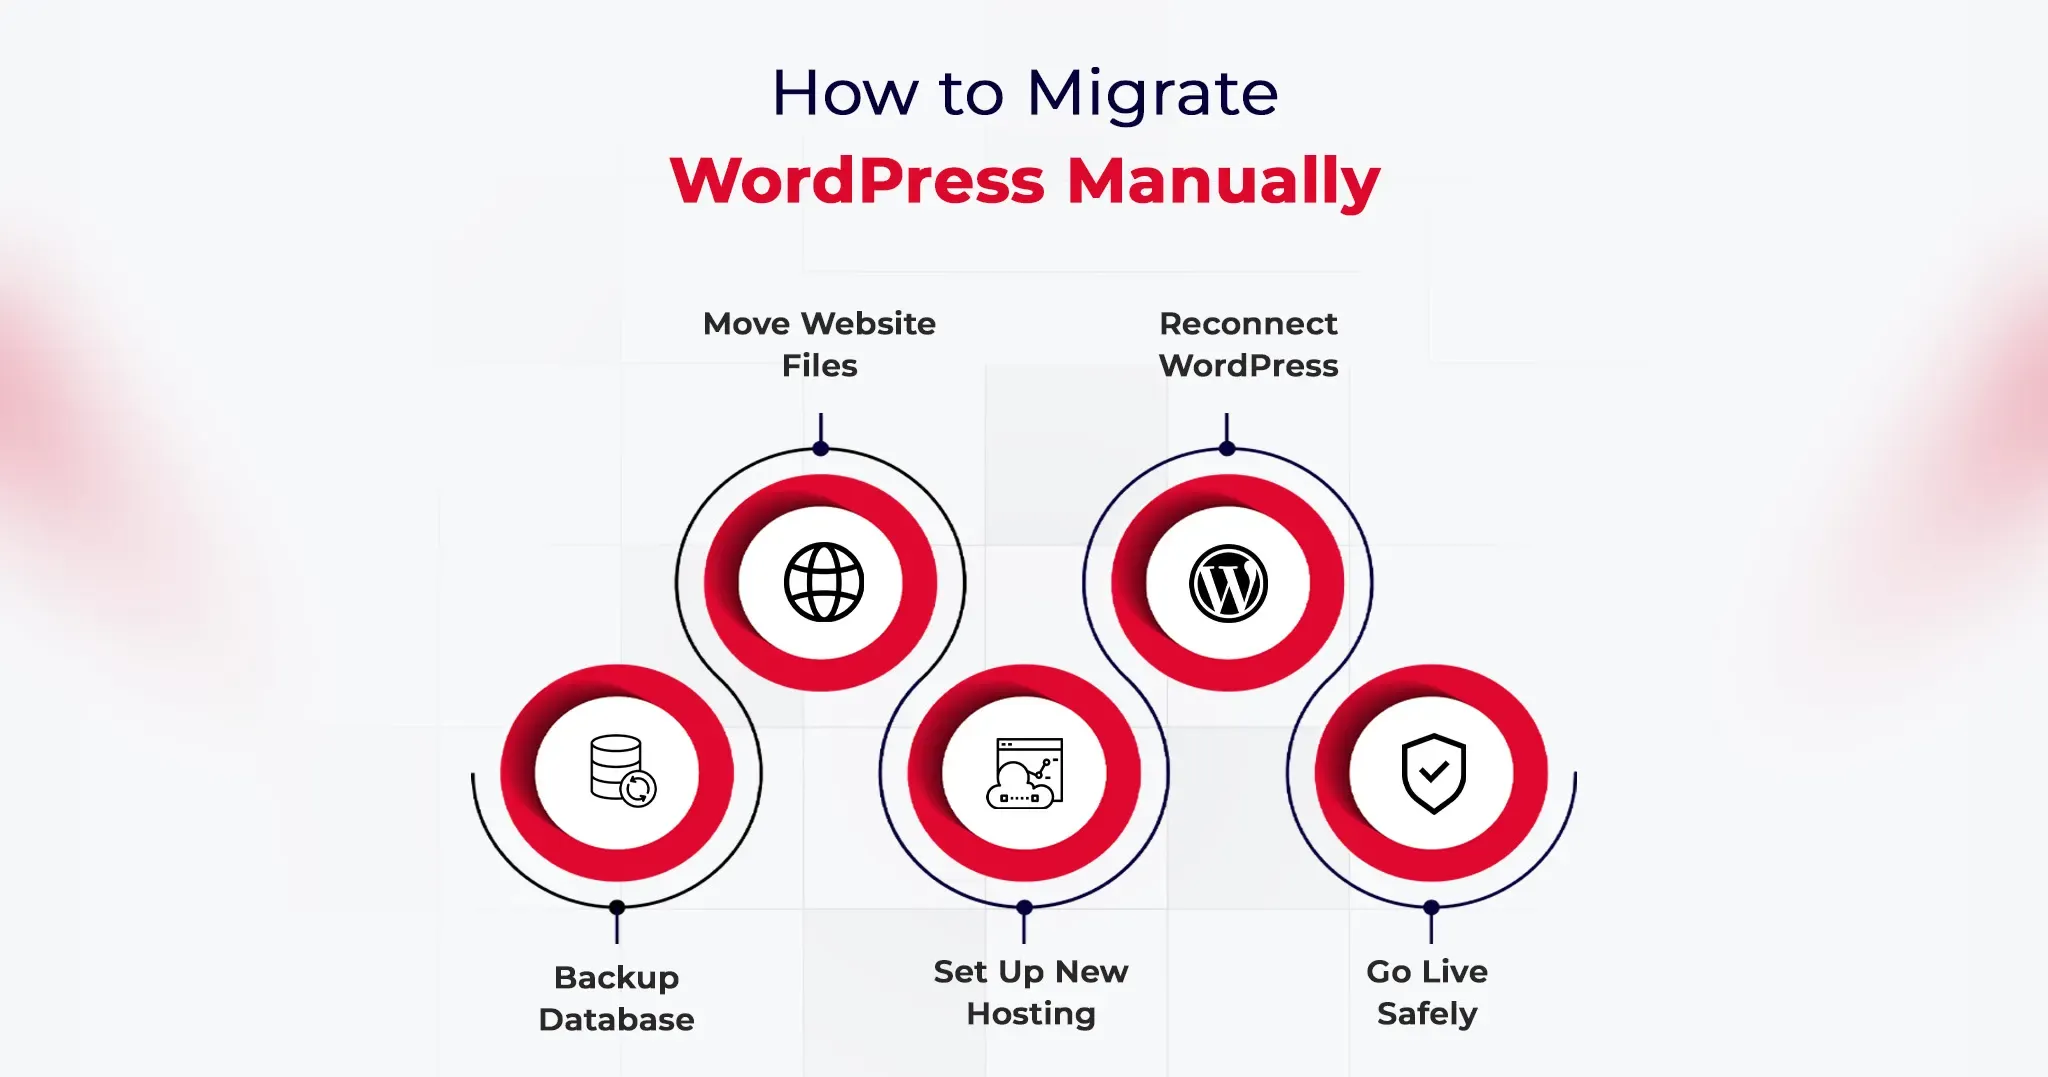
How to Migrate WordPress Site Manually (Step-by-Step)

Manual migration covers the same destination as the plugin method but gives you direct access to every component of the transfer.

Step 1: Export Your WordPress Database via phpMyAdmin

Log in to your current hosting cPanel and open phpMyAdmin. Select your WordPress database from the left panel, click the Export tab, choose the Quick export method, set the format to SQL, and click Go. Save the .sql file locally. This file contains every post, page, user, plugin setting, theme option, and WordPress configuration your site holds. Back it up separately before importing to the new host.

Step 2: Download All WordPress Files via FTP

Connect to your current server using FileZilla or an equivalent FTP client. Navigate to your WordPress root directory, typically public_html or www. Download the entire directory including wp-content, wp-includes, wp-admin, and the .htaccess file. Download time ranges from 15 minutes for a lean site to over an hour for wp-content folders heavy with media.

Step 3: Create a New Database on Your Destination Host

On your new host’s cPanel, open MySQL Databases. Create a fresh database, create a user, and assign all privileges to that user. Record the database name, username, and password precisely. The WordPress site migration checklist requirement at this step is exact credential matching: a single character mismatch between your wp-config.php and the actual database credentials will produce a database connection error.

Step 4: Import the Database and Reconfigure wp-config.php

Open phpMyAdmin on your new host, select the new empty database, click Import, and upload your .sql file. Once imported, open wp-config.php in a text editor and update DB_NAME, DB_USER, DB_PASSWORD, and DB_HOST to match your new database credentials. Upload the updated wp-config.php and all your WordPress files to the new host’s public root via FTP.

Step 5: Update URLs and Complete Your WordPress Site Migration Checklist

Navigate to your new site using the host’s temporary URL during the staging period. Run a database search-replace to update all instances of your old domain with the new one.

Better Search Replace handles serialized data correctly, which is critical for sites built with Elementor, Divi, or WooCommerce, where hardcoded URLs nest inside serialized arrays. Flush your permalinks by going to Settings > Permalinks and clicking Save Changes. That single action resolves approximately 90% of 404 errors that appear immediately after a manual migration.
How to Migrate WooCommerce Sites Safely

WooCommerce migrations require additional caution because they involve customer accounts, order data, payment gateways, and transactional functionality.

Important WooCommerce Migration Checks
  • Place the store in maintenance mode before migration
  • Backup WooCommerce orders separately
  • Test checkout and payment gateway functionality after migration
  • Reconnect Stripe, PayPal, and shipping integrations if needed
  • Verify transactional emails and automation workflows
  • Check product image references and inventory sync

Even when pages load correctly, payment or checkout issues can remain hidden until customers attempt purchases. That is why live transactional testing is essential after migrating WooCommerce websites.

Important Post-Migration Tasks You Shouldn’t Skip

The migration is not finished when the site loads correctly on the new server. These tasks are where most people create the problems they later spend hours debugging.

Verify SSL installation and HTTPS consistency. Confirm HTTPS works correctly on the new host. If your old host provisioned the SSL and your new host requires a fresh certificate, your site may load on HTTP but not HTTPS, which breaks any hardcoded HTTPS links stored in the database.

Recheck Google Analytics and Search Console tracking. Confirm your analytics tracking code fires on the new environment. If you changed domains, update your Search Console property and resubmit your XML sitemap to trigger a fresh crawl indexing the correct URLs.

Test every form, integration, and payment gateway. Contact forms, WooCommerce checkout flows, and third-party API connections (Mailchimp, Stripe, CRM hooks) need live testing. API keys and environment variables don’t transfer automatically, and a visual check of the page doesn’t confirm a form submission actually routes correctly.

Run a full crawl within 24 hours of going live. Screaming Frog or Sitebulb will surface broken internal links, redirect chains, missing image references, and duplicate content signals that a manual browse misses entirely. Even a 15-page site can return a crawl report with 30 actionable items.

Reduce DNS TTL 24 hours before the migration, not after. Lowering TTL to 300 seconds before you switch DNS means propagation completes in minutes rather than 24 to 48 hours. Set it back to 3600 once propagation confirms fully across major DNS resolvers.

WordPress Migration SEO Checklist

Moving a WordPress website without protecting SEO can quietly damage rankings, traffic, and indexed pages even when the migration itself appears successful. A structured SEO migration checklist helps preserve visibility and reduces the risk of crawl or indexing issues after launch.

Key SEO Checks Before and After Migration

  • Preserve the existing URL structure whenever possible
  • Configure 301 redirects for changed URLs
  • Verify canonical tags after migration
  • Re-submit your XML sitemap in Google Search Console
  • Review robots.txt configuration on the new environment
  • Monitor crawl errors and indexing coverage for at least two weeks
  • Check Core Web Vitals and page speed after DNS propagation
  • Validate internal links and image URLs after migration

According to Google Search Central, proper redirects and sitemap resubmission are critical steps when migrating websites without losing search visibility.

Even small migration errors like broken redirects or incorrect noindex settings can affect organic performance within days.

Common Migration Issues and How to Fix Them

404 errors across all pages. Go to Settings > Permalinks and click Save Changes without modifying anything. This regenerates the rewrite rules in .htaccess and resolves the majority of post-migration 404 issues within seconds.

White screen of death after migration. This points to a PHP version mismatch or an exhausted memory limit on the new host. Check the server error logs first. If logs show a memory error, add define(‘WP_MEMORY_LIMIT’, ‘256M’); to wp-config.php. If logs show plugin errors, rename the entire plugins folder via FTP to deactivate all plugins at once, confirm the admin loads, then reactivate plugins one by one to isolate the conflict.

Images not loading after the transfer. Hardcoded image URLs in the database still reference the old domain. Run Better Search Replace, searching for your old domain and replacing with the new one, with the dry-run option turned off. Confirm the serialized data checkbox is enabled.

Database import timeout or file size error. Large .sql files frequently exceed phpMyAdmin’s default upload limit. Compress the file to .sql.gz before importing, or use a tool like BigDump for databases exceeding 200MB. Alternatively, import via SSH: mysql -u username -p database_name < backup.sql.

Admin login broken after migration. This is typically a cookie domain mismatch or a siteurl/home URL conflict. Add define(‘COOKIE_DOMAIN’, ”); to wp-config.php to reset the cookie domain configuration, then log in and correct the URLs under Settings > General.

Bonus Tips to Make WordPress Migration Even Faster

Use your new host’s free migration service. Per hosting industry data, 63% of managed WordPress hosting plans include free site migrations. Providers like Kinsta, WP Engine, and Cloudways move your site at no additional charge and handle technical edge cases that trip up self-managed migrations. For non-developers, this is consistently the fastest and lowest-risk path.

Move to NVMe-based hosting while you’re migrating. Sites migrated from SATA SSD to NVMe infrastructure typically see a 50 to 70% reduction in server response time (TTFB), according to hosting benchmark data from Hostingstep. If your migration is performance-driven, the hosting infrastructure choice matters more than the migration method you use.

Migrate during low-traffic hours. Schedule migrations between midnight and 6 AM in your site’s primary audience timezone. Any DNS propagation window falls during minimum traffic, errors surface before peak audience hours, and your monitoring tools catch anomalies before users do.

Use WP-CLI for databases over 1GB. WP-CLI, WordPress’s command-line interface, handles database exports, imports, and search-replace operations directly on the server, with no phpMyAdmin file size caps and no browser timeout risk. For any site with a database above 1GB, command-line tooling is the correct approach, not a browser-based phpMyAdmin interface.

Conclusion

Getting the process of how to migrate a WordPress site right is not primarily a technical challenge. It is a sequencing challenge. Full backup happens before anything else. The staging environment gets tested before DNS changes. The post-migration checklist runs before you announce the new site is live.

Whether you use a WordPress migration plugin like Duplicator or work through the manual FTP and phpMyAdmin method, the structure of the process matters more than the specific tools. Follow the sequence, test before switching DNS, verify after switching, and most migrations complete without incident.

5 Best Practices for Choosing the Right B2B eCommerce Platform

Smart B2B businesses recognize that 89% of buyers prefer vendors with strong eCommerce solutions. Although, it’s a misconception to think that the future of online shopping is limited to B2C platforms. Forrester Research predicts that the US B2B eCommerce sector will surge to $2 trillion by year-end and reach $3 trillion by 2027.

Think about the advantages of embracing a B2B eCommerce platform if you are in the B2B sector. It has the potential to streamline operations for both your clients and your team, paving the way for accelerated growth and enhanced efficiency. Let’s delve deeper into the process of selecting the ideal B2B eCommerce platform for your business.

What’s Important in a B2B Platform, Anyway?

A robust and effective platform is the backbone of your business success. It’s not just a digital space; it’s a dynamic tool that can transform the way you interact with clients, manage transactions, and facilitate growth. So, what exactly is important in a B2B platform?

  • Seamless User Experience
  • Scalability
  • Customization
  • Security Measures
  • Integration Capabilities
  • Mobile Responsiveness
  • Excellent Customer Support

B2B eCommerce Platform Checklist for Better Selection

Grab this checklist on the go and explore it even when you’re offline!

Download Now

5 Best Practices for Selecting the Ideal B2B eCommerce Platform

The eCommerce platform you choose is the foundation of your online store. To help you make the right choice, let’s categorize the selection process into five key criteria, aligning with best practices based on user needs.

#1 Selection Based on Your Product Type

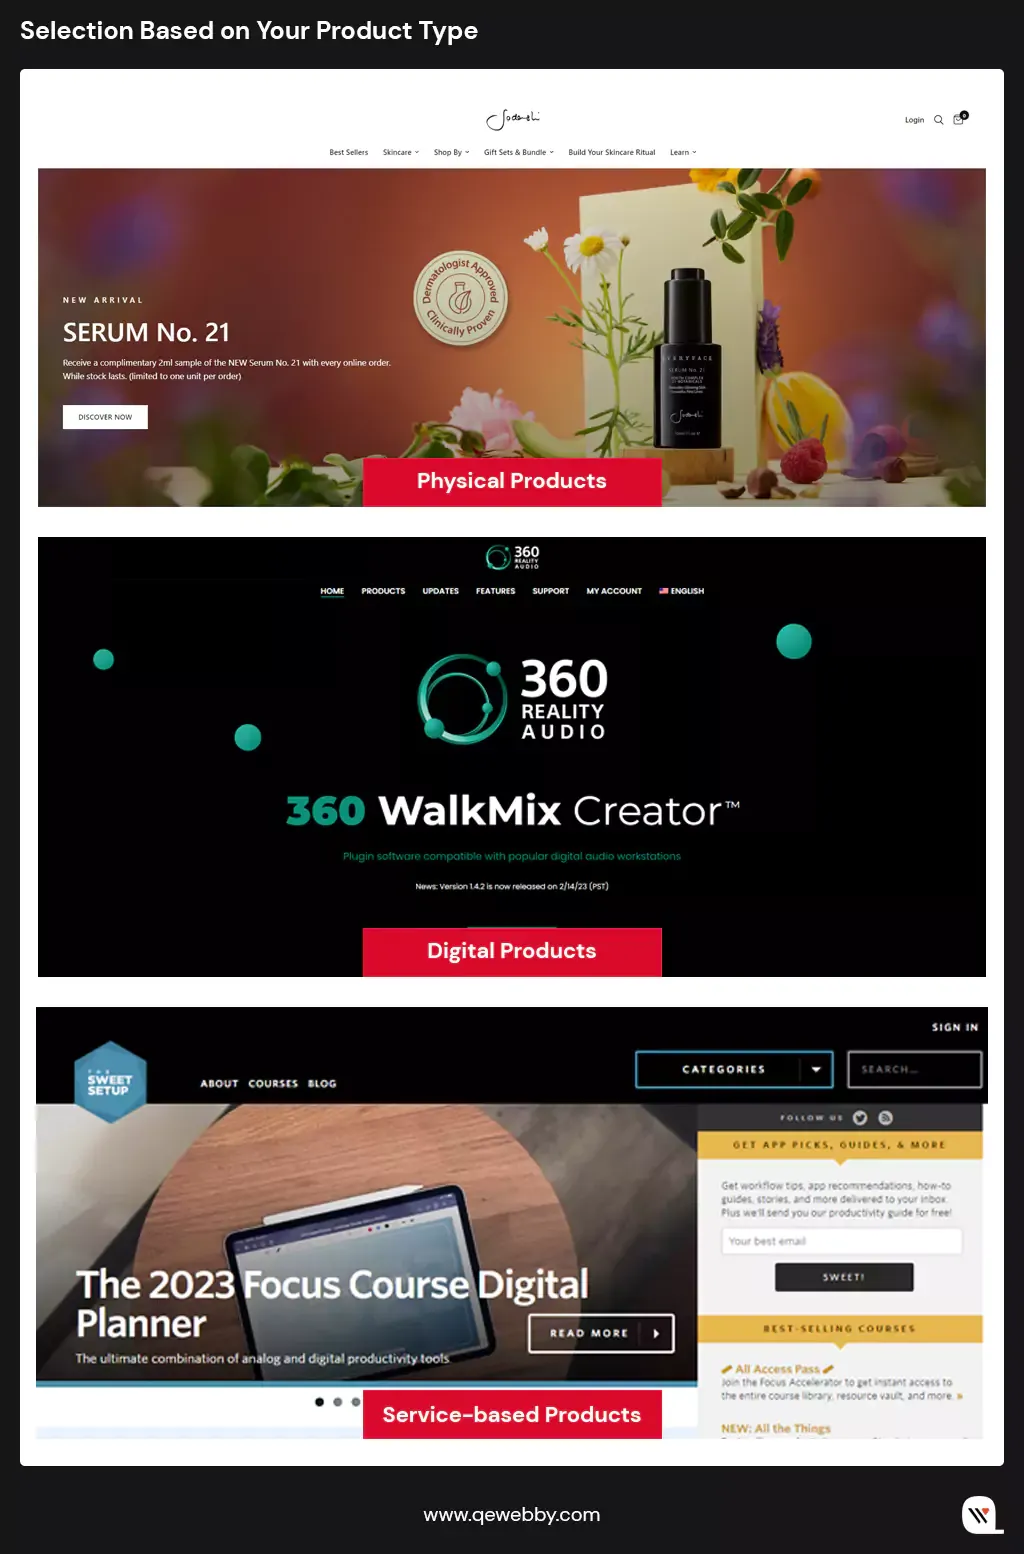
B2B businesses often deal with a wide array of products, ranging from physical goods and digital items to services and subscriptions. Each category necessitates a distinct approach in terms of presentation, payment methods, and user experience. Identifying the primary nature of your products is the initial step in this selection process.

Image Source: Physical, Digital, Service

  • Physical Products: For businesses dealing in physical products, a robust B2B platform should seamlessly integrate with shipping carriers. Efficient logistics management, including real-time tracking and inventory synchronization, becomes vital. Businesses that deal in physical products such as electronics (e.g., smartphones, laptops), machinery (e.g., industrial equipment, manufacturing machinery), or industrial supplies (e.g., safety gear, construction materials), need a platform that integrates seamlessly with shipping carriers. For that, features like weight-based or location-based shipping fees are essential to ensure accurate cost calculations for both you and your clients.
  • Digital Products: Digital products such as software, eBooks, or multimedia files demand heightened security measures. Platforms like WooCommerce, with its extensive plugin library, enable you to implement secure payment gateways like Stripe or PayPal. Easy Digital Downloads (EDD) is another WordPress-based solution tailored for digital products. These platforms provide secure transactions and download links, ensuring that your clients receive their digital goods promptly and safely.
  • Service-based Products: Businesses offering services or subscription-based products, such as consulting services or software subscriptions, require platforms that support flexible payment models. B2B platforms should support recurring payments, allowing seamless billing cycles for ongoing services. Additionally, features like trial periods, subscription upgrades, and automated invoicing enhance user experience for both you and your clients.

#2 Selection Based on Customization Capabilities for Exceptional User Experience

Today, businesses are increasingly aware that a one-size-fits-all approach doesn’t suffice. Your clients are diverse, with varying preferences, technical expertise, and business requirements. Tailoring your platform’s UX ensures that your users find the buying process intuitive, efficient, and delightful. Whether it’s simplifying complex ordering processes, enabling quick product searches, or offering personalized recommendations, a customized UX addresses these specific needs, fostering a positive customer journey.

Check out these key elements of your UX that require customization:

  • Navigation: A platform should allow you to create logical menu structures, categorize products effectively, and implement filters for easy product discovery.
  • Search Functionality: Advanced search options, including filters, auto-suggestions, and synonym recognition, enhance the search experience.
  • Product Presentation: From high-quality images and detailed descriptions to interactive elements like product videos and 360-degree views, a tailored product presentation enhances client engagement.
  • Account Management: The ability to set up multiple users, manage permissions, access order history, and facilitate bulk ordering simplifies their procurement process.

#3 Selection Based on Design Elements

Choosing a B2B platform based on its design elements is not just about aesthetics; it’s about creating an immersive, intuitive, and trust-building user experience. Here are the key aspects of design elements that should guide your selection process:

  • Themes and Templates: Themes serve as a foundation, allowing businesses to modify layouts, color schemes, and typography to align with their brand identity. With 80% of visitors attributing design to credibility, choosing the perfect theme on your platform is paramount to securing a lasting impression and ensuring 70% higher conversion rates for your business.
  • Block Editors: With a 40% increase in customization options, block editors ensure higher user interaction, enhancing the overall shopping experience for customers on your B2B eCommerce platform. It empowers businesses to create custom layouts without intricate coding. Drag-and-drop functionality and a variety of content blocks facilitate the creation of visually appealing product pages and landing pages.
  • Design Elements: Design Elements are the heart of your B2B eCommerce platform, shaping your brand identity and user experience. They ensure a visually appealing and intuitive interface, enhancing customer engagement and trust, making them essential for a successful online business.
  • Color Palette: Colors evoke emotions and convey brand identity. A harmonious color scheme not only enhances visual appeal but also creates a consistent and memorable brand image. For instance, a medical equipment supplier might opt for calming blues and whites to instill trust, while a technology provider might choose vibrant, modern hues to signify innovation.
  • Typography: Clear and readable fonts are fundamental. Choose fonts that align with your brand personality and ensure readability across devices. Serif fonts can evoke tradition and reliability, while sans-serif fonts often convey modernity and simplicity.
  • Interactive Elements: Buttons, forms, and other interactive elements should be intuitive and responsive. Interactive design fosters engagement, guiding visitors seamlessly through the buying process.
  • Multimedia Integration: High-quality images, product videos, and interactive media enrich the browsing experience. Showcase products from multiple angles, provide detailed images, and incorporate videos demonstrating product features. Platforms like WooCommerce enable easy multimedia integration, allowing businesses to create compelling product presentations.

#4 Selection Based on Integration Capabilities

Choosing a B2B platform that seamlessly integrates with various software and tools is essential for managing diverse aspects of your enterprise, from inventory and customer relationship management to payment processing and analytics. Look for the following integration capabilities in a B2B platform:

  • Customer Relationship Management (CRM) Systems: Integration with CRM software enables you to manage client relationships, track interactions, and personalize customer experiences. Salesforce, HubSpot, and Zoho CRM are popular CRM systems that seamlessly integrate with various B2B platforms.
  • Enterprise Resource Planning (ERP) Systems: ERP integrations centralize business processes, including inventory management, order fulfillment, and financial reporting. Platforms like SAP, Oracle NetSuite, and Microsoft Dynamics offer robust ERP solutions, often with pre-built integrations for leading eCommerce platforms.
  • Inventory Management Tools: Integration with inventory management systems ensures real-time visibility into stock levels, preventing over-selling and stockouts. Tools like TradeGecko and Skubana integrate seamlessly with eCommerce platforms, providing advanced inventory control features.
  • Payment Gateways: Secure and diverse payment options are crucial for B2B transactions. Evaluate platforms that support major payment gateways like Stripe, PayPal, and Square. Consider gateways that offer features such as multi-currency support and subscription billing for enhanced flexibility.
  • Shipping and Logistics: Integration with shipping carriers streamlines order fulfillment, automates label generation, and provides real-time tracking information to customers. Consider platforms compatible with carriers like UPS, FedEx, and DHL for efficient shipping operations.
  • Marketing and Analytics Tools: Integrations with marketing automation platforms (e.g., Mailchimp) and analytics tools (e.g., Google Analytics) enable data-driven marketing strategies and performance tracking.

#5 Selection Based on Security Potential

Security encompasses a range of aspects, including data protection, payment security, user privacy, and safeguarding against cyber threats. For B2B platforms, security is not just a feature; it’s a fundamental requirement. A secure platform not only protects your business and customers but also fosters confidence, leading to long-term relationships with clients and partners. Here’s how you evaluate the security aspects of a B2B platform:
  • Data encryption & SSL certificates: Data encryption ensures that all information exchanged between your website and users remains private and secure. Secure Sockets Layer (SSL) certificates encrypt data transmissions, preventing unauthorized access during communication.
  • Compliance with Regulations: Various regions and industries have specific regulations governing data protection and privacy, such as GDPR in Europe and HIPAA in healthcare.
  • Regular Security Audits and Updates: Cyber threats evolve continuously. A reputable B2B platform conducts regular security audits to identify vulnerabilities and employs timely updates and patches to address them.
  • Authentication and Authorization Protocols: Implement multi-factor authentication (MFA) and strong password policies to fortify user access controls. MFA adds an extra layer of security, requiring users to provide multiple forms of identification before accessing sensitive data or performing critical actions.
  • Payment Security: For B2B transactions, payment security is paramount. Choose platforms that support reputable payment gateways and comply with Payment Card Industry Data Security Standard (PCI DSS) requirements. PCI DSS ensures secure handling of credit card information, reducing the risk of data breaches and financial fraud.

  • Firewalls and Intrusion Detection Systems: Robust firewalls and intrusion detection systems (IDS) provide a proactive defense against malicious attacks. Firewalls filter incoming and outgoing traffic, blocking unauthorized access, while IDS monitors network activities, detecting and alerting you to potential security threats.
  • Security Certifications and Partnerships: Look for B2B platforms that have security certifications or partnerships with cybersecurity organizations. Certifications like ISO 27001 demonstrate a commitment to information security management, indicating a high level of dedication to safeguarding user data and maintaining robust security practices.

End Note

Selecting the right B2B eCommerce platform is a pivotal decision that will significantly impact the success and growth of your business. The right platform should offer customization, robust design elements, seamless integration capabilities, and top-notch security features. As you embark on this journey to transform your B2B eCommerce venture, we invite you to explore our trusted services in WooCommerce B2B development. Our expert team stands ready to help you build a powerful and tailored online presence that not only meets but exceeds your expectations. Contact us today to take the next step toward eCommerce excellence and success. Your journey to a thriving B2B eCommerce platform begins here.

8 Ways Headless WordPress Development Supercharges Business Growth

In the ever-evolving landscape of digital technology, WordPress has undoubtedly reigned as the go-to content management system worldwide. Its ease of use, flexibility, and code-free content creation have made it a favorite among businesses of all sizes. However, what truly sets WordPress apart is its evolution alongside emerging technologies, giving rise to the innovative concept of Headless WordPress and the revolutionary WP Engine’s Atlas. So are you ready to step into a world of limitless possibilities?

Let’s dive in and uncover the magic of Headless WordPress!

Advantages of Headless WordPress for Business Owners

Headless WordPress offers a plethora of advantages for business owners, empowering them to create dynamic, high-performing, and user-centric digital experiences. Let’s explore the compelling benefits that make Headless WordPress a game-changer in the CMS landscape.

#Reduction of Frontend-Related Bottlenecks:

  • Enhanced Security: With the frontend and backend layers decoupled, Headless WordPress reduces the risk of security breaches. By limiting direct access to the backend, potential attack vectors are minimized, ensuring a more secure digital ecosystem.
  • Improved Development Velocity: The separation of frontend and backend development in Headless WordPress allows for faster iterations and updates. Developers can work independently on their respective layers, enabling rapid development and deployment of new features, enhancements, and bug fixes.
  • Enhanced Content Performance: Decoupling the frontend from the backend enhances content delivery, as the focus shifts solely to content presentation. Content delivery networks (CDNs) can be effectively utilized to cache and serve content, reducing latency and ensuring optimal content performance across the globe.
  • Elimination of Frontend Plugin Conflicts: Traditional CMS setups often face frontend conflicts arising from various plugins. In Headless WordPress, these conflicts are minimized or eliminated altogether, ensuring a smoother and more reliable frontend experience for users.

#Ability to Handle High Traffic Loads:

  • Enhanced User Retention: Headless WordPress’s efficient scaling capabilities ensure a seamless user experience, preventing potential frustration and retaining users during peak traffic periods. Visitors are more likely to stay on the site, explore more content, and engage with your brand.
  • Scalability on Demand: Headless WordPress offers businesses the flexibility to allocate additional resources specifically for handling frontend traffic when needed. Scaling up or down becomes more manageable, allowing businesses to adapt quickly to fluctuating traffic demands.
  • Global Reach and Performance: Handling high traffic loads efficiently ensures consistent website performance, even with users accessing the site from different parts of the world. Users in various geographic locations experience optimized page loading times, fostering positive user experiences.
  • Stability during Traffic Spikes: Seasonal promotions, marketing campaigns, or viral content can result in sudden spikes in traffic. Headless WordPress can effortlessly handle these surges without compromising site performance or user satisfaction.

#Separation of Design and Content:

  • Design Flexibility and Iteration: With design and content separated, website redesigns become more manageable and less disruptive. Design teams can experiment freely, iterate quickly, and refine the user interface without affecting content integrity.
  • Consistent User Experience: By allowing design updates independently of content changes, Headless WordPress ensures a consistent user experience. This consistency across design elements creates a cohesive and memorable brand identity for visitors.
  • Collaborative Workflow: The separation of design and content empowers design and content teams to work concurrently. This collaborative workflow streamlines the creation and updating of web pages, resulting in more efficient website management.
  • Future-Proof Branding: With the ability to change the website’s design without altering the underlying content, businesses can easily adapt their branding to stay relevant in a rapidly evolving digital landscape. Headless WordPress ensures branding agility and future-proofing capabilities.

#Freedom to Choose Frontend Technologies:

  • Cutting-edge Frontend Choices: Whether it’s React, Vue.js, Angular, or any other modern JavaScript framework, the flexibility allows businesses to implement cutting-edge features, dynamic interactions, and personalized user experiences that perfectly align with their specific business goals.
  • Customized User Experience: This freedom of choice ensures that businesses can tailor their website’s frontend to best cater to their target audience, delivering an exceptional digital experience that sets them apart from the competition. With the power to integrate the latest frontend technologies, businesses can stay at the forefront of innovation and provide users with captivating and engaging interactions that leave a lasting impression.
  • Innovation Unleashed: Headless WordPress becomes a versatile canvas for businesses to create digital masterpieces that resonate with their audience and drive meaningful growth.

#Faster Loading Times and Improved Performance:

  • Optimized User Engagement: With faster loading times, users are more likely to stay engaged and explore your website. The reduced waiting period minimizes user frustration and increases the chances of conversions, leading to a positive impact on your business’s bottom line.
  • Mobile Responsiveness: In today’s mobile-centric world, a quick and responsive website is crucial for success. Headless WordPress’s improved performance ensures that mobile users enjoy a smooth and enjoyable browsing experience, encouraging them to return for more interactions.
  • SEO Advantages: Search engines favor fast-loading websites, and Headless WordPress’s optimized performance can positively influence your search engine rankings. This boost in SEO visibility translates to increased organic traffic and broader brand reach.
  • Streamlined Development: The decoupled nature of Headless WordPress enables developers to focus on their specific tasks, resulting in more streamlined and efficient development processes. This reduction in development complexities allows for faster project completion and quicker time-to-market for new features and updates.

#Seamless Integration with Multiple Platforms:

  • Omnichannel Content Delivery: Headless WordPress empowers businesses to deliver content seamlessly across various platforms, ensuring an omnichannel presence. Whether it’s mobile apps, voice assistants, smartwatches, or other IoT devices, your content remains accessible to users wherever they are.
  • Consistent Branding: Maintaining a consistent brand experience across different platforms is essential for building trust and loyalty. Headless WordPress ensures that your brand identity remains intact across all touchpoints, reinforcing your message and values to users.
  • Targeted User Experiences: Tailoring user experiences for specific platforms becomes more manageable with Headless WordPress. Businesses can optimize content and interactions according to each platform’s unique requirements, ensuring relevance and engagement for diverse audiences.
  • Expansion into Emerging Markets: As new platforms and technologies emerge, Headless WordPress enables swift adoption and integration. Businesses can take advantage of untapped markets and early adopter opportunities, setting the stage for future growth and expansion.

#Easy Integration with Emerging Technologies:

  • Future-Ready Innovation: Headless WordPress’s adaptability to emerging technologies ensures that your digital presence remains cutting-edge and future-ready. As technology advances, your business can easily embrace new trends and capitalize on novel opportunities.
  • Enhanced User Experiences: By integrating emerging technologies like virtual reality (VR), augmented reality (AR), or AI-powered chatbots, businesses can offer captivating and immersive digital experiences that resonate with users on a deeper level.
  • Competitive Edge: Being an early adopter of emerging technologies can give your business a competitive edge in the market. With Headless WordPress as your foundation, you can lead the industry and attract tech-savvy audiences who seek innovative and forward-thinking brands.
  • Versatile Applications: Whether it’s incorporating VR for immersive product demonstrations, using AR for interactive shopping experiences, or leveraging chatbots for personalized customer support,
  • Headless WordPress can seamlessly accommodate a wide range of applications, unleashing creativity and innovation for your business.

#Flexibility to Adapt to Changing Business Needs:

  • Agile Business Growth: Headless WordPress’s flexibility empowers businesses to adapt to changing market demands and evolving customer preferences swiftly. This agility ensures that your digital strategy can pivot and align with your business’s growth trajectory.
  • Scalability for Success: As your business scales, Headless WordPress can scale with it, accommodating increased traffic, data volumes, and user interactions without compromising performance. This scalability ensures a consistent and positive user experience during periods of rapid growth.
  • Efficient Content Management: The decoupled architecture allows for streamlined content management, making it easier to update, modify, or repurpose content as needed. Businesses can respond promptly to changing requirements and trends, ensuring that their content remains relevant and up-to-date.
  • Future-Proof Investment: Investing in Headless WordPress means investing in a versatile and adaptable digital solution. As your business evolves and embraces new technologies, Headless WordPress remains the backbone of your digital presence, future-proofing your investment and supporting your long-term success.

Conclusion

Headless WordPress is the gateway to unparalleled potential in the dynamic digital realm. Its decoupled architecture, seamless integration capabilities, and flexibility to adapt to changing business needs position it as a transformative force in the world of web development. By reducing frontend-related bottlenecks, handling high traffic loads, and offering seamless integration with emerging technologies, Headless WordPress paves the way for improved website performance, user engagement, and brand reach.

Don’t miss out to discover the full suite of WordPress solutions tailored to your business needs and embark on a journey of growth and prosperity. Contact us today for a free consultation for any WordPress solutions!

8 Essential Client Site Features That Boost WordPress Website Success

According to W3Techs, WordPress powers 43.1% of all websites on the internet, making it the most popular content management system (CMS). With over 810 million websites using WordPress and a daily increase of more than 500 sites, it continues to rapidly gain traction as the go-to CMS. Creating a compelling WordPress website isn’t just about aesthetics; it’s about ensuring you have these 8 must-have features in your arsenal.

Let’s dive in!

#1 User-Friendly Navigation

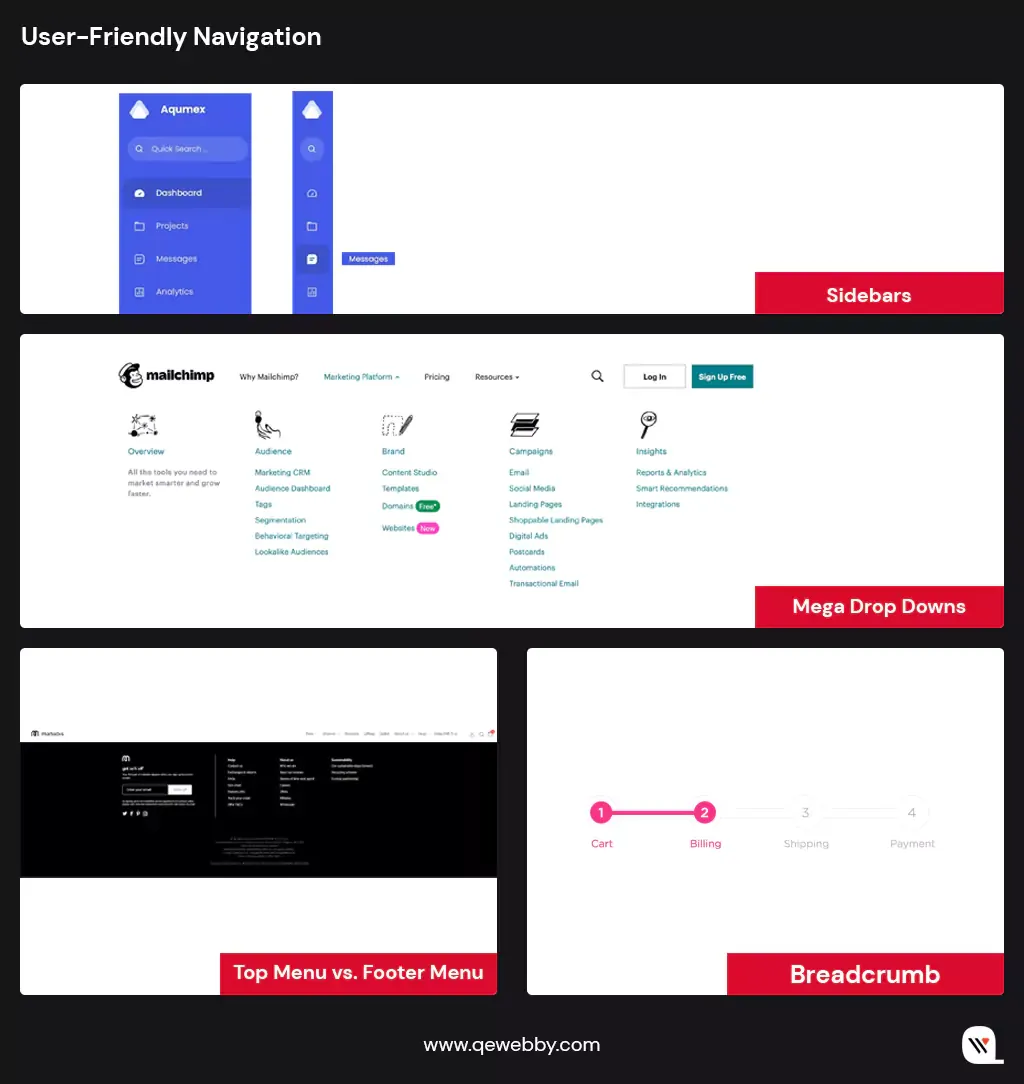
A website with clear and intuitive navigation can increase user satisfaction by up to 50%. Similarly, websites with challenging navigation offer limited accessibility, compelling users to explore alternative options. Your goal should be to make sure that every page on your website, even the ones not in the main menu, can be easily reached within three clicks.

Some of the most used types of website navigation:

  • Mega Drop Downs: Large menus that drop down from the top header, ideal for sites with many pages like e-commerce sites.
  • Top Menu vs. Footer Menu: Top menus run along the top of the page, while footer menus are at the bottom, suitable for less crucial content.
  • Sidebars: Appear at the side of the webpage, directing users to related content, great for blogs.
  • Breadcrumbs: Hierarchical links showing sub-categories, aiding navigation through nested content.
  • Sticky/Fixed Navigation: Navigation bars that remain at the top as users scroll down for easy access.
  • Vertical vs. Horizontal Navigation: Choose between a horizontal bar at the top or a vertical one often seen on corporate or portfolio sites.
  • Primary vs. Secondary Navigation: Primary bars hold key content, while secondary elements direct users to additional content on the site.

Basically, your website navigation should allow users to select from a concise set of pages with clear labels, adapting to their needs. And based on your business’s required pages to promote your business online, you can pick any of the suitable menu styles for your WordPress website and make it easier for users to navigate through the different sections of your website.

#2 Fast Loading Times

Just like a firm and confident handshake that sets the tone for positive interaction, your website has less than 3 seconds to make a memorable first impression. A common error among new WordPress users is picking a flashy theme that’s overly complicated and packed with unnecessary features. This can be problematic as it can slow down your website and negatively impact its performance. A multifaceted approach encompassing various facets of web development and server performance:

  • Image optimization plays a pivotal role, with careful consideration given to file formats, compression, and the implementation of lazy loading techniques.
  • Minification of HTML, CSS, and JavaScript files is another vital step, significantly reducing file sizes and enhancing load times.
  • Content Delivery Networks (CDNs) are a powerful ally, dispersing website assets across geographically distributed servers and enhancing caching capabilities.
  • Hosting choices are critical, with performance-focused hosting providers offering SSD storage, server-side caching, and scalable resources.
  • The adoption of HTTP/2 protocol accelerates page loading, enabling parallel requests and responses.
  • Browser caching is another indispensable component, with Expires headers and Cache-Control directives facilitating the storage of static resources for returning visitors.

We strongly recommend you consider incorporating some most popular WordPress plugins like ‘WP Super Cache’ or ‘W3 Total Cache’ for efficient page caching. Additionally, optimizing images using ‘Smush’ and streamlining scripts and styles with ‘Autoptimize’ can significantly enhance your website’s loading speed.

Take a moment to check your website’s loading time!

Feel the need for speed?

Check Here

#3 Mobile Responsiveness

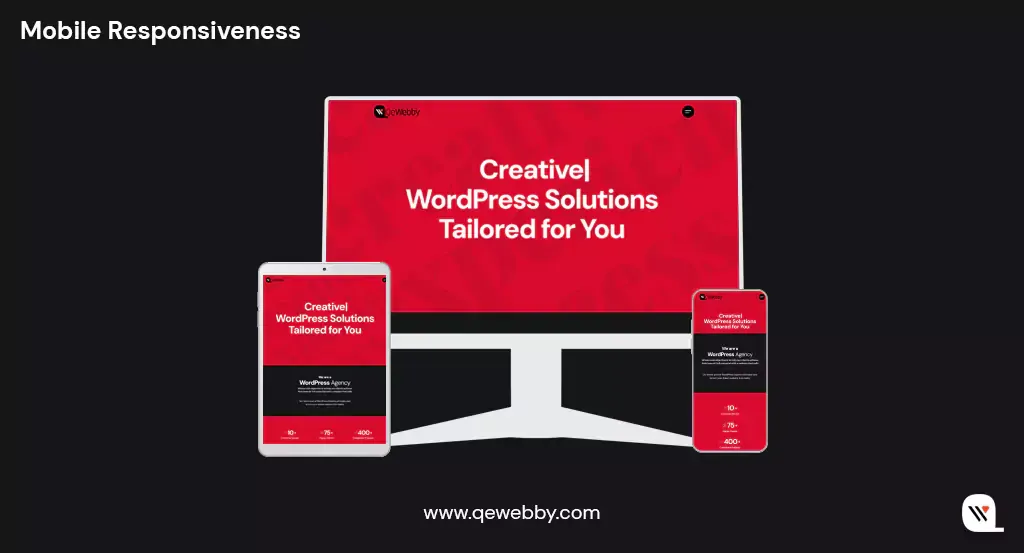
Over 4.9 billion people worldwide use mobile devices to access the internet. Imagine the vast pool of potential visitors your website can attract. However, mobile responsiveness isn’t just about fitting content onto smaller screens but delivering an exceptional user experience. A responsive design ensures that your website adapts seamlessly to various screen sizes, orientations, and resolutions. Whether your visitors are using smartphones, tablets, or laptops, they should encounter a website that’s easy to navigate, read, and interact with.

Google, the undisputed king of search engines, has adopted a mobile-first indexing approach. This means that when determining search rankings, Google predominantly considers the mobile version of websites. A non-responsive site risks plummeting in search engine rankings, reducing visibility and, subsequently, organic traffic.

Research shows that mobile users are less patient than their desktop counterparts. If a website doesn’t load or function correctly on a mobile device, users quickly abandon it. In fact, a one-second delay in mobile page load times can result in a 7% reduction in conversions. You simply can’t afford high bounce rates caused by poor mobile performance.

#4 High-Quality Content

Today, where attention spans are dwindling and competition is relentless, high-quality content stands as the bedrock upon which WordPress website success is built. As you embark on the journey to elevate your website’s performance, understand that crafting, curating, and consistently delivering exceptional content is not just an option; it’s an essential feature that can catapult your online presence to unprecedented heights.

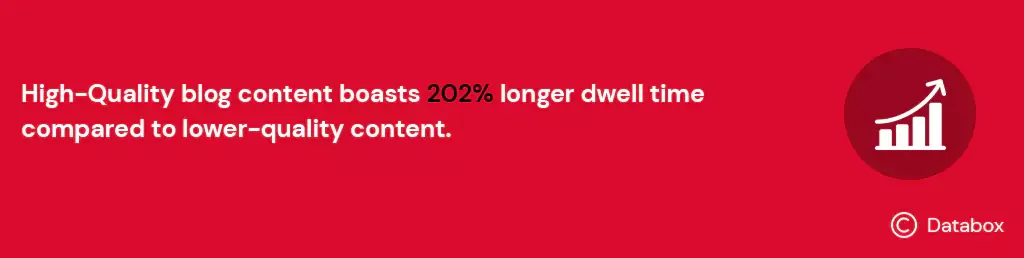
A study by Databox revealed that the average dwell time (the time users spend on a webpage) for high-quality blog content surpasses that of lower-quality content by 202%. Longer dwell times indicate user engagement and satisfaction, factors that search engines like Google consider when ranking websites.

Content marketing generates 3x more leads than paid search advertising. But, high-quality content doesn’t happen by accident, it’s the result of a proactive content strategy. This involves,

  • Thorough Research: Understanding your audience’s needs, preferences, and pain points.
  • Keyword Research: Identifying relevant keywords to target in your content.
  • Regular Updates: Consistently refreshing and updating existing content to keep it relevant.
  • Content Promotion: Actively promoting your content through social media, email marketing, and other channels.
  • Measuring Success: Monitoring key metrics, such as engagement, traffic, and conversion rates, to refine your content strategy.

WordPress offers AI-powered plugins designed to assist you in crafting accurate and top-notch content for your website. These plugins leverage cutting-edge AI technology to streamline your content creation process, ensuring that your website consistently delivers valuable and engaging material to your audience.

#5 Contact Forms

HubSpot indicates that businesses experience a 5% to 10% increase in conversion rates when they provide multiple contact methods, including contact forms. One of the most significant advantages of contact forms is their accessibility and convenience. They eliminate the need for visitors to search for an email address or pick up the phone, streamlining the communication process. With a well-designed contact form, users can quickly submit their queries or requests without leaving your website.

Contact forms encourage user engagement, allowing visitors to take an active step in reaching out to you. This interaction not only builds a sense of involvement but also increases the likelihood of further engagement. Contact forms serve a dual purpose. Besides facilitating communication, they also serve as valuable data-collection tools. When designed thoughtfully, contact forms can capture essential information about your visitors, such as their names, email addresses, and specific inquiries.

To harness the full potential of contact forms, consider the following strategies:

  • Clear Placement: Position contact forms prominently on your website, ensuring that they are easily accessible from every page.
  • Form Fields: Keep contact forms concise and relevant, minimizing the number of fields to encourage submissions.
  • Autoresponders: Implement autoresponders to acknowledge submissions promptly, assuring users that their messages have been received.
  • Personalization: Tailor contact form messages and responses to align with your brand’s tone and personality.

Moreover, tailor-made forms designed to suit your unique requirements and branding, enhance user engagement and provide efficient communication channels for your visitors. This, in turn, can lead to increased conversions and improved user satisfaction.

#6 Multilingual Support

In a world that’s more interconnected than ever before, embracing multilingual support is no longer a luxury; it’s a strategic necessity for WordPress website success. Thus, to truly succeed in this global digital ecosystem, you must be able to communicate with them in their preferred language.

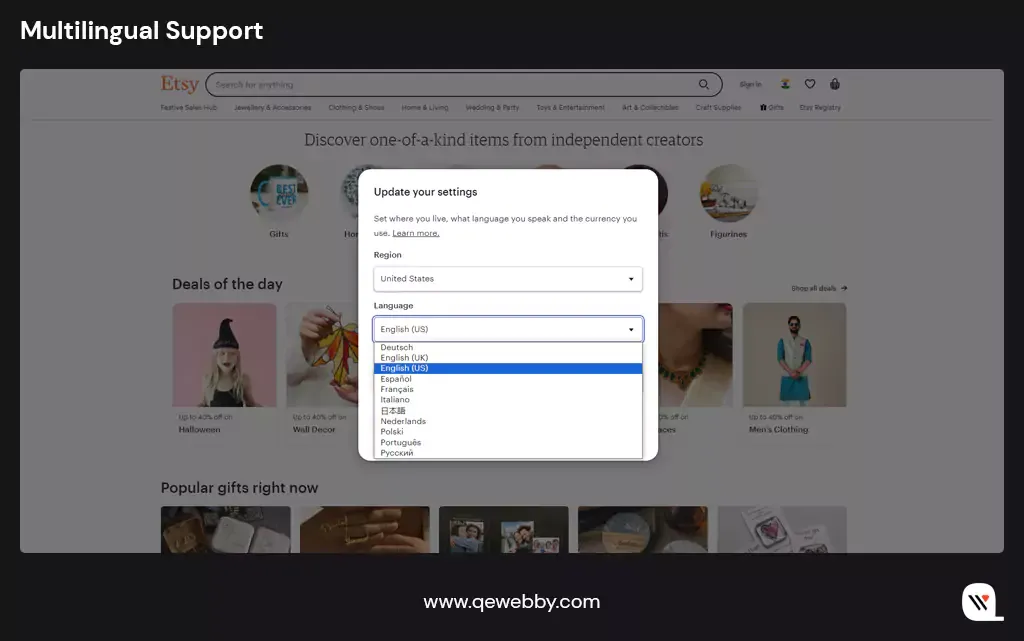
Research reveals that 75% of consumers prefer to buy products in their native language. Multilingual support extends beyond mere translation; it’s about cultural relevance. When your website speaks the language of your audience, it conveys an understanding of their culture, preferences, and needs.

With the WPML plugin’s automated installation and update system, achieving a multilingual WordPress website has never been easier. This powerful WordPress plugin streamlines the entire process, allowing you to effortlessly connect with a global audience by breaking down language barriers. By keeping your website’s content current and accessible to a diverse audience, you also create an enriched user experience that goes beyond language barriers.

#7 Regular Backups

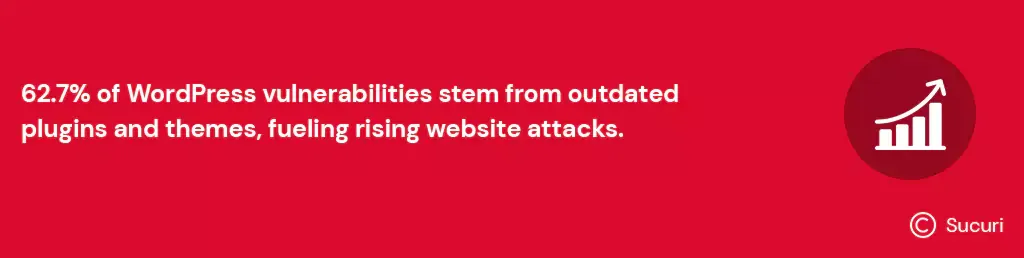
According to cybersecurity firm Sucuri, the number of website attacks continues to rise, with an average of 62.7% of WordPress vulnerabilities resulting from outdated plugins and themes. Besides, a single data loss incident can lead to hours or even days of website downtime.

Data loss incidents are not just about the inconvenience of rebuilding; they often involve a race against time. The longer it takes to recover lost data, the higher the financial and reputational costs. With up-to-date backups, you have the power to restore your website to a clean, pre-attack state, minimizing downtime and data loss.

To harness the full potential of regular backups, consider these proactive strategies:

  • Automated Backups: Implement automated backup solutions that perform regular backups at specified intervals, reducing the risk of human error.
  • Off-Site Storage: Store backups in secure, off-site locations to prevent data loss in the event of server issues or disasters.
  • Testing Backups: Regularly test the restoration process to ensure that backups are functional and reliable.
  • Versioning: Maintain multiple backup versions to allow for the retrieval of specific data or configurations.

With automated backup systems in place, we prioritize having a proactive approach to minimize downtime and data loss, allowing your site to operate seamlessly even in the face of unexpected challenges.

#8 SEO Optimization

Research by OptinMonster shows that SEO leads have a 14.6% close rate, while outbound leads (such as cold calling or direct mail) have a mere 1.7% close rate. SEO-optimized traffic is not only abundant but also more likely to convert into clients.

SEO ensures that your website is visible to users actively searching for products, services, or information related to your niche. SEO optimization aligns your website’s content with user intent, delivering content that addresses their specific queries and needs. High search engine rankings bestow credibility on your website, positioning it as an authoritative source in your industry.

To harness the full potential of SEO optimization, consider these proactive strategies:

  • Keyword Research: Identify relevant keywords and phrases that resonate with your target audience.
  • On-Page SEO: Optimize your website’s structure, meta tags, headings, and content to align with SEO best practices.
  • Link Building: Cultivate high-quality backlinks from reputable websites to enhance your website’s authority.
  • Mobile Optimization: Ensure that your website is mobile-friendly and loads quickly on all devices.
  • Regular Audits: Conduct regular SEO audits to identify and rectify issues that may impact your website’s performance.

Yoast SEO is one robust WordPress plugin that offers comprehensive on-page optimization, including keyword analysis, content readability checks, and XML sitemap creation. It provides actionable insights and suggestions to enhance your site’s search engine visibility, helping you climb the ranks and attract more organic traffic.

Wrap-Up

Your WordPress website isn’t just a digital entity; it’s your brand’s ambassador, your client’s first impression, and your portal to global success. It’s your digital frontier, where success hinges on the right tools, strategies, and, above all, a website that stands as a beacon in the vast online landscape. At QeWebby, we’re not just developers; we’re digital architects, crafting websites that captivate, engage, and convert.

Our expertise spans the spectrum of essential client site features, from user-friendly navigation that guides your visitors seamlessly to high-quality content that resonates with your audience. As the digital landscape evolves, so do we. Our commitment is to your success, and we’re here to navigate the ever-changing digital currents on your behalf. Your website’s success story begins here!

What Makes Headless WordPress Unique? Pros & Cons Explored

With over 60% of the market share in the CMS market, WordPress is the most widely used and also the fastest-growing CMS of this digital world. Renowned for its user-friendly interface, extensive plugin ecosystem, and robust community support, WordPress has become the go-to choice for website owners and bloggers worldwide. Now, with the rise of Headless CMS, WordPress expands its horizons, embracing a new era of flexibility and innovation.

Here you will discover how Headless WordPress transcends the limitations of traditional websites and opens the door to a new realm of innovation and user engagement.

Let’s explore!

Defining the Concept of Headless WordPress

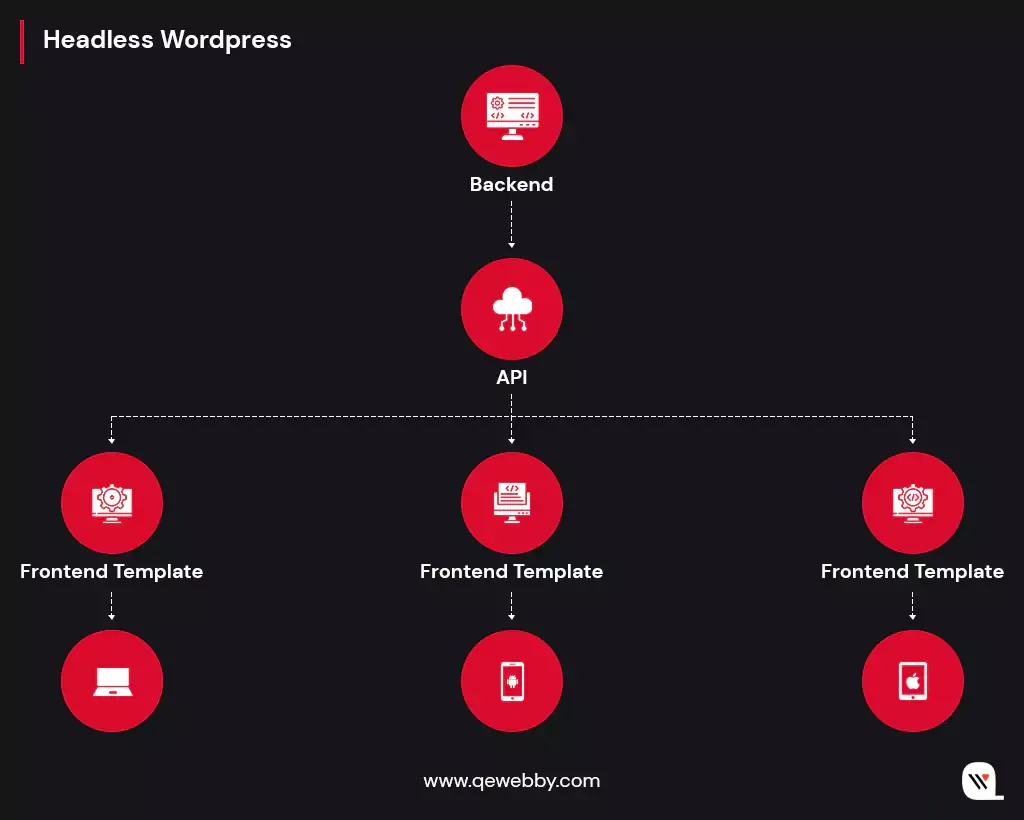
Headless WordPress is a powerful concept that revolutionizes how we approach content management systems. At its core, Headless WordPress separates content management capabilities from the frontend presentation. It focuses solely on content management through its robust backend. It exposes a powerful API (Application Programming Interface) that allows developers to retrieve content in a structured manner. And this content can then be consumed by a separate frontend application or framework, which handles the rendering and presentation. So ultimately, it gives the developers the freedom to choose the frontend technologies that best suit the project requirements.

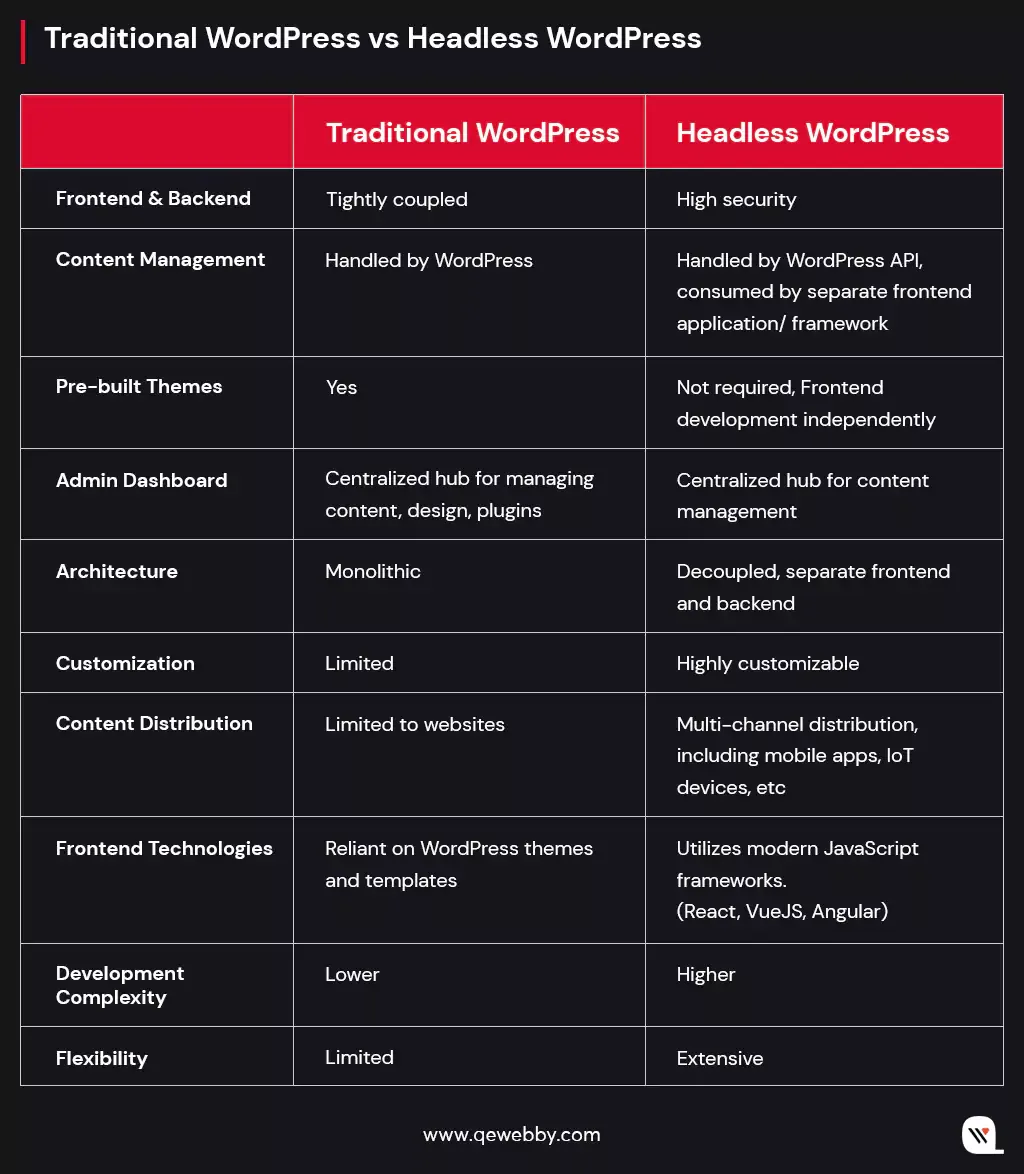
Differentiating Traditional WordPress from Headless WordPress

Understanding the distinctions between Traditional WordPress and Headless WordPress is crucial in selecting the right approach for your specific project requirements. Traditional WordPress is suitable for simple websites with straightforward needs, offering simplicity and ease of use. On the other hand, Headless WordPress provides greater flexibility, customization options, and the ability to deliver content to multiple channels beyond websites. Here are the basic differences:

How Headless WordPress Works?

In the world of Headless WordPress, the traditional coupling of the frontend and backend layers gives way to a more flexible architecture. Here are the key components involved in its operation.

Separation of frontend and backend layers

In a Headless WordPress setup, the frontend and backend are decoupled, allowing for independent development and management of each layer. Let us see how this separation works:

Backend (Content Management):

  • The backend layer, powered by WordPress, serves as the content management system (CMS).
  • Content creators utilize the familiar WordPress admin interface to manage and organize content, including creating posts, pages, and media.
  • WordPress retains its robust content management capabilities, ensuring efficient organization, searchability, and retrieval of content.

Frontend (Presentation and User Interface):

  • The frontend layer is responsible for rendering and presenting the content to the end-users.
  • Instead of relying on WordPress to generate complete web pages, the frontend is developed using modern JavaScript frameworks like React, Vue.js, or Angular.
  • These frameworks consume the content using APIs provided by Headless WordPress and handle the rendering and user interface interactions.
  • Developers have the freedom to design highly customized and dynamic interfaces, tailoring the user experience to specific requirements.
Role of APIs in Headless Architecture

API plays a pivotal role in facilitating the communication and data flow between the backend and frontend layers in Headless WordPress. Here’s how APIs enable this seamless interaction:

REST API (Representational State Transfer):

  • WordPress provides a powerful REST API that exposes endpoints to access and manipulate content.
  • The REST API allows frontend applications to retrieve structured content, such as posts, pages, categories, and tags.
  • By making HTTP requests to these API endpoints, frontend frameworks can fetch the required content and utilize it to build dynamic interfaces.

GraphQL:

  • In addition to the REST API, Headless WordPress also supports GraphQL, an alternative query language for APIs.
  • GraphQL offers more flexibility in fetching precisely the data needed, reducing the overhead of over-fetching or under-fetching data.
  • Developers can define custom queries in GraphQL to retrieve specific fields or related data efficiently.
Exploring the Content Delivery Process in Headless WordPress:

Once the frontend is developed and the APIs are utilized, content delivery process in Headless WordPress follows these steps:

Content Creation and Management:

  • Content creators use the WordPress admin interface to create and manage content, organizing it into posts, pages, and other relevant structures.
  • Metadata, taxonomies, and custom fields can be added to enhance the content structure and organization.

API Consumption:

  • The frontend application, built with JavaScript frameworks, interacts with the Headless WordPress API to retrieve the desired content.
  • Developers use API requests to fetch specific content, filtering by categories, tags, or custom parameters as needed.

Content Rendering and Presentation:

  • The retrieved content is then dynamically rendered and presented to the end-users.
  • Frontend frameworks handle the rendering process, applying the desired design, layout, and user interface interactions.

Real-World Utilization of Headless WordPress Implementation

  • Headless WordPress serves as a powerful backend for mobile applications, enabling businesses to leverage their existing WordPress content and deliver it seamlessly to mobile users.
  • When modern frontend frameworks are used it helps to build highly interactive and engaging product catalogs and shopping interfaces.
  • Integration with third-party eCommerce platforms or custom-built solutions will handle transactions, inventory management, and order processing.
  • The robust content management capabilities of WordPress will allow the flexibility to tailor the frontend experience to match specific branding and user interface requirements.
  • Headless WordPress empowers businesses with a multichannel content delivery approach to ensure consistent branding and engaging experiences across platforms.

Challenges of Headless WordPress Implementation

While the benefits of Headless WordPress are compelling, it’s essential to consider the following challenges when implementing this approach:

  • Development expertise: Implementing Headless WordPress requires familiarity with frontend frameworks and API integrations. Ensure you have the necessary technical expertise or partner with experienced developers.
  • Customization complexity: Headless WordPress provides extensive customization options, but this can also introduce complexity. Plan for additional development time and resources for building and maintaining the frontend application.
  • Plugin compatibility: Some WordPress plugins rely on the traditional frontend architecture and may not be compatible with Headless WordPress setups. Ensure critical functionality can be replicated or find suitable alternatives.

Conclusion

Headless WordPress stands out as a transformative approach to content management systems that offers unparalleled flexibility, customization, and multichannel content delivery. By decoupling the frontend and backend layers, Headless WordPress empowers you to deliver exceptional user experiences, achieve enhanced performance and scalability, and future-proof your website.

QeWebby specializes in harnessing the full potential of every innovation in WordPress website development. Our team of experts can best guide you through the setup process, ensuring a seamless transition to Headless WordPress and helping you unlock the benefits it offers.

Don’t miss out on the opportunity to revolutionize your digital presence with a free consultation call with our experts! Contact us today to explore how Headless WordPress can transform your business and create memorable experiences for your audience.

Boost Your WordPress Site’s Speed in 9 Simple Steps

The first 3 seconds of webpage load times can make or break conversion on a website! This means a user will take only 3 seconds to make an opinion about your website. That’s why your website speed is a critical factor in determining success – a user will stay or leave. Slow loading times can have a detrimental effect on user experience, leading to high bounce rates, low conversions, and ultimately, reduced revenue. Moreover, search engines like Google also take website speed into account when ranking websites, which makes it essential for website owners to optimize their website’s speed.

While improving website speed seems dismaying, there are several actionable steps that website owners can take to speed up their WordPress websites. Let us discuss some effective strategies that will help you improve your website’s speed and performance.

9 Steps that will improve your WordPress website speed

Step 1: Choose a Fast and Reliable Web Hosting Provider

When selecting a hosting plan, it’s important to understand the differences between shared, VPS, and dedicated hosting and their impact on website speed. Shared hosting is the most common and affordable hosting option, where multiple websites share the same server resources. Shared hosting can be slow and unreliable, as the server resources are divided among several websites.

VPS (Virtual Private Server) hosting is a more advanced hosting option that offers more control and better performance than shared hosting. VPS hosting involves dividing a single physical server into several virtual servers, each with its own resources and operating system. This ensures that the server resources are not shared among several websites, resulting in better performance and speed.

Dedicated hosting is the most advanced hosting option, where a single physical server is dedicated to a single website. It provides complete control over the server resources and offers the best performance and speed. However, it’s also the most expensive hosting option and may not be suitable for small businesses or websites with low traffic.

Shared Hosting

  • Lowest cost
  • Low performance
  • Low security
  • Restricted configurability
  • Limited scalability

VPS Hosting

  • Highest security
  • High performance
  • Highest configurability
  • Mid-level cost

Dedicated Hosting

  • Highest security
  • Some configurability
  • Mid-tier performance
  • Mid-level scalability
  • High cost

Understanding the differences between shared, VPS, and dedicated hosting and their impact on website speed can help you choose the hosting option that best suits your needs and budget. Some highly exercised hosting providers by our patrons include web hosting providers like GoDaddy, WPEngine, and SiteGround.

Step 2: Use a Lightweight and Optimized WordPress Theme

A theme with excessive features, complex code, and bloated scripts can significantly slow down your website, resulting in a poor user experience, low conversions, and reduced search engine rankings. A lightweight and optimized theme, on the other hand, can provide faster loading times, better performance, and improved user experience.

Highly recommended themes to consider while comparing a variety of others
  • Astra Theme
  • Elegant Themes-Divi
  • Avada Themes
  • Ocean WP Themes
  • Uncode Themes
  • Adios Themes

When evaluating the performance and optimization of a WordPress theme, several key factors should be considered, including page load time, page size, script optimization, and compatibility with caching plugins. Page load time is the time it takes for your website to load, and it should ideally be under three seconds. Page size is the amount of data that needs to be downloaded to load your website, and it should ideally be under 1 MB. Script optimization involves optimizing JavaScript and CSS files to reduce the amount of data that needs to be downloaded to load your website. Compatibility with caching plugins is essential for improving website speed, as caching plugins can help reduce server load and improve website performance.

Step 3: Optimize Images and Media Files

Images and media files are an essential part of any website, but they can also significantly slow down a website if they are not optimized. Large image and media files can increase the loading time of a website, resulting in a poor user experience and reduced search engine rankings. Therefore, it is crucial to optimize images and media files to improve website speed and performance.

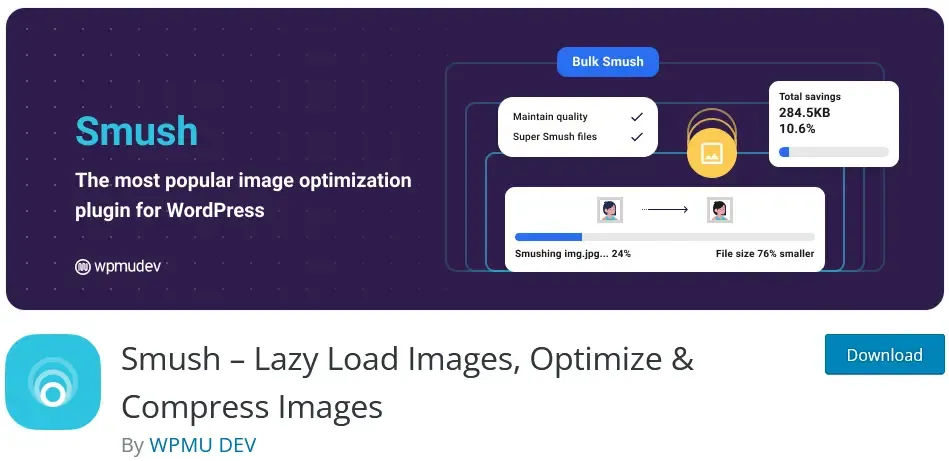
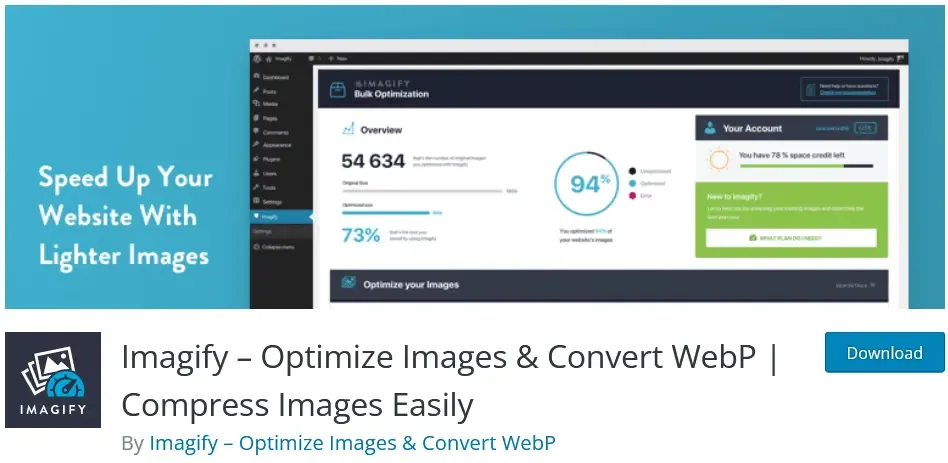
Several tools and plugins are available for optimizing images and media files on WordPress websites. These tools can compress, resize, and optimize images and media files to reduce their size without compromising their quality. Popular image optimization plugins for WordPress include Smush, ShortPixel, and Imagify. These plugins can automatically optimize images and media files on your website and reduce their size without compromising their quality.

Smush
ShortPixel
Imagify

To reduce the size and improve the loading speed of images and media files, several tips should be followed.

Firstly, images should be compressed and resized to reduce their size without compromising their quality. Image compression tools can reduce the size of images without affecting their quality.

Secondly, images should be optimized for the web, which involves reducing their resolution, file size, and file format. JPEG and PNG are the most commonly used file formats for images on the web.

Thirdly, lazy loading should be enabled for images and media files. Lazy loading delays the loading of images until they are required, which can significantly improve website speed and performance.

Step 4: Minimize HTTP Requests and Database Queries

Excessive HTTP requests and database queries can have a consequential impact on website speed and performance. HTTP requests are made each time a resource, such as an image or a script, is requested from the server. Similarly, database queries are made each time a user requests data from the website. These requests slow down the website and result in a poor user experience. Therefore, it is crucial to minimize HTTP requests and database queries to improve website speed and performance.

One way to reduce HTTP requests is to minify website resources, such as CSS and JavaScript files. Minifying involves removing unnecessary characters from code, such as white spaces and comments, which can significantly reduce the size of website resources. Additionally, website owners can combine multiple CSS and JavaScript files into a single file to reduce the number of HTTP requests made to the server.

Optimizing database queries is another way to improve website speed and performance. This involves reducing the number of queries made to the database and optimizing existing queries. Additionally, optimizing database queries by using indexes and limiting the number of returned results can significantly improve website speed and performance.

Step 5: Use Content Delivery Networks (CDNs)

Content Delivery Networks (CDNs) are an excellent solution for improving website speed and performance. CDNs work by distributing website resources, such as images, videos, and scripts, across multiple servers located in various geographic regions. By doing so, CDNs reduce the distance between website users and website resources, resulting in faster loading times and improved website performance.

Using a CDN can be particularly useful for WordPress websites that have a global audience. When a user requests a resource from a website, the request is sent to the server hosting the website. However, if the user is located far from the server, the request may take longer to process, resulting in slower loading times. By using a CDN, website resources are distributed across multiple servers, allowing users to request resources from a server located closer to them, resulting in faster loading times.

Popular CDNs for WordPress websites include Cloudflare, MaxCDN, and Amazon CloudFront. Cloudflare, in particular, offers a free plan that includes a range of features, such as content optimization, security, and analytics. MaxCDN and Amazon CloudFront are paid services that offer more advanced features, such as real-time analytics and advanced caching options.

It’s important to note that while CDNs can significantly improve website speed and performance, they are not a replacement for other speed optimization techniques. Website owners should still optimize images and other website resources, minimize HTTP requests, and use a lightweight WordPress theme to achieve the best possible website speed and performance.

Step 6: Enable Gzip Compression and Browser Caching

Enabling Gzip compression and browser caching are two effective techniques for improving website speed. Gzip compression is a method of compressing files before they are sent to the user’s browser, reducing the size of the files and speeding up the website’s loading time. This is particularly effective for text-based files like HTML, CSS, and JavaScript. By enabling Gzip compression, you can significantly reduce the size of these files, resulting in faster load times.

Enabling Gzip Compression:

  • Log in to your WordPress dashboard and navigate to the “Appearance” menu.
  • Click on “Editor” and select “functions.php” from the list of files on the right-hand side.
  • Add the following code to the bottom of the file, and save the changes to the file.

add_filter(‘wp_headers’, ‘my_gzip_output’);
function my_gzip_output($headers) {
$headers[‘Content-Encoding’] = ‘gzip’;
ob_start(‘ob_gzhandler’);
return $headers;
}

Browser caching, on the other hand, allows the user’s browser to store a copy of certain files, such as images, CSS, and JavaScript, on their computer. The next time the user visits your website, their browser can retrieve these files from their cache, rather than having to download them from your server again. This reduces the number of server requests, resulting in faster load times for your website.

Enabling Browser Caching:

  • Install and activate a caching plugin like WP Fastest Cache, WP Super Cache or W3 Total Cache.
  • Navigate to the plugin settings and enable browser caching.
  • Configure the settings according to your preferences. Generally, it’s recommended to set the cache expiration time to at least a month. Save the changes to the settings.
WP Fastest Cache
WP Super Cache
W3 Total Cache

Step 7: Minimize Plugins and Remove Unused Ones

Plugins are undoubtedly one of the key features of WordPress that make it such a popular and flexible platform for website creation. However, it’s important to remember that each additional plugin you install on your WordPress website comes with a cost, in terms of server requests, file size, and potential conflicts. Excessive plugins can significantly slow down your website and negatively impact its performance, which is why minimizing plugins and removing unused ones is an important step in optimizing website speed.

To evaluate and remove unused plugins, start by taking an inventory of all the plugins you currently have installed on your WordPress website. You can do this by logging in to your WordPress dashboard and navigating to the Plugins page, which will list all the plugins you have activated. Take a critical look at each plugin and ask yourself whether it’s really necessary for your website’s functionality or performance. Are there any plugins that you haven’t used in a while, or that duplicate the functionality of another plugin you have installed?

Once you’ve identified the plugins that you no longer need, it’s important to properly remove them from your website. Simply deactivating a plugin isn’t enough, as it can still leave behind residual code and database entries that can negatively affect website performance. To fully remove a plugin, you should first deactivate it, then delete it from your WordPress dashboard. Be sure to check for any plugin-specific settings or options that you may need to manually remove or reset as well. Additionally, try to use plugins from reputable developers who update their plugins regularly and provide good support.

Step 8: Optimize Website Database and Server

The website database is an influential component of a WordPress website. It stores all the website data, including posts, pages, media files, and user information. A poorly optimized database can slow down website performance, leading to longer loading times and increased bounce rates. To optimize the website database, you can use plugins like WP-Optimize, which can remove unnecessary data, compress images, and optimize database tables.

WP Optimize

In addition to optimizing the database, it’s also essential to optimize the server configuration for WordPress. This includes adjusting the server settings, such as increasing the PHP memory limit, enabling caching, and configuring the server to use HTTP/2.

Furthermore, to optimize your PHP configuration, you can edit the php.ini file on your server to adjust settings like memory limits and file upload sizes.

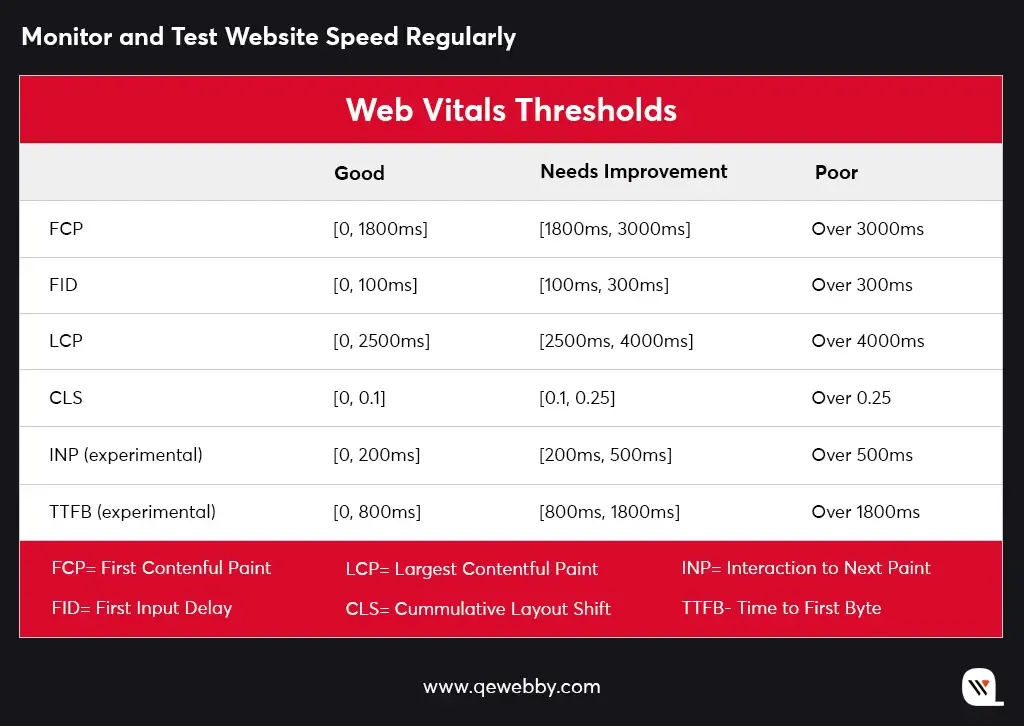
Step 9: Monitor and Test Website Speed Regularly

Monitoring and testing your website speed on a regular basis can help you identify potential issues early and take necessary actions to optimize your website’s performance. Regular monitoring and testing can also help you keep up with the latest website speed trends and best practices, ensuring that your website is up-to-date and competitive in the online market.

Web vitals is an initiative by Google that bestows consolidated guidance for quality signals essential in delivering great user experience on the web. This initiative simplifies the landscape and helps website to focus on the metrics that are crucial for analyzing user experience.

There are several tools available for measuring website speed and performance. Some popular tools include:

  • Google PageSpeed Insights:This tool analyzes website speed and provides a score based on various factors such as page load time, server response time, and more. It also provides suggestions for improving website speed.
  • GTmetrix: This tool provides a comprehensive analysis of website speed and performance, including page load time, page size, and the number of requests made to the server. It also provides recommendations for optimizing website speed.
  • Pingdom: This tool provides real-time monitoring of website speed and performance, including uptime, downtime, and response time. It also provides alerts for potential issues and suggestions for improving website speed.

Pro Tip: Install Nitro Pack

Are you tired of slow-loading WordPress websites?

Look no further than NitroPack – the ultimate solution for website speed optimization.

If you face difficulties implementing the above enhancements and plugins to your WordPress website, the NitroPack plugin will handle it all for you. With NitroPack, you can drastically improve the speed of your WordPress website with just a few clicks. Its powerful optimization algorithms compress and optimize your website files, images, and code, reducing your website’s loading time and improving user experience.

Here are some of the benefits of NitroPack:

  • Instant speed improvements: NitroPack is designed to instantly speed up your website, without requiring any technical knowledge. Our innovative optimization technology ensures that your site is fully optimized for maximum speed and performance.
  • Easy setup: Setting up NitroPack on your WordPress site is quick and easy. Just install our plugin, and our optimization process will automatically begin. You can also customize your optimization settings to suit your specific needs.
  • Reliable hosting: We provide reliable and fast hosting solutions for your website. Our hosting infrastructure is optimized for maximum performance, ensuring that your site is always lightning fast.
  • Continuous optimization: We continuously monitor your website’s performance and make real-time optimizations to ensure that your site is always performing at its best.
  • Comprehensive support: Our support team is available 24/7 to assist you with any questions or issues you may have. We are committed to providing the best possible service and support to our customers.

So, if you want to improve your WordPress site’s speed and performance, NitroPack is the perfect solution for you. Try NitroPack today and experience the difference!

Conclusion

Remember, website speed is a critical factor in the success of your online presence. Slow loading times can negatively impact your bounce rates, conversions, and revenue. By optimizing your website speed, you can keep your visitors engaged, improve your search engine ranking, and boost your bottom line. The actionable tips recommended in this post will help you to improve your site speed and performance. However if you don’t have technical expertise to implement these yourself, consider hiring our professional web development services. Our team of experts can optimize your website speed, enhance its functionality, and provide ongoing maintenance and support.

Don’t let slow website speed hold you back from achieving your online goals. Our team has years of experience in optimizing WordPress websites for maximum speed and performance. We can help you identify areas for improvement, implement the necessary changes, and monitor your website’s progress over time. With our expertise, you can expect faster loading times, improved user experience, and better search engine rankings. Plus, you’ll see an increase in conversions and revenue as a result. So why wait?

Contact us today to learn more about how we can help you take your website to the next level.

Progressive Web Apps: Exaggeration or Evolution?

World has come to a mutual understanding that evolution can only happen with iterations and synchronicities. Especially after the discovery of learning algorithms, technology has reached a point where it can adapt itself to deal with newer problems. PWA (Progressive Web Apps) are a type of web apps with a similar kind of taste. It has one for all and all for one sort of functionality. They are known for their flexibility of running in different systems as well as for reaching maximum people or users.

What areProgressive Web Apps?

PWAs are software applications that can work with any device that has a basic browsing system. They are installable, linkable, with push notifications, progressively enhanced (meaning can work on older browser versions with lesser efficiency) and use SEO to appear first on Google Index. This is what makes these types of apps more reachable. They are specially built in such a way that they are extremely easy to handle and use.

As you might know there are now in total 3 basic types of apps: Web apps, Native apps, and PWAs.
Web apps are more reachable.
Native apps have more features whereas,
PWAs are sort of a hybrid of both.

What makes Progressive Web Apps so special?

1) Discoverability:

PWAs can be easily found over the grid as they only require a basic web browser. This makes it easy for the content available inside the app to get indexed in Google Indexing. This makes it appear before any other apps on google search page. SEO (Search Engine Optimization) plays a very important role in creation of content for the PWA. It is the main reason why a PWA stays trending.

2) Capable:

Until recently video chatting was only available on platform specific apps but with the recent development of programming languages, one can easily integrate two languages as extensions to add more functionality. This makes the creation of PWAs easier and also makes them more capable.

3) Reliable:

One more interesting fact about PWAs is that they work regardless of the quality of internet connection that the user has. Even if the network is bad or the user is offline, PWAs are reliable and fast. The quickness of these apps is what makes them more reliable. As the page load time increases, the bounce rate of the webpage also increases simultaneously. This reduces the quantity of the audience that visits the website. Thus, to avoid such hassle, PWAs are made to make the app content available and the app usable in the blink of an eye.

4) Installable:

Another thing that makes PWAs so interesting is the fact that they can easily be installed over the computer. The app opens in a separate window over which the user can operate it easily. This gives extra functionality to the user and the data that is modified over the installed app automatically saved over the browser PWA. For example: the latest WordPress.

5) Progressive:

PWAs are specially made to make them usable in older versions of web browsers. As the version of browsing improves, the functionality of the app also improves. This makes it possible for them to be available everywhere no matter how much older technology the user is using. This in turn increases the traffic of the website making them more and more popular.

6) Linkability:

Last but not the least, PWAs are also very linkable meaning they can be easily shared through various devices using a link. These days, links can be shared easily using any social media platform like-Whatsapp and since PWAs can be made available on any device with a basic web browser, its linkability supports the overall reach.

If you have further queries regarding how affordable they can be or if you are interested in making one, then you can always Hire WordPress Developers to fulfil your IT needs and additionally, we have Digital Marketing to help you reach further.